Revenue ledgers help a finance team control when and how revenue is recognized in Rocketlane, so that reported numbers do not change after books are closed. This article explains what revenue entries are, how they relate to existing revenue recognition methods, and how the user can create and manage them.
TABLE OF CONTENTS
- Overview
- Enable Revenue Recognition Ledger
- Creating Posting Periods
- Accessing & Viewing Revenue Entries
- Bulk Creating Revenue Entries
- Locking and Unlocking Posting Periods
- Export Revenue Entries
- RBAC Permissions
Overview
Rocketlane already supports revenue recognition methods based on billing types and project activity, for example:
- Time and material, based on bill rate and hours tracked
- Fixed fee, based on allocation, tracked effort, or milestones
- Subscription projects, based on completed periods
These methods are dynamic. If the user adds or edits time entries for a past period, the calculated revenue for that period can change. This creates a problem for finance teams that must publish income statements and keep those numbers fixed for regulatory and audit purposes.
Revenue entries solve this by:
- Decoupling reported revenue from dynamic system calculations
- Allowing the finance team to manually lock revenue in each posting period
Once revenue entries are used and posting periods are locked, revenue for those periods does not change, even if time entries or other inputs are adjusted later.
Enable Revenue Recognition Ledger
To enable Revenue entries:
- Click your Profile icon in the bottom-left corner and select Settings.
- In the left sidebar, navigate to Financial management > Revenue recognition ledger and select Revenue Essentials.
- Click the toggle switch to activate Revenue recognition ledger.
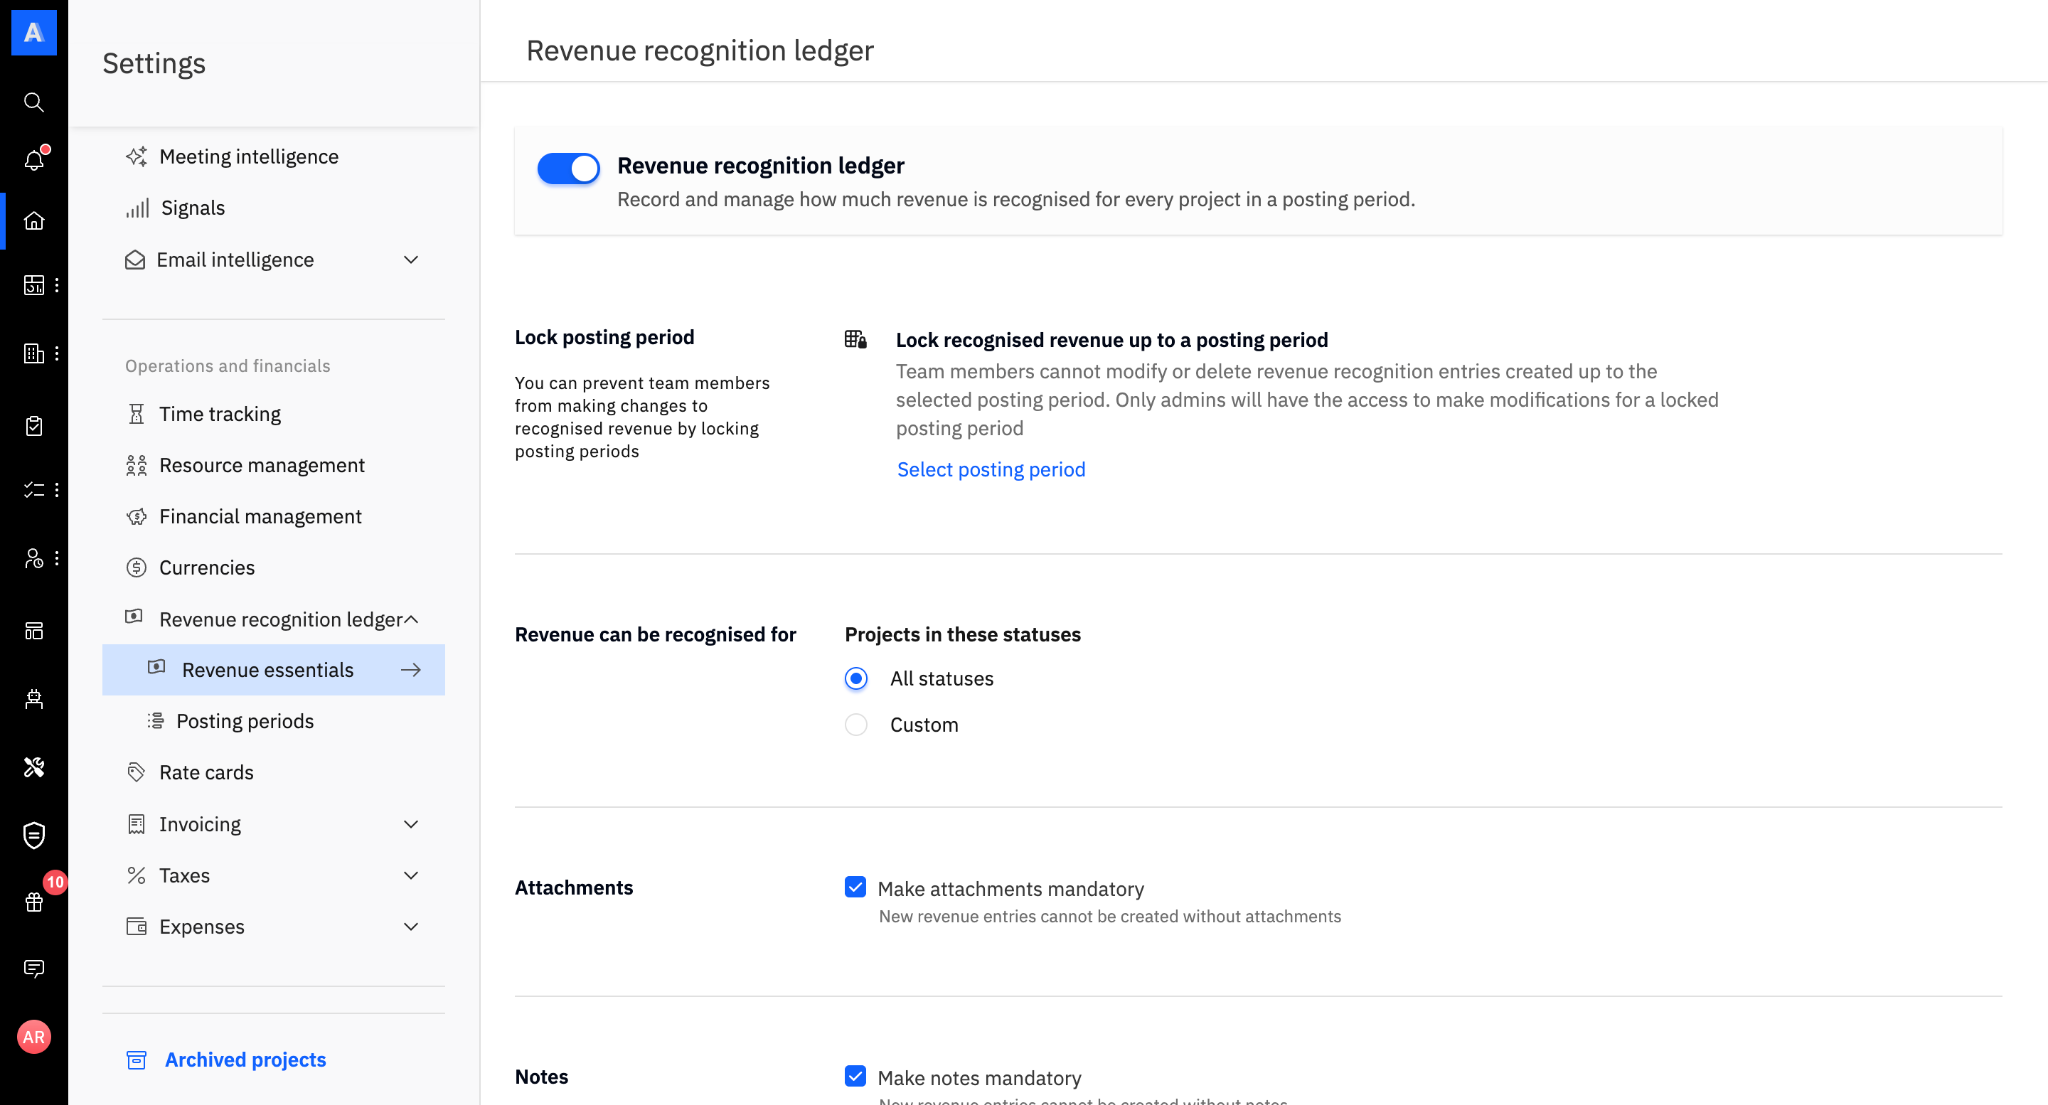
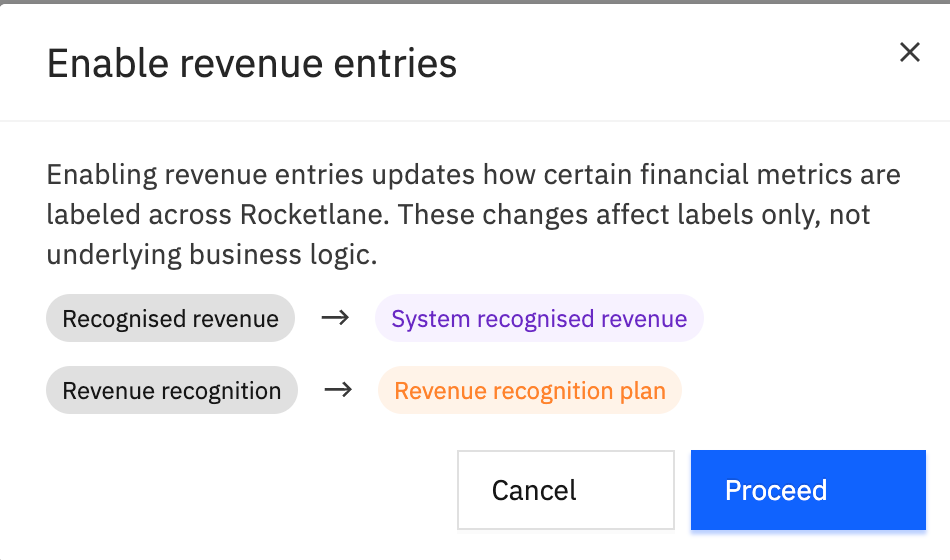
- Review the pop-up modal to see how your metrics (like Actual revenue and Actual profit) will be renamed.
- (Optional) Set configuration to make attachments and notes mandatory.
Once the feature is enabled:
- Existing Actual revenue in the UI is relabeled as System revenue.
- Existing revenue recognition configuration is treated as the Revenue plan.
- Revenue recognized through revenue entries becomes the new Actual revenue used for financial reporting.
Note: If no revenue entry exists for a project (and budget, if applicable) in a posting period, the Actual revenue is 0 for that period until an entry is created.
You cannot adopt revenue entries starting from a chosen posting period. Once enabled, entry-based Actual revenue applies across periods.
Once enabled, you can configure the Revenue Entry Lock, mandate attachments or notes, and define the specific criteria for revenue recognition.
You can set revenue to be recognized based on:
- Projects: Select all statuses or choose specific project-related custom statuses.
- Budgets: Select all statuses or choose specific budget-related custom statuses.
System Revenue vs Recognized Revenue vs Revenue Plan
| Term | Meaning |
|---|---|
| System revenue | Revenue that Rocketlane calculates automatically using the configured revenue recognition method (for example, time tracked, milestones, or subscription periods). This continues to exist as a suggested or estimated value and can change if historical inputs change. |
| Revenue plan | The configuration that defines how system revenue is calculated for a fixed fee project with milestone or manual revenue recognition. |
| Recognized revenue (via revenue entries) | The final revenue amount that the finance team approves for a posting period. This is the value that becomes Actual revenue in the UI and is used in reports and financial dashboards once revenue entries are enabled. |
Revenue entries allow the finance team to review system revenue, then confirm or adjust the final recognized revenue.
Recognized revenue can be positive or negative (negative values are supported for reversals or true-ups).
Accessing & Viewing Revenue Entries
Once enabled, to navigate to the revenue entries table:
- Click on the Resource Management module on the left navigation.
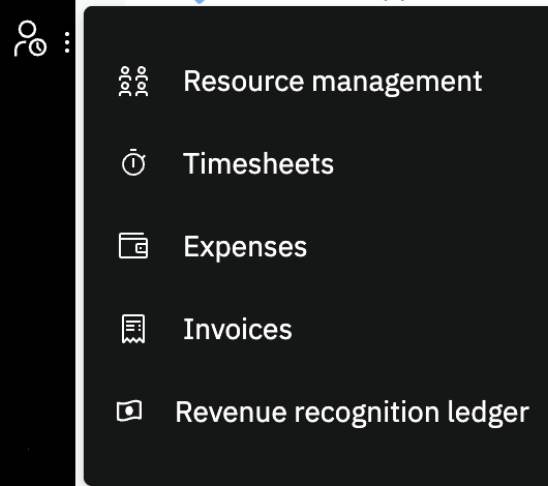
- Open Revenue recognition ledger.
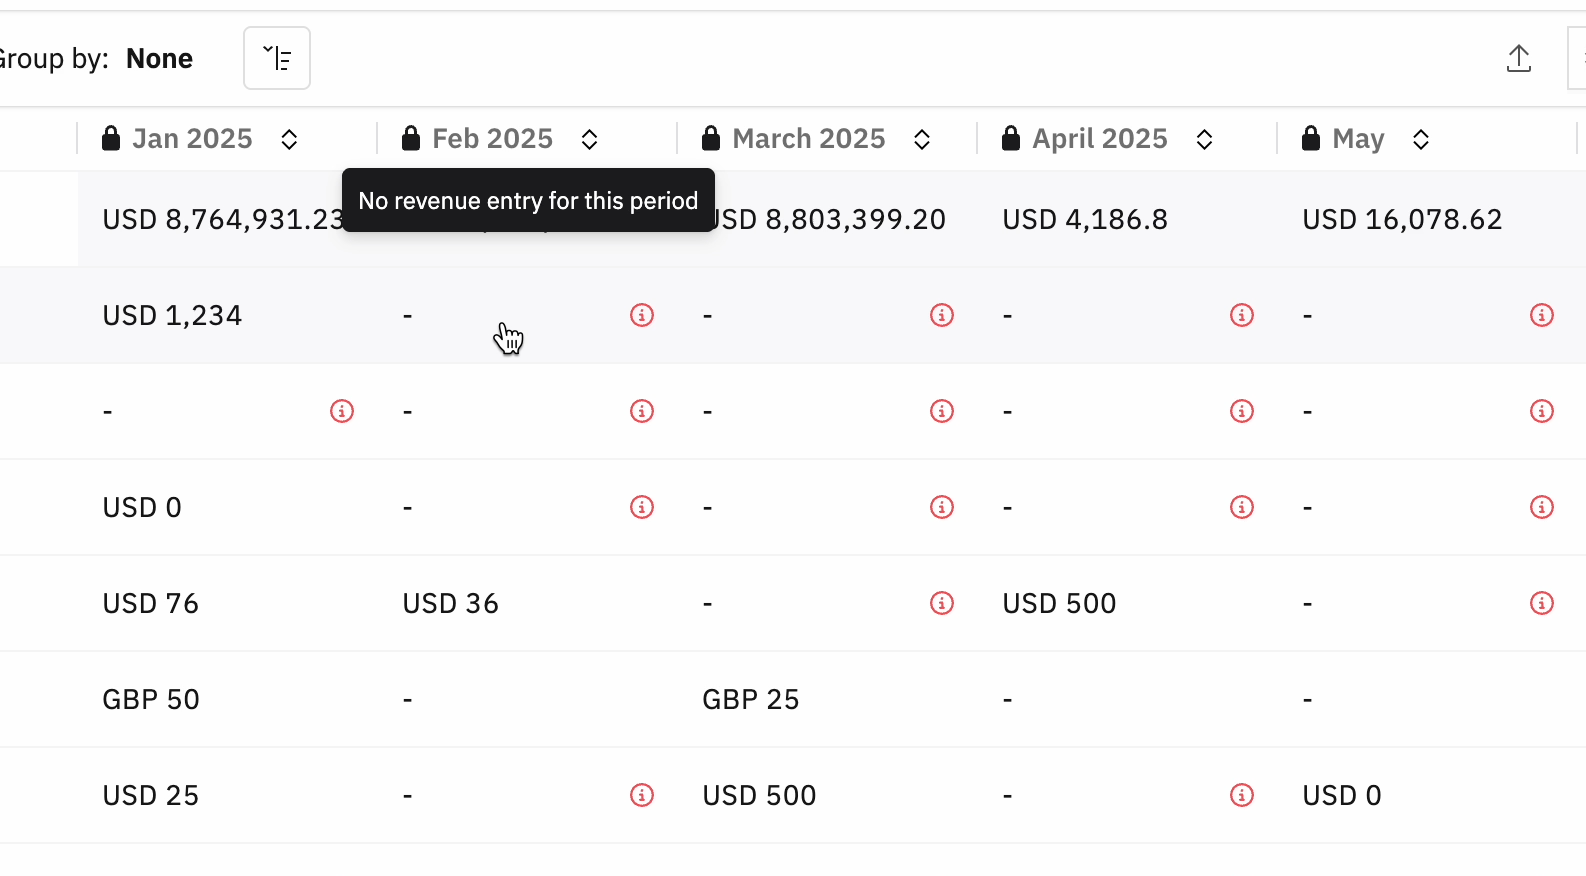
This opens the revenue entries table, which showcases the revenue recognized across projects and their budgets as rows, along with the respective posting periods as columns.
In the Revenue entries overview
- Each row typically represents a project and budget.
- Each column represents a posting period (for example, January, February, March).
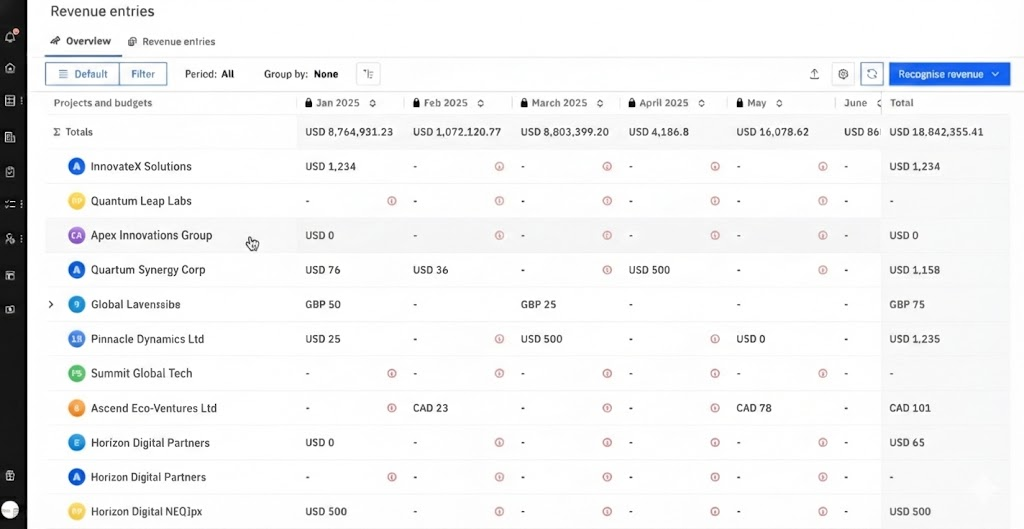
The user can:
- See totals per period
- Filter by project, company, billing type, and more
- Group by fields such as company or project type
For each project and period, the finance user can compare:
- System revenue (calculated by Rocketlane)
- Recognized revenue (from revenue entries, shown as Actual revenue once enabled)
- The difference between them (for example, under-recognized or over-recognized amounts)
Creating a Single Revenue Entry
A finance user can create a revenue entry directly from the overview or from a dedicated creation flow.
- Open the Revenue Recognition module.
- Select or click the desired posting period.
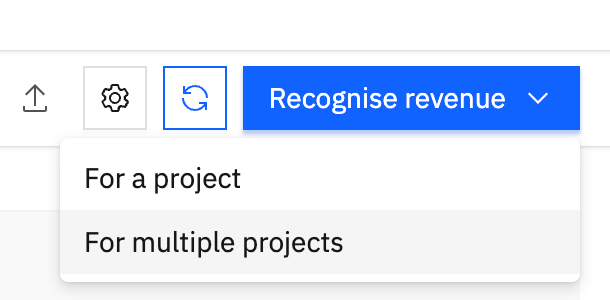
- Click the Recognize revenue button and select For a project.
- Select a project and period.
Alternatively, you can identify the project and the specific period where you want to log revenue, or click the corresponding cell in the table (indicated by a “—” or a value).
- Project: Select the specific project from the dropdown.
- Budget: Select the budget of the project.
- Posting period: Confirm the start and end dates for the revenue entry.
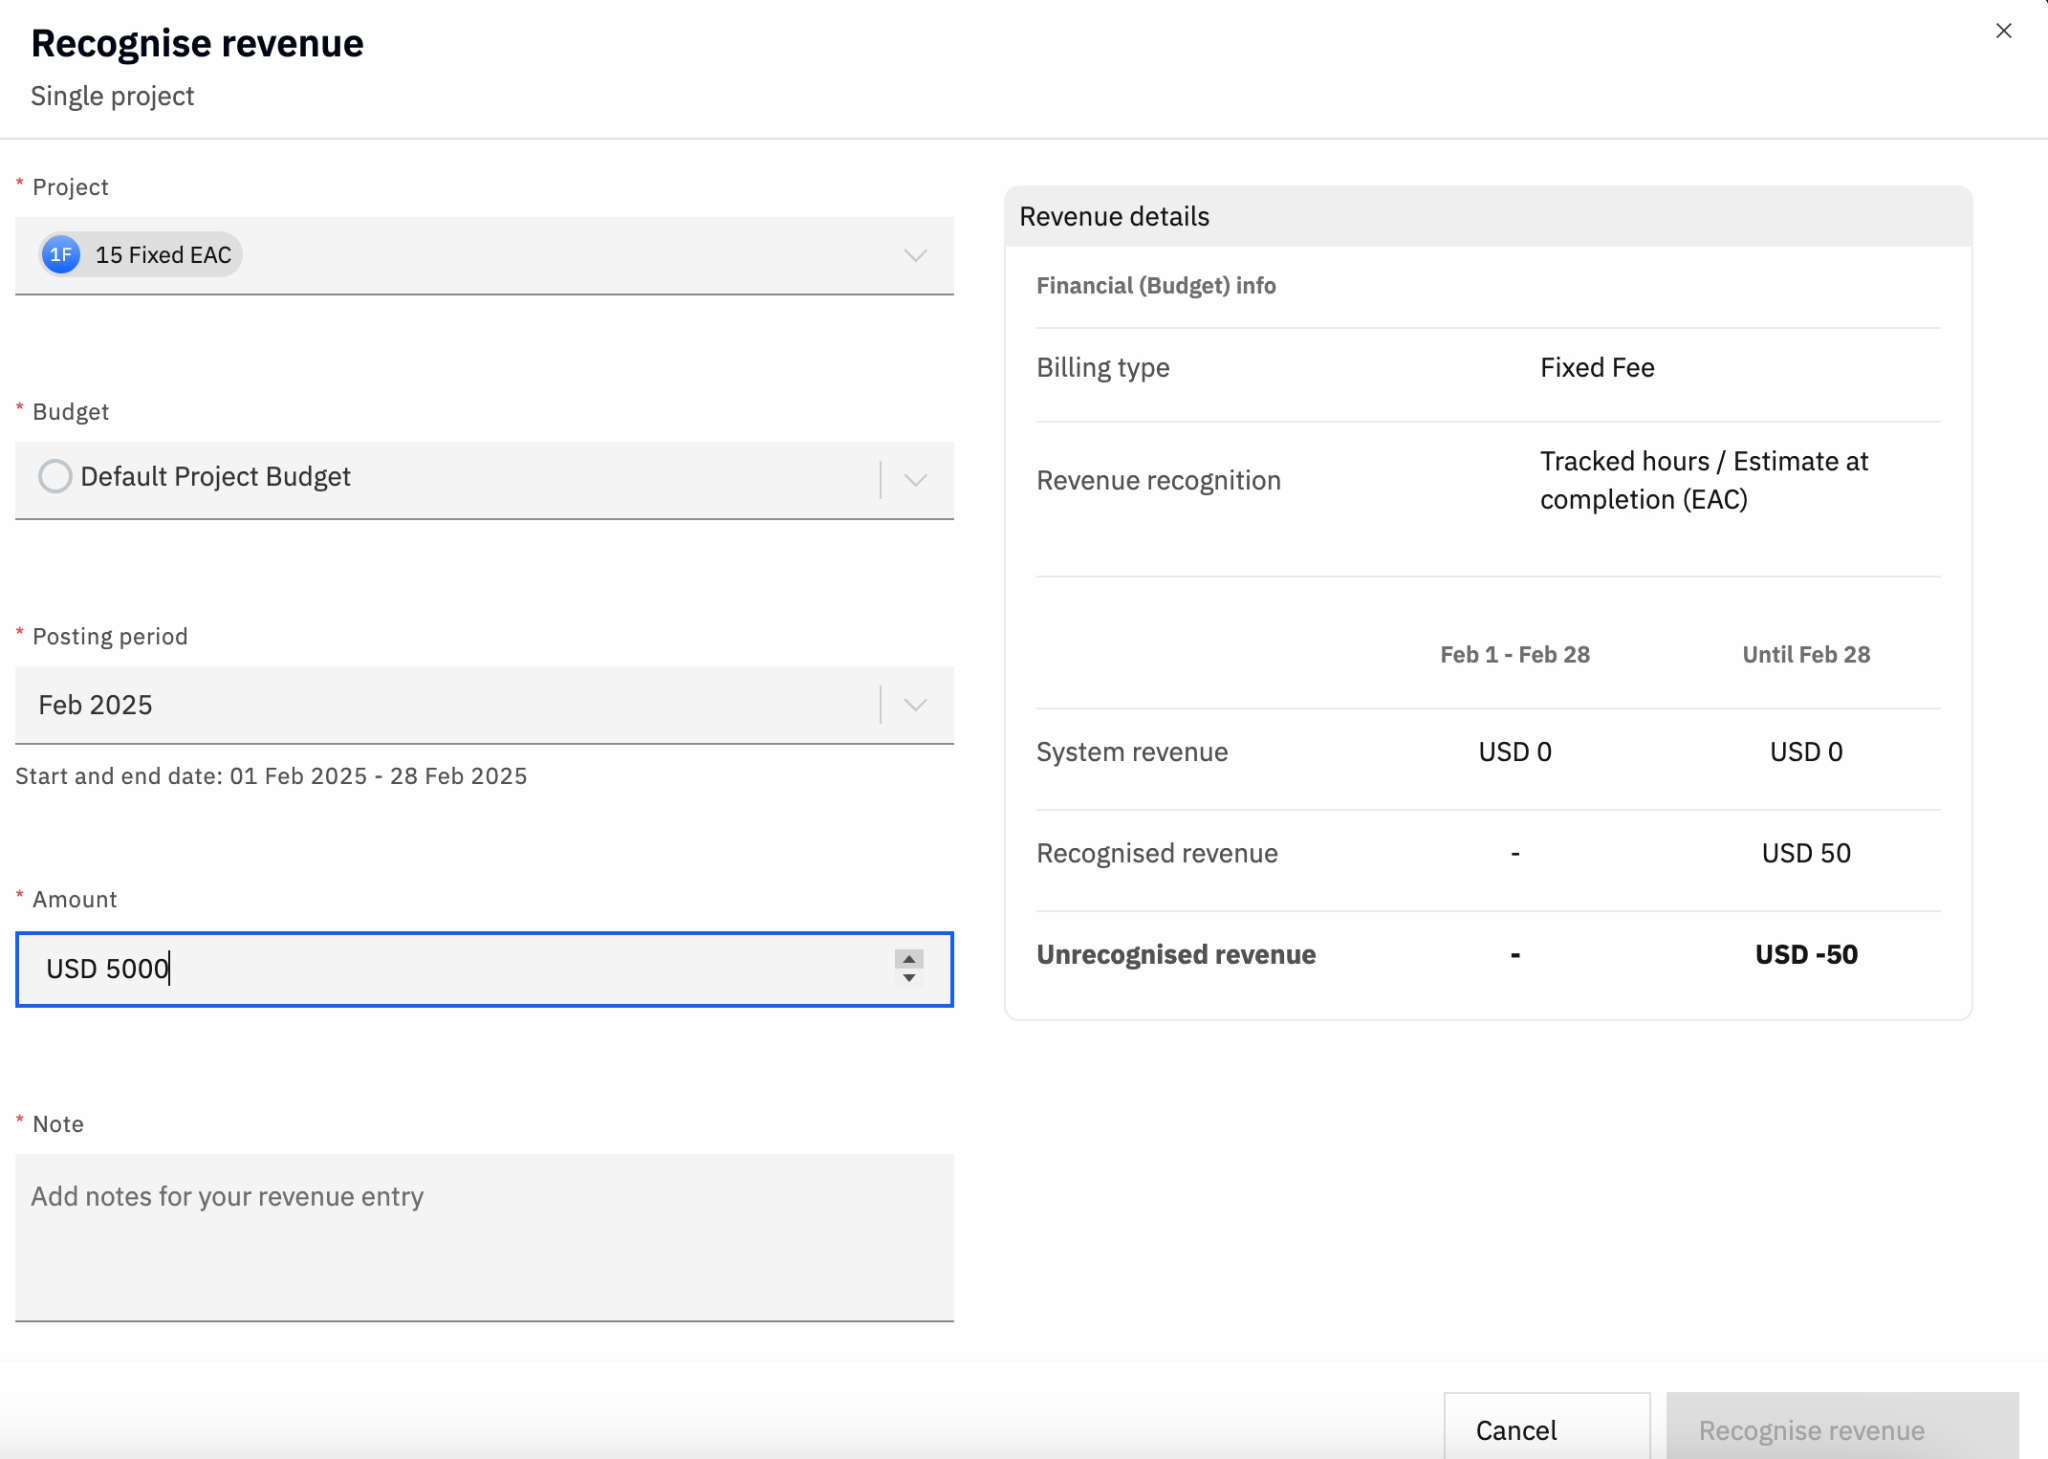
Enter financial data
- Enter the Amount to be recognized (positive or negative values supported).
- Add Notes for documentation (if mandated by your org’s configuration).
Add supporting documents
- Click + Add attachment to upload invoices, receipts, or other supporting files (maximum 20 MB).
- Save.
Note: Rocketlane allows one revenue entry per project, per budget, per posting period.
If the user tries to create another entry for the same project, budget, and posting period combination, it is blocked.
That posting period now has a fixed recognized revenue value for the chosen project and budget.
Bulk Creating Revenue Entries
For larger portfolios, the finance team can create multiple revenue entries at once.
- Open the Revenue Recognition module.
- Click Recognise revenue > For multiple Projects.
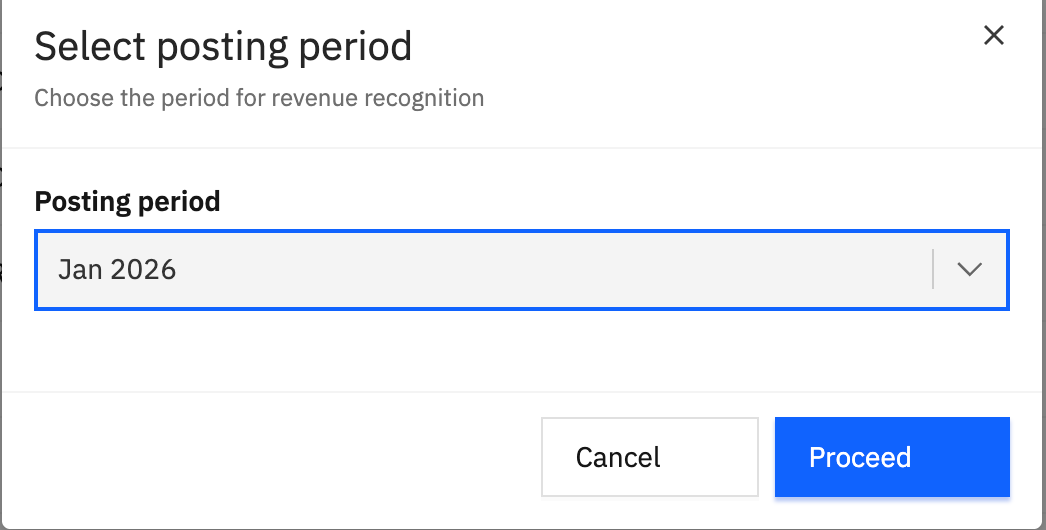
- Select the posting period to recognize revenue for.
- Select a set of projects.
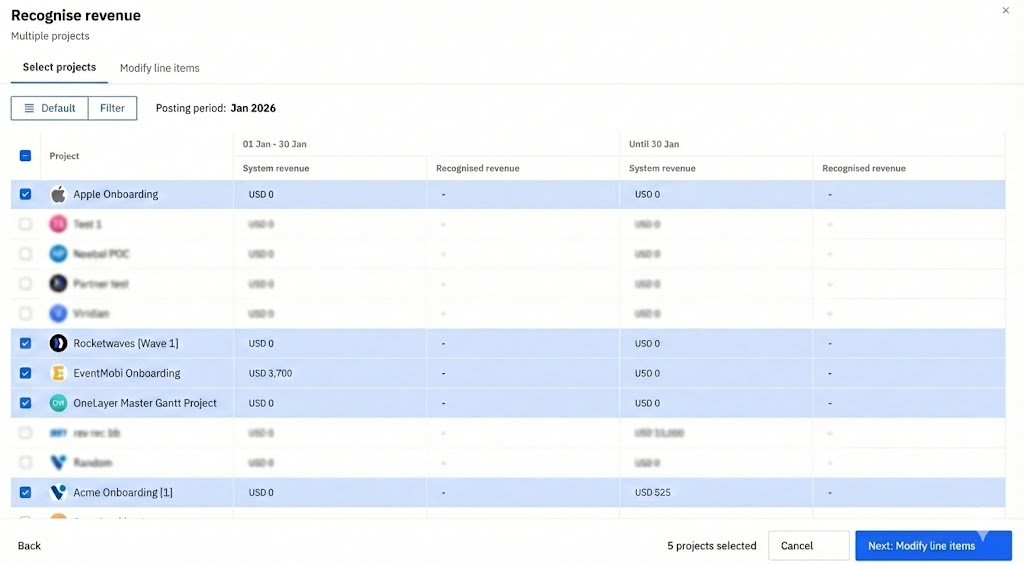
Pick projects using filters and saved views, for example:
- all fixed fee projects
- a specific portfolio
Rocketlane pre-fills the amount to recognize for each project or budget using the system revenue for that period.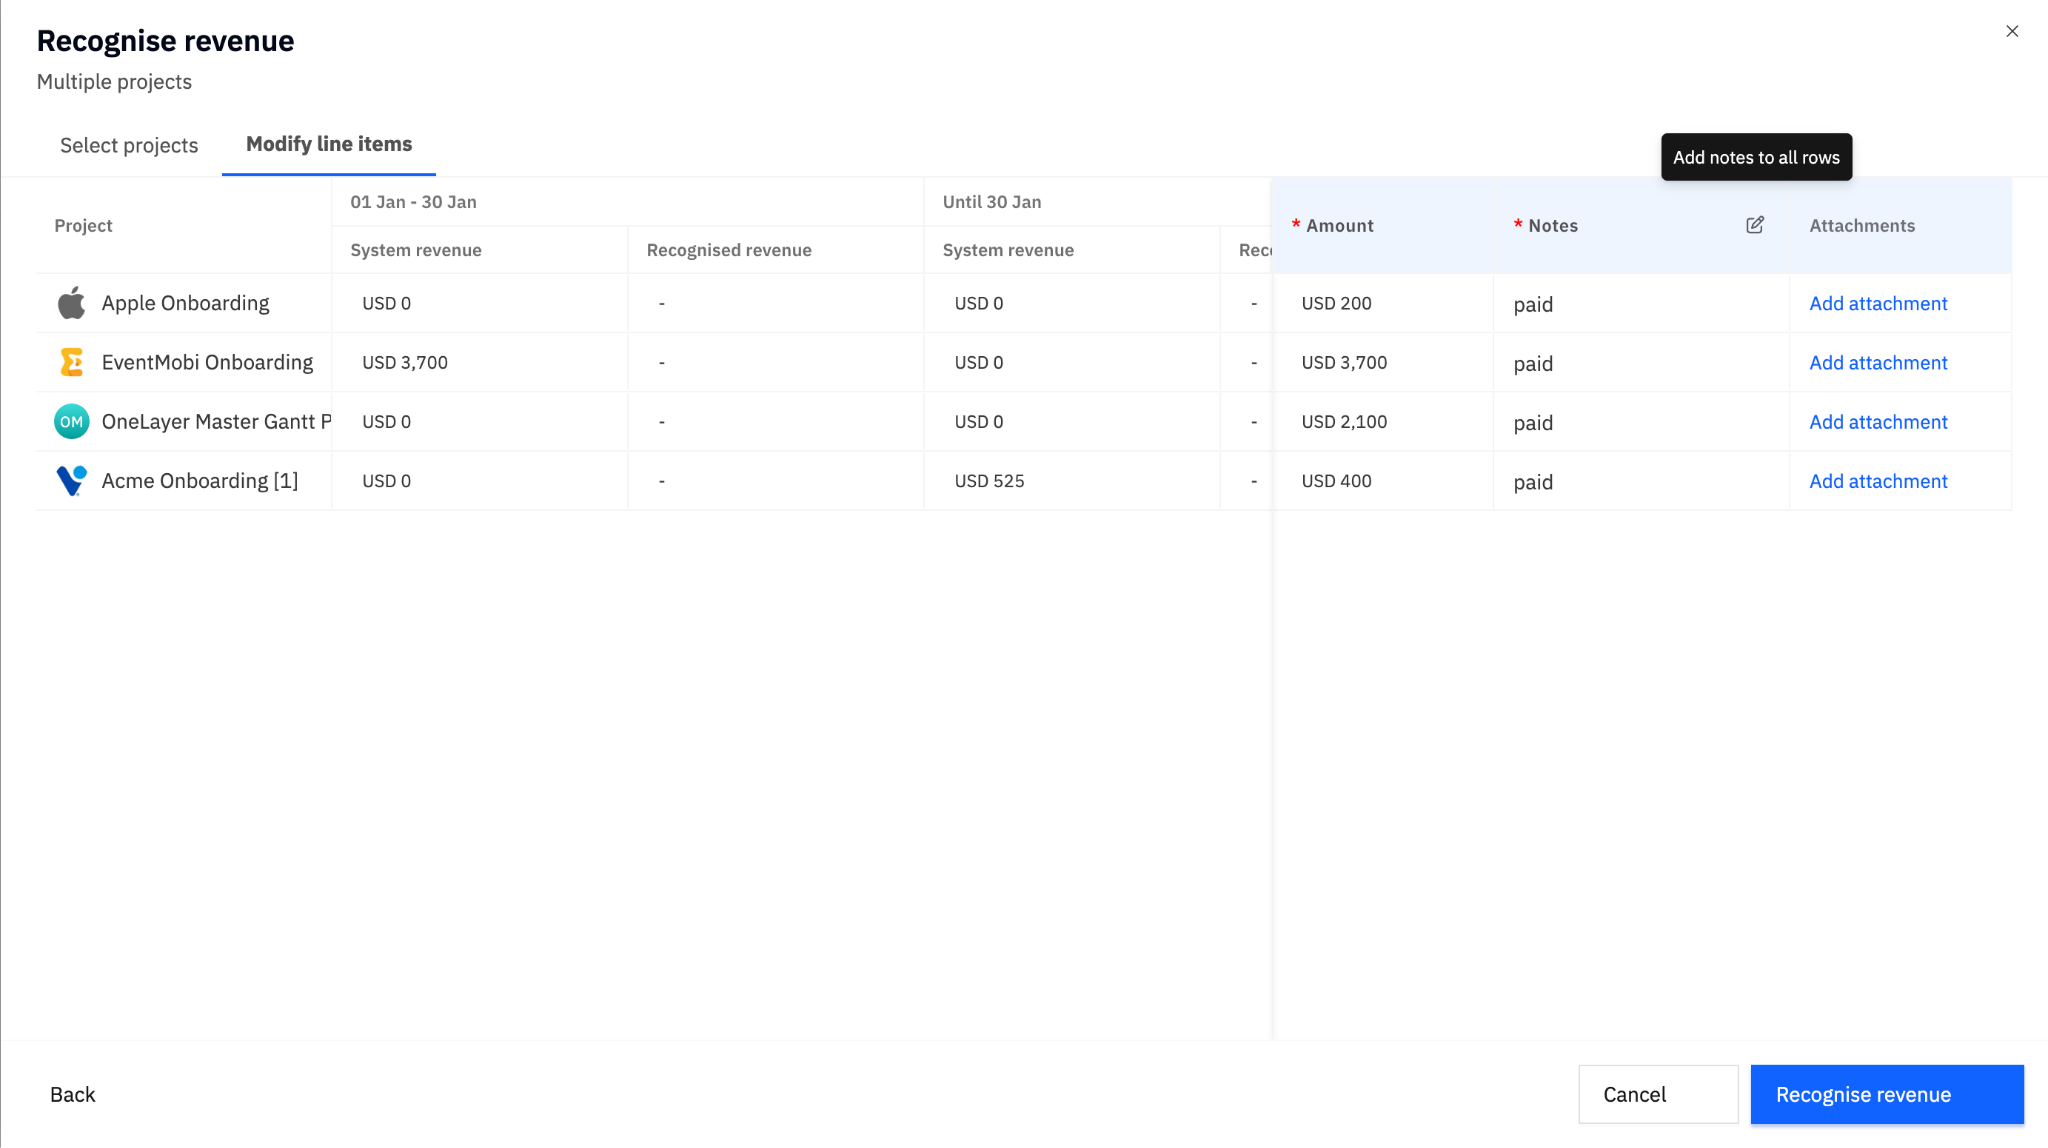
Review the suggested amounts
- If system revenue is acceptable, accept it as the recognized revenue.
- If adjustments are required, override any prefilled value.
- Confirm and create all entries.
If some project/budget rows already have revenue entries for that posting period, they are skipped during bulk create (not overwritten).
Export Revenue Entries
Revenue entry data can be:
- Exported from Rocketlane for use in ERPs such as NetSuite or Xledger
- Used as the source of truth for professional services revenue in the company’s financial system
The finance team can:
- Export revenue entries by posting period
- Use integrations, APIs, or automation tools (such as Workato, where available) to move data into the external ledger system
To export the revenue entry table
- Navigate to Revenue entries.
- Use the export option available on the revenue entries table (if enabled for your org).

This allows ERP ledgers, such as Professional Services Revenue, to rely on Rocketlane’s recognized revenue values.
RBAC Permissions
Navigate to Settings > Permissions to set up the following for Revenue Recognition ledger.
Posting Periods
- Can create posting periods: Allows the user to set up new posting periods.
- Can delete posting periods: Allows the user to remove existing posting periods.
Revenue Entries Permissions
To grant access to any revenue actions, you must first enable the primary View permission. For each enabled permission, you can define the access level via a Scope dropdown.
- Can view revenue entries
- Can create revenue entries
- Can manage revenue entries
- Can manage locked revenue entries
For the View, Create, and Manage permissions above, you can choose from the following levels:
- Global: Access for all projects across the entire system.
- Group: Access for projects belonging to the user's specific groups.
- Participant: Access for projects where the user is an active team member.
- Owner: Access restricted only to projects owned by the user
Note: Only the viewing, creation, and management of revenue entries are controlled at the project level. All other functions are managed at the account level.