Access Resource Management
You can access Resource Management from the vertical left navigation bar.

Resource Management: Projects tab
The Projects tab gives you a timeline view of all projects. Select a project to view the team members and placeholders working on it, their roles, and the time allocated to each person.
This view helps project managers plan team capacity, balance workloads, and commit timelines based on available capacity.

Projects tab: Menu bar options

Filter
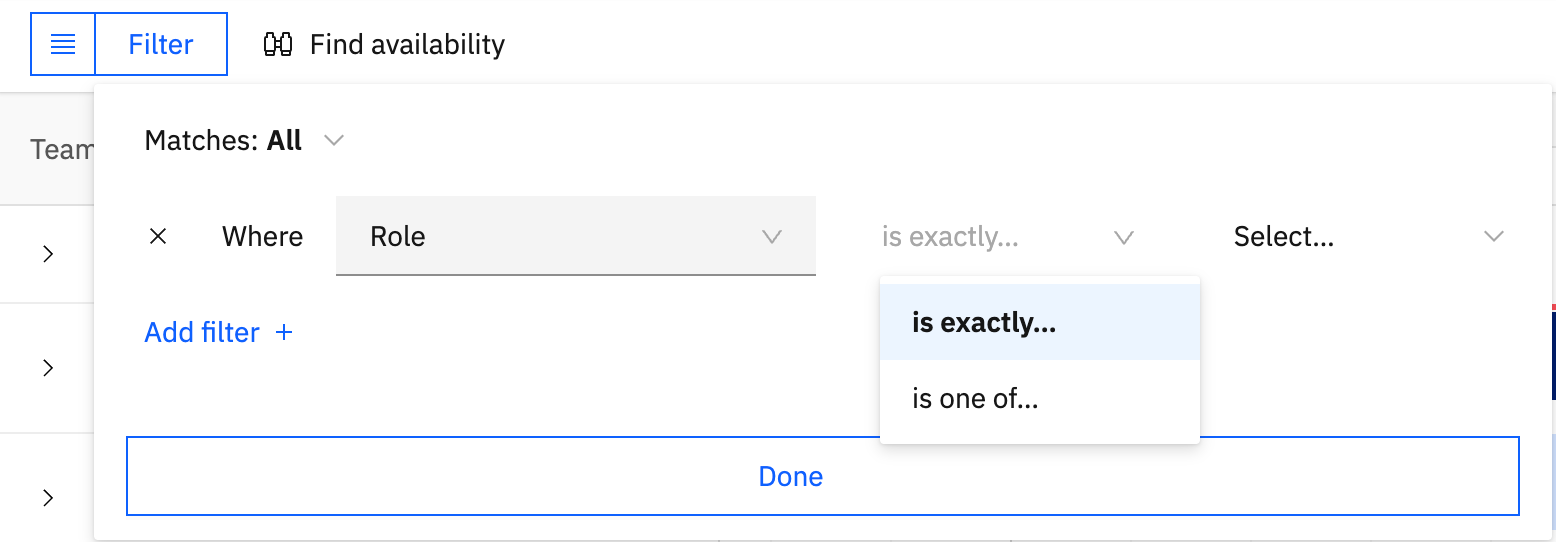
Use filters to narrow the projects shown in the Projects tab.
- Matches: Choose All to show projects that match all filter conditions. Choose Any to show projects that match at least one filter condition.
- Where: Select the project field or condition you want to filter by.
- Add filter: Add more filter conditions as needed.
Click Done to apply the filter conditions. Click Clear to exit filter mode.
Saved views
Recurring filters can be saved as views for easy access. To save a filter as a view, click Save view as.
In the New View dialog box, enter a name for the view. You can choose to make the view private or public.
Click Save to save the view.
To display a saved view, click the Saved Views icon next to filters.

- All Projects: Opens the default view without any filters applied.
- My Saved Views: Lists saved views marked as private.
- Shared Views: Lists saved views marked as public.
Search
Use Search to look for specific projects or team members.
Month, week, and day views
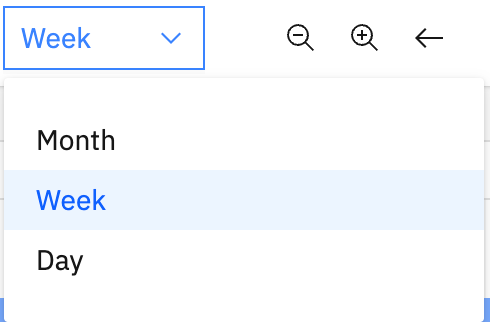
Switch between Month, Week, and Day views to change the timeline span.
Zoom in and zoom out
Use the zoom controls to expand or reduce the timeline view. Zooming automatically changes the timeline span between Month, Week, and Day views.
Previous and next timespan
Use the previous and next controls to move across the timeline based on the current zoom level and viewing window.
Today
Click Today to return to the current date on the timeline.
Projects tab: Projects column
The Projects column next to the timeline lists all projects in your account.

Click a project to open the list of team members and placeholders working on that project.
Team members are listed under their respective placeholders.

Go to start of project
Click the Go to start of project icon to move the timeline view to the start date of the corresponding project.

More actions for projects: Go to Project Plan
To open the project plan for a project, click the More actions icon next to the project and select Go to Project Plan.

The project plan opens in a new browser tab.
Remove a team member from a project
To remove a team member from a specific project, click the project from the Projects column and find the team member you want to remove.
Click More actions > Remove from project.

A warning message appears asking you to confirm whether you want to remove the team member from the project.
Click Remove.

Add team member
Click Add team member at the end of the team members list under a project.

The Add team members dialog box opens.

You can filter team members by role, search by name, or select team members from the list.
You can select and add multiple team members.

Click Invite and add team member to add the team member to the project.
Add placeholders
When a project is still in planning or you do not yet know which team members will work on it, you can add placeholders and replace them with team members later.
Click Add placeholder at the end of the team members list under a project.

The Add placeholder dialog box opens.

You can filter placeholders by role, search by placeholder name, or select a placeholder from the list.
You can also select multiple placeholders. Click Add placeholder to add the placeholders to the project.

If the placeholder you need does not exist, click New placeholder + to create one.

From the New placeholder dialog box, choose a role and enter a placeholder name.

Click Create and add to create the new placeholder and add it to the project.
Find team member
Use the Find team member icon next to a placeholder to find and allocate a team member based on role and availability. The selected team member replaces the placeholder.

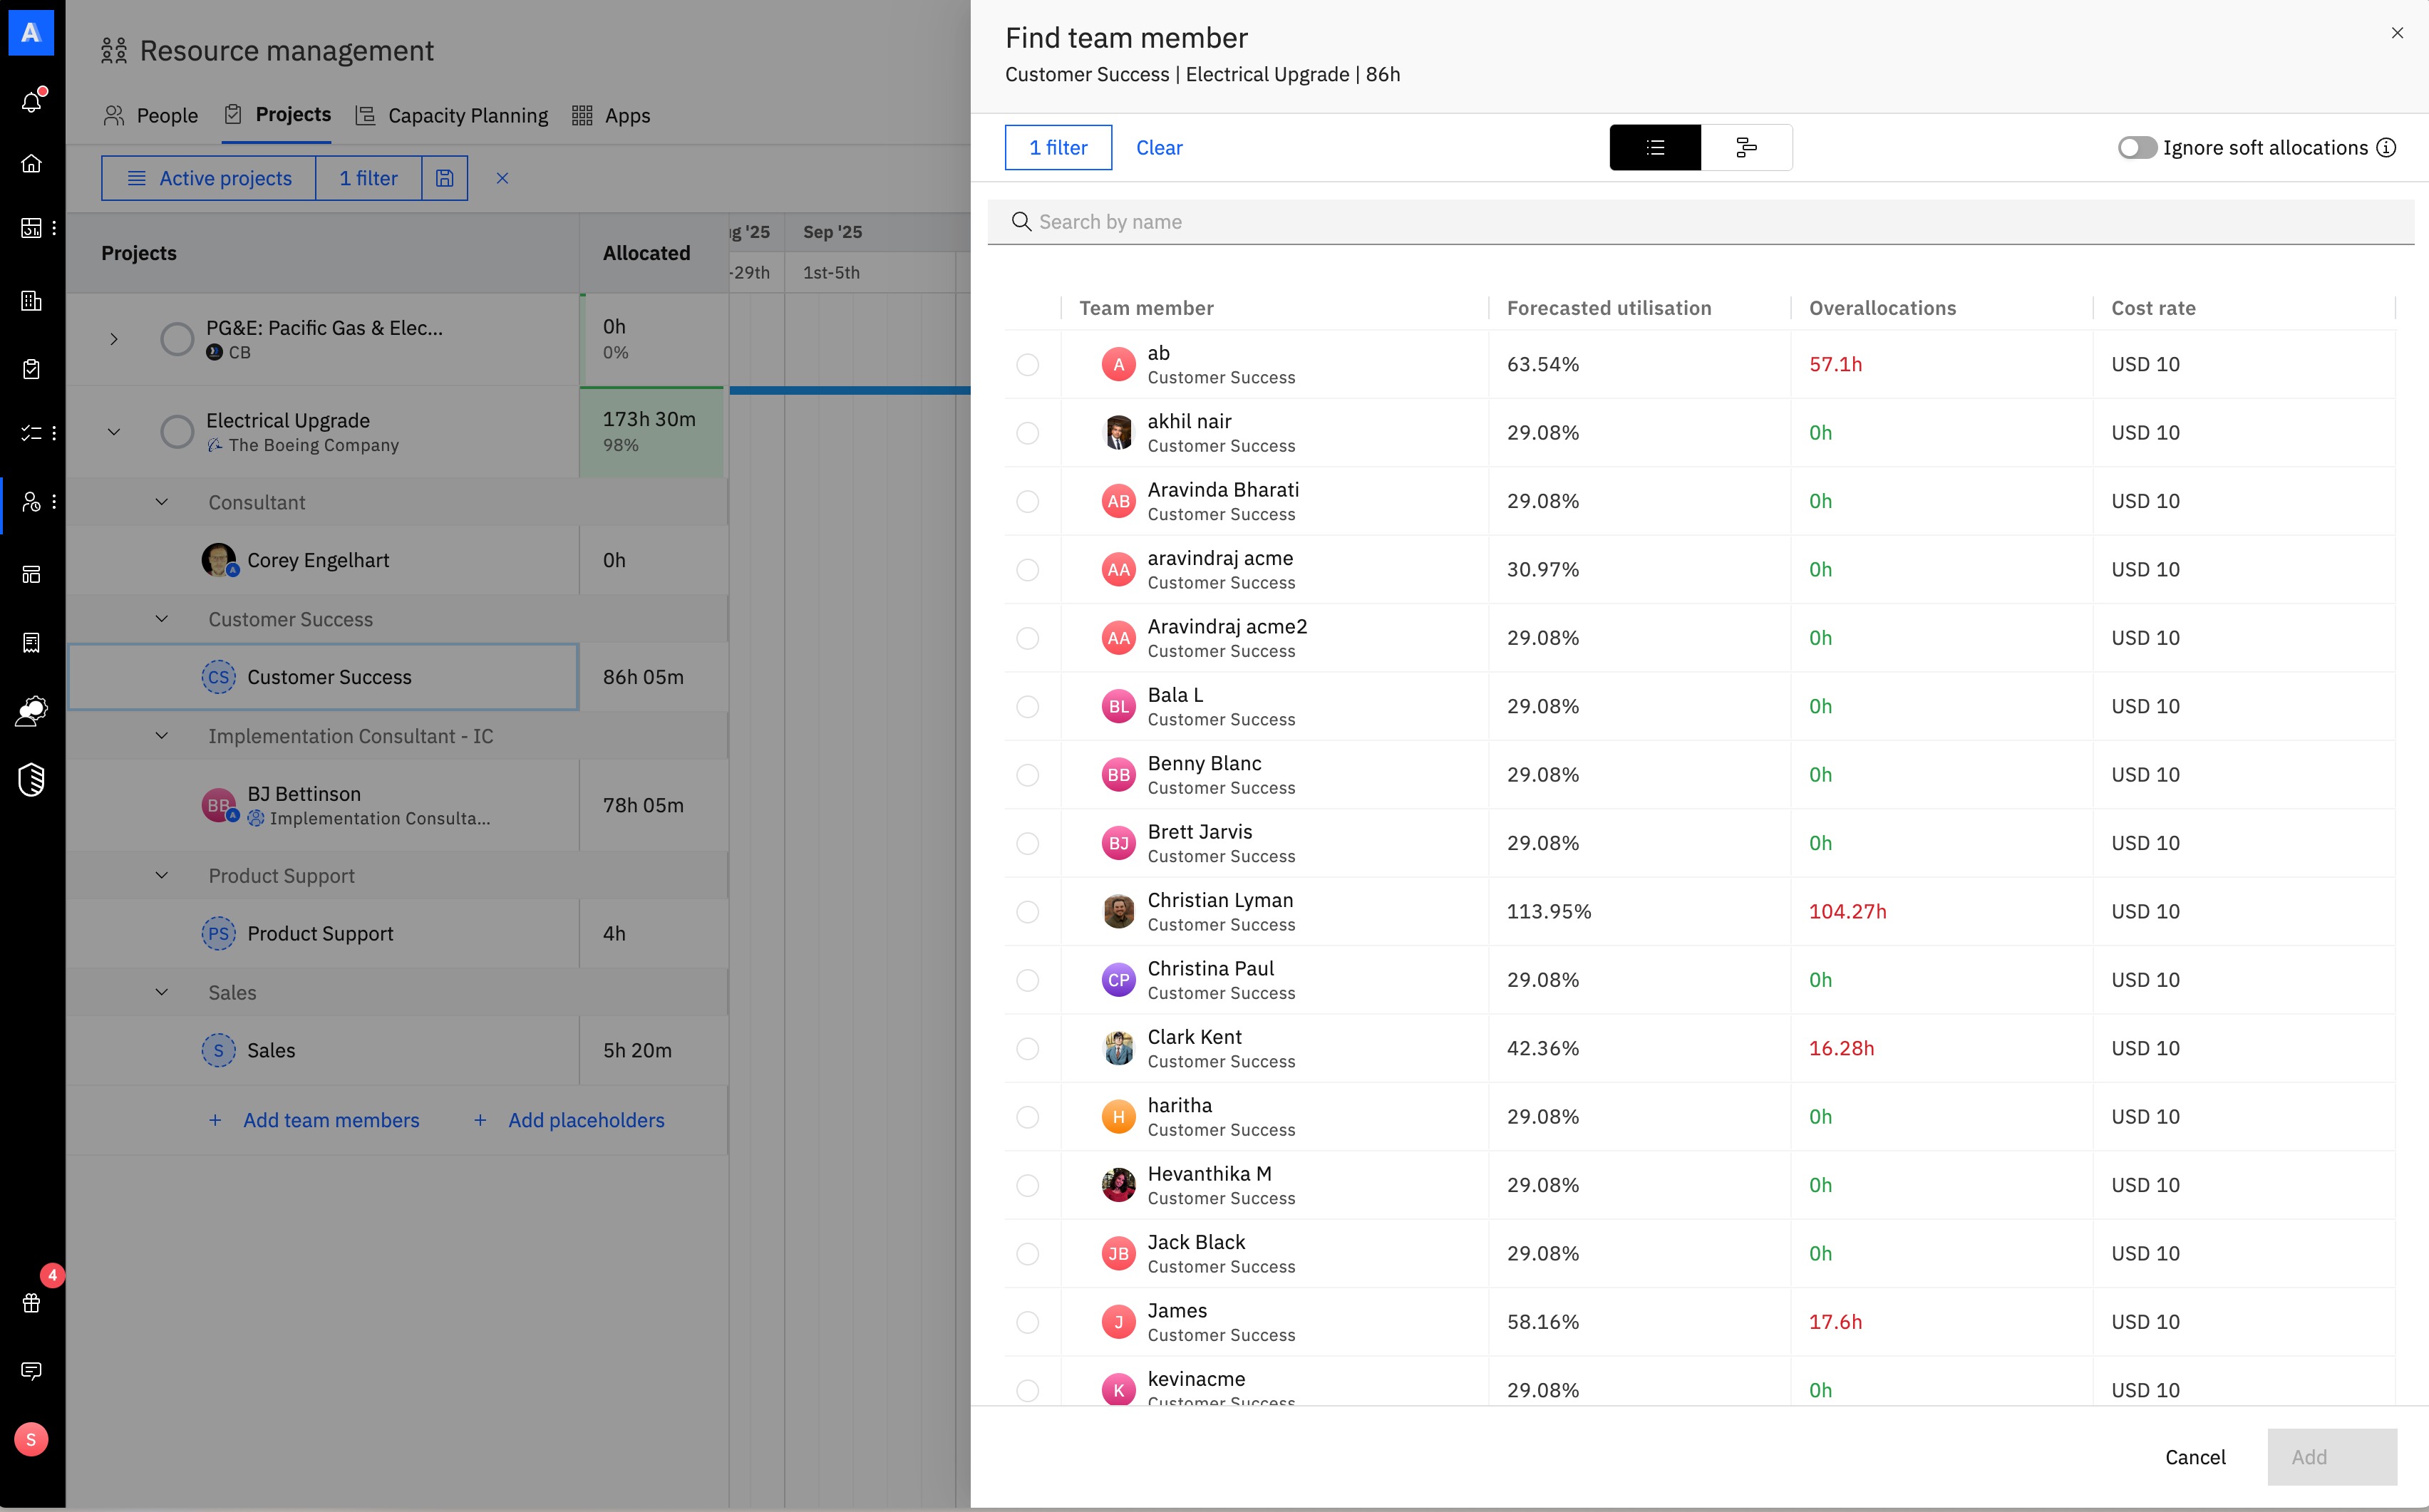
The Find Team Member dialog box opens and lists team members in the role with their availability.
You can browse members using two views: List and Timeline.
In the Timeline view, you can see a user’s existing project allocations and how the requested hours affect their overall availability.
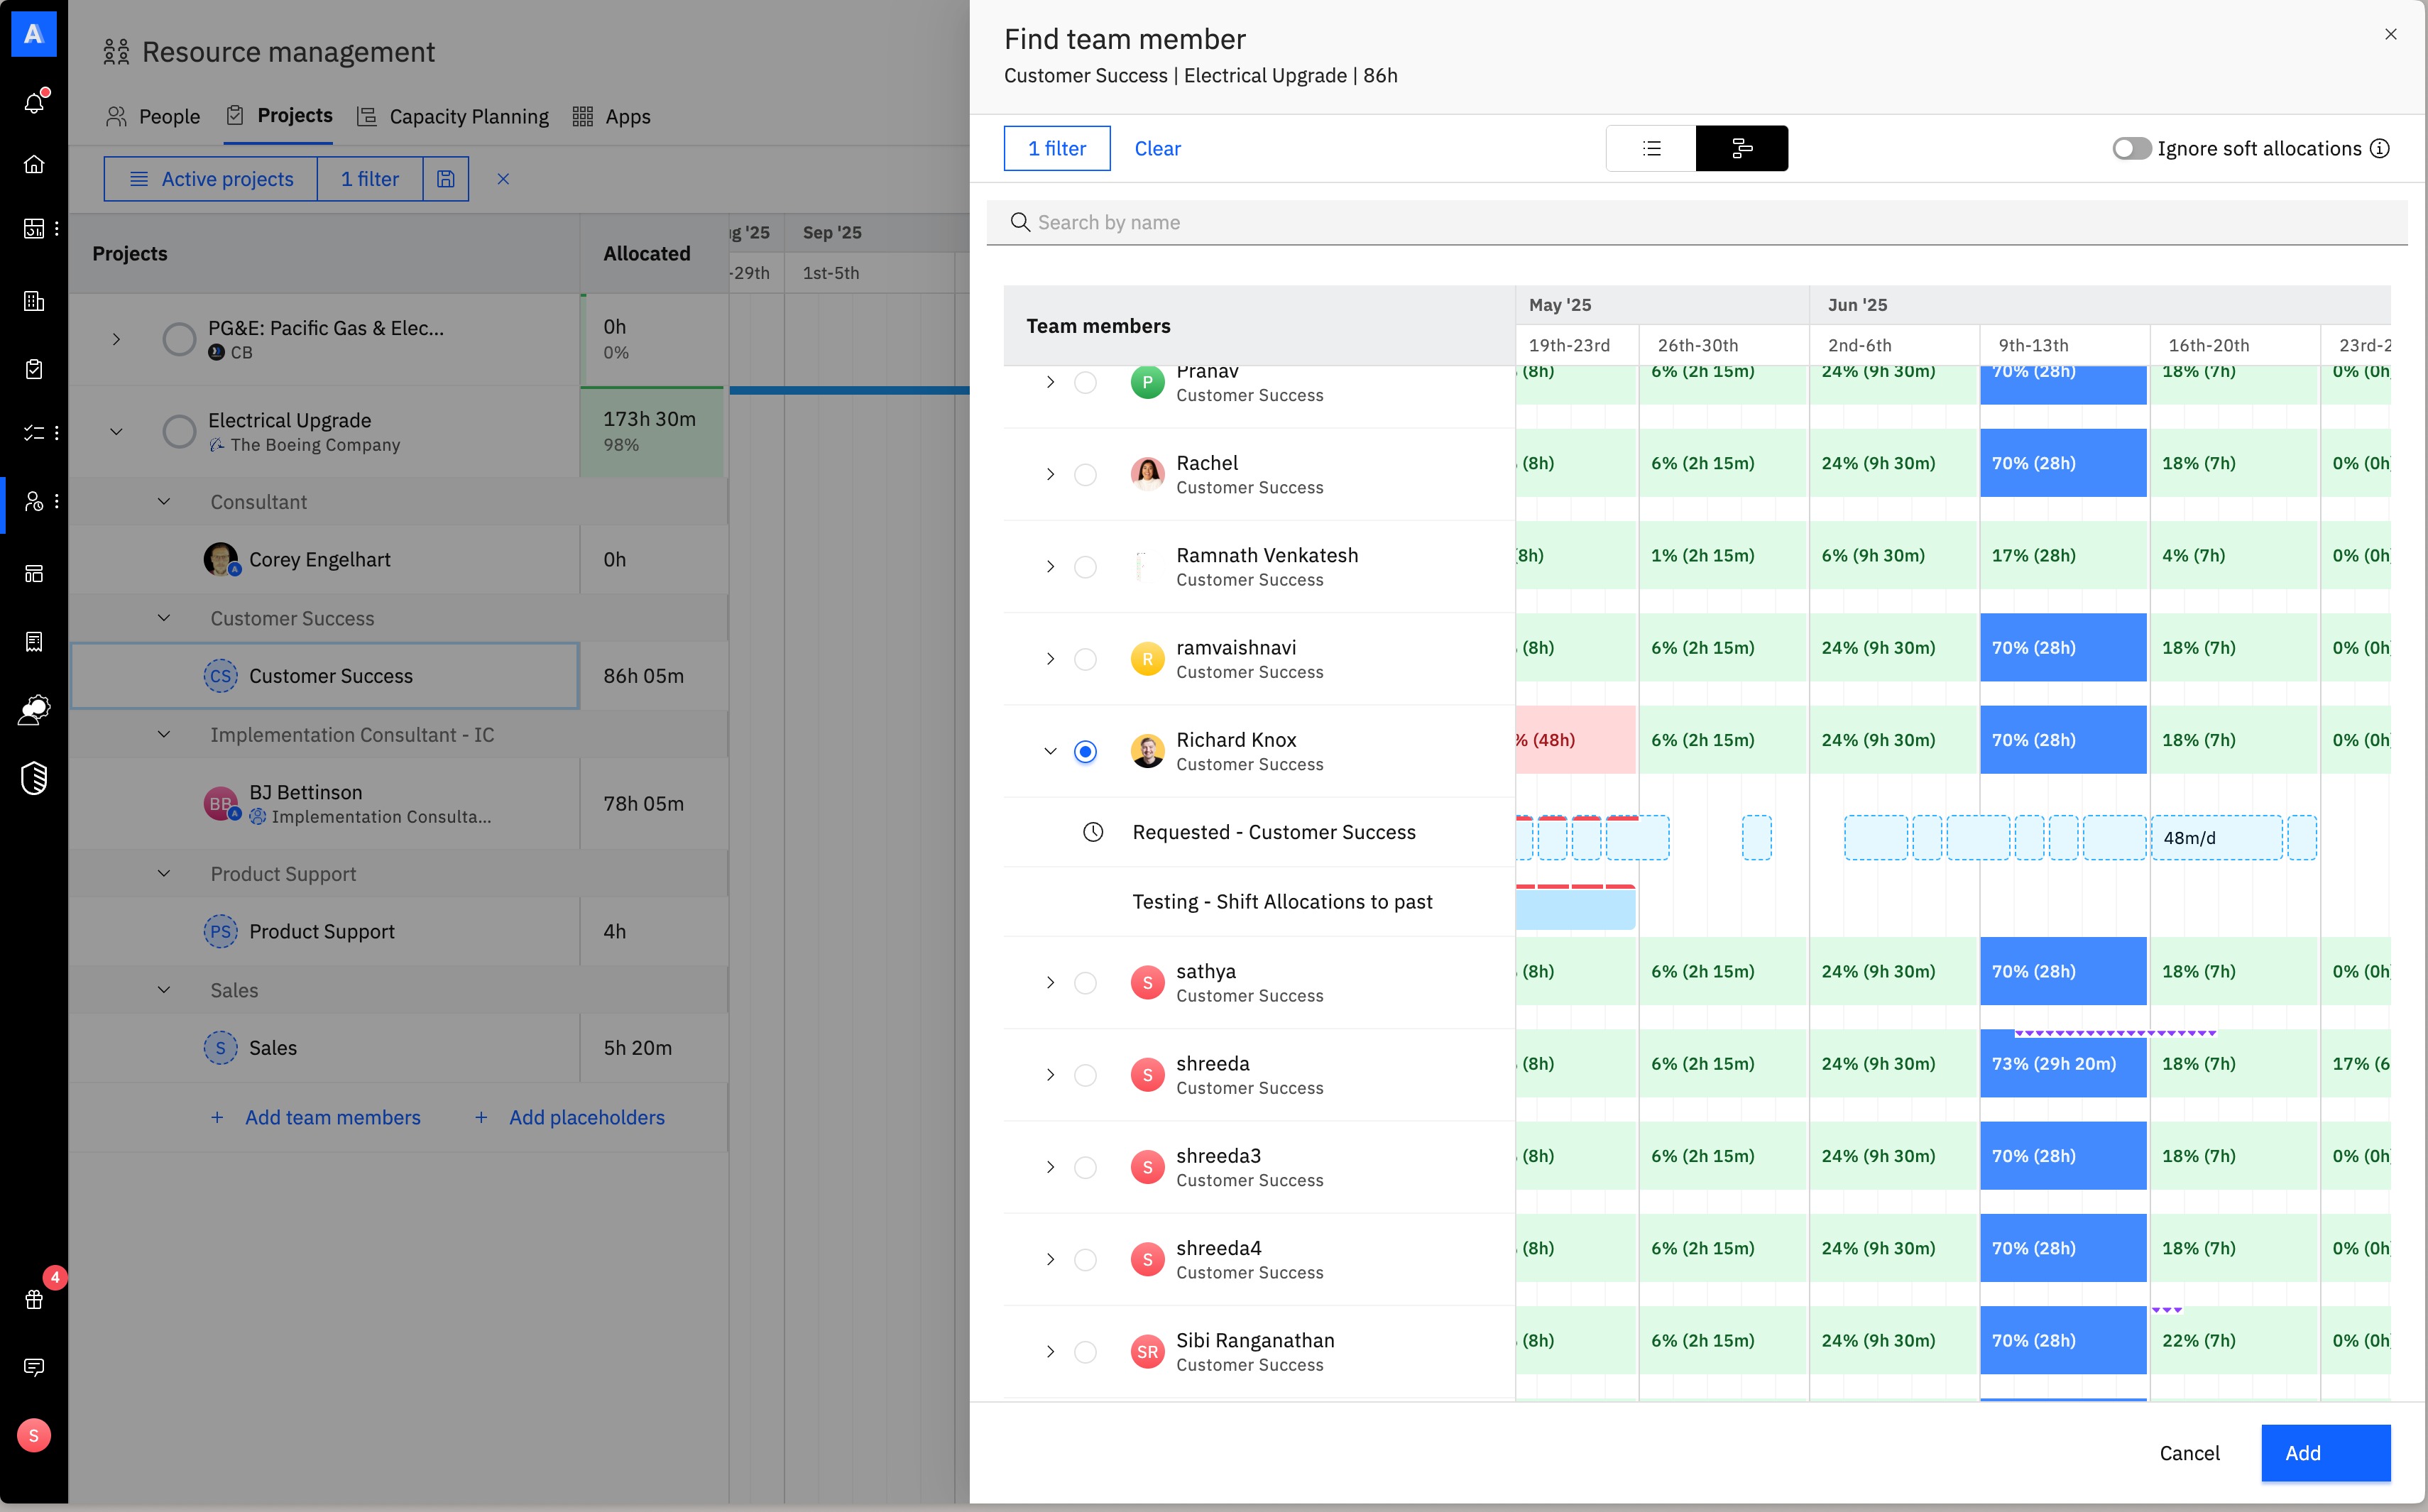

You can select a role or search by the team member’s name. Select the team member and click Add.

The placeholder is replaced by the selected team member’s name.
More actions for placeholders
Click More actions next to a placeholder. You can edit or remove the placeholder.

Edit placeholder
Use Edit placeholder to change the placeholder name.
Remove placeholder
Use Remove placeholder to remove the placeholder from your account.
Projects tab: Allocated column
The Allocated column shows the total number of hours allocated to resources in a project.

Click a project to see the breakdown of allocated hours.
You can view the total hours allocated to each team member in the Allocated column.

To learn more about finding the best team for your project, see this article.