The following best practices can help your team manage onboarding projects, collaborate with customers, and keep project work organized in Rocketlane.
In this article
Bring customers into the portal early
Invite customers to the project and introduce the Customer Portal during the kickoff or first onboarding call. This helps establish the portal as the primary place for customers to follow project progress and participate in project work.
To invite customers:
- Open the onboarding project.
- Go to Project Settings > Team Members.
- Under the customer team, add the customer's email address.
- Select Invite.

When introducing the portal to customers, you can refer to it as your Onboarding Portal. If you want the portal to use your organization's branding, configure a custom domain.
For setup instructions, see Custom Domain and Email Domain Configuration.
Collaborate with customers
Use @mentions when you need someone's attention
Use @mentions to tag customers in messages, task descriptions, or documents when you need their attention.
Mentioning a customer notifies them in Rocketlane and through email.

Reference tasks and documents in conversations
You can reference tasks and documents using @@ and @@@ in places such as chat, documents, and task descriptions. This makes it easier to connect conversations to the relevant project work.

Run project reviews using Board view
Use Board view within a project for weekly reviews or standups with customers. Tasks can be organized by status so you can quickly review what is planned, in progress, or completed.

You can organize Board view columns using fields such as:
- Assignee
- Due date
- Priority
- Status
- Custom fields such as Task Type
Rows can also be organized by fields such as Assignee, Priority, or Project Phase. This can help you tailor the board to the type of project review you are running.

Configure notifications
Configure your notification preferences based on how you use Rocketlane. This helps you stay informed about important project activity without receiving unnecessary notifications.
Go to Settings > Notifications to review and update your preferences.

Organize task information with custom fields
Create custom task fields, or update existing task fields, when you need to capture additional information for important tasks. Consistent task fields make it easier to organize, filter, and review project work.

Use keyboard shortcuts
Keyboard shortcuts can help you move between commonly used areas without navigating through the sidebar.
| Shortcut | Action |
|---|---|
| N | Open the New Task creation window |
| H | Open Home |
| P | Open the Projects list |
Manage work across projects
Use Home to review your work
Use Home to stay on top of work assigned to you across projects. Select Group by: Projects to organize your tasks by project.

Bulk edit tasks
Use multi-select from All Tasks to select and update several tasks at once. Bulk edits can be useful when you need to make the same change across multiple tasks, such as shifting task dates.

Use Kanban view in All Tasks
The All Tasks page includes a Kanban view that can help you analyze and organize tasks across projects. You can also use this view for internal project reviews.

Control what customers can see
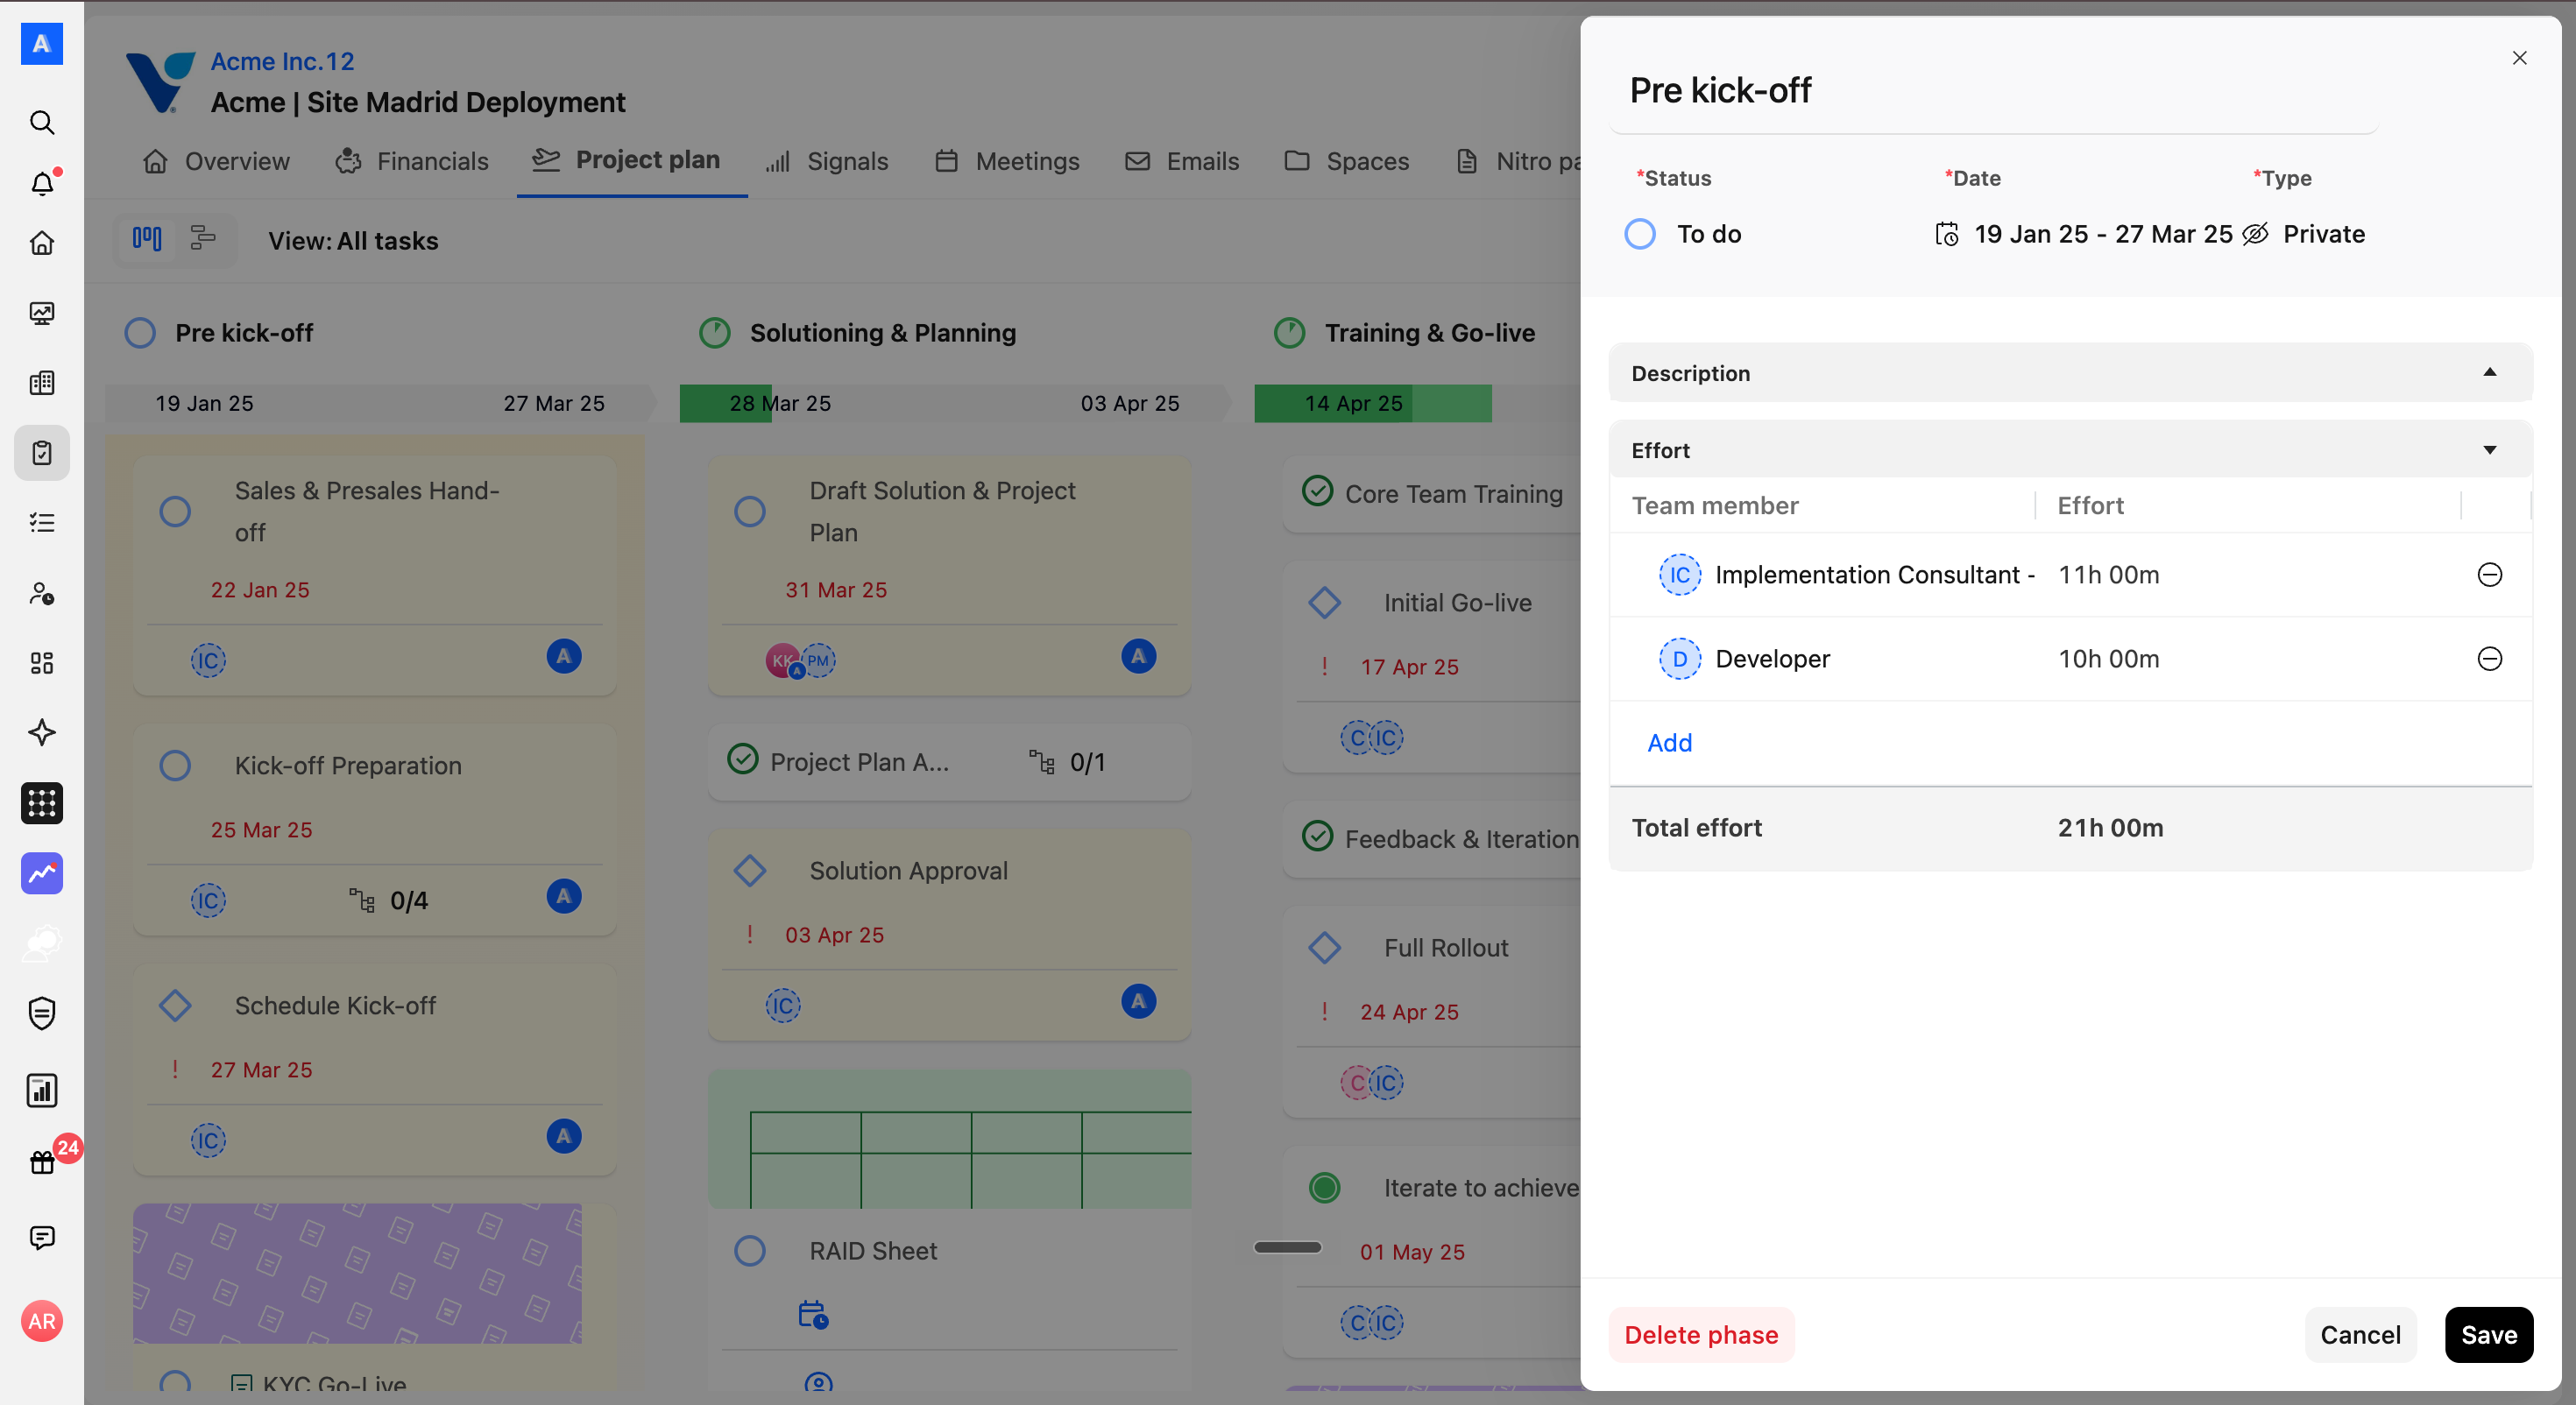
Make a phase private
To hide a phase from customers in the Project Plan:
- Open the Project Plan.
- Switch to Board view.
- Select the edit icon next to the phase name.
- In the Edit Project Phase window, set the privacy type to Private.
- Select Save.
Present the project plan to customers
Use Present to walk customers through the project plan.
You can keep selected phases private during the initial rollout and make them visible later when they become relevant to the customer.
