You can move ongoing and new projects to the new Customer Portal by applying a Customer Portal template to those projects. The setup differs slightly based on whether the project is already active, newly created, or created through a CRM integration such as Salesforce or HubSpot.
In this article
Transition ongoing projects to the new Customer Portal
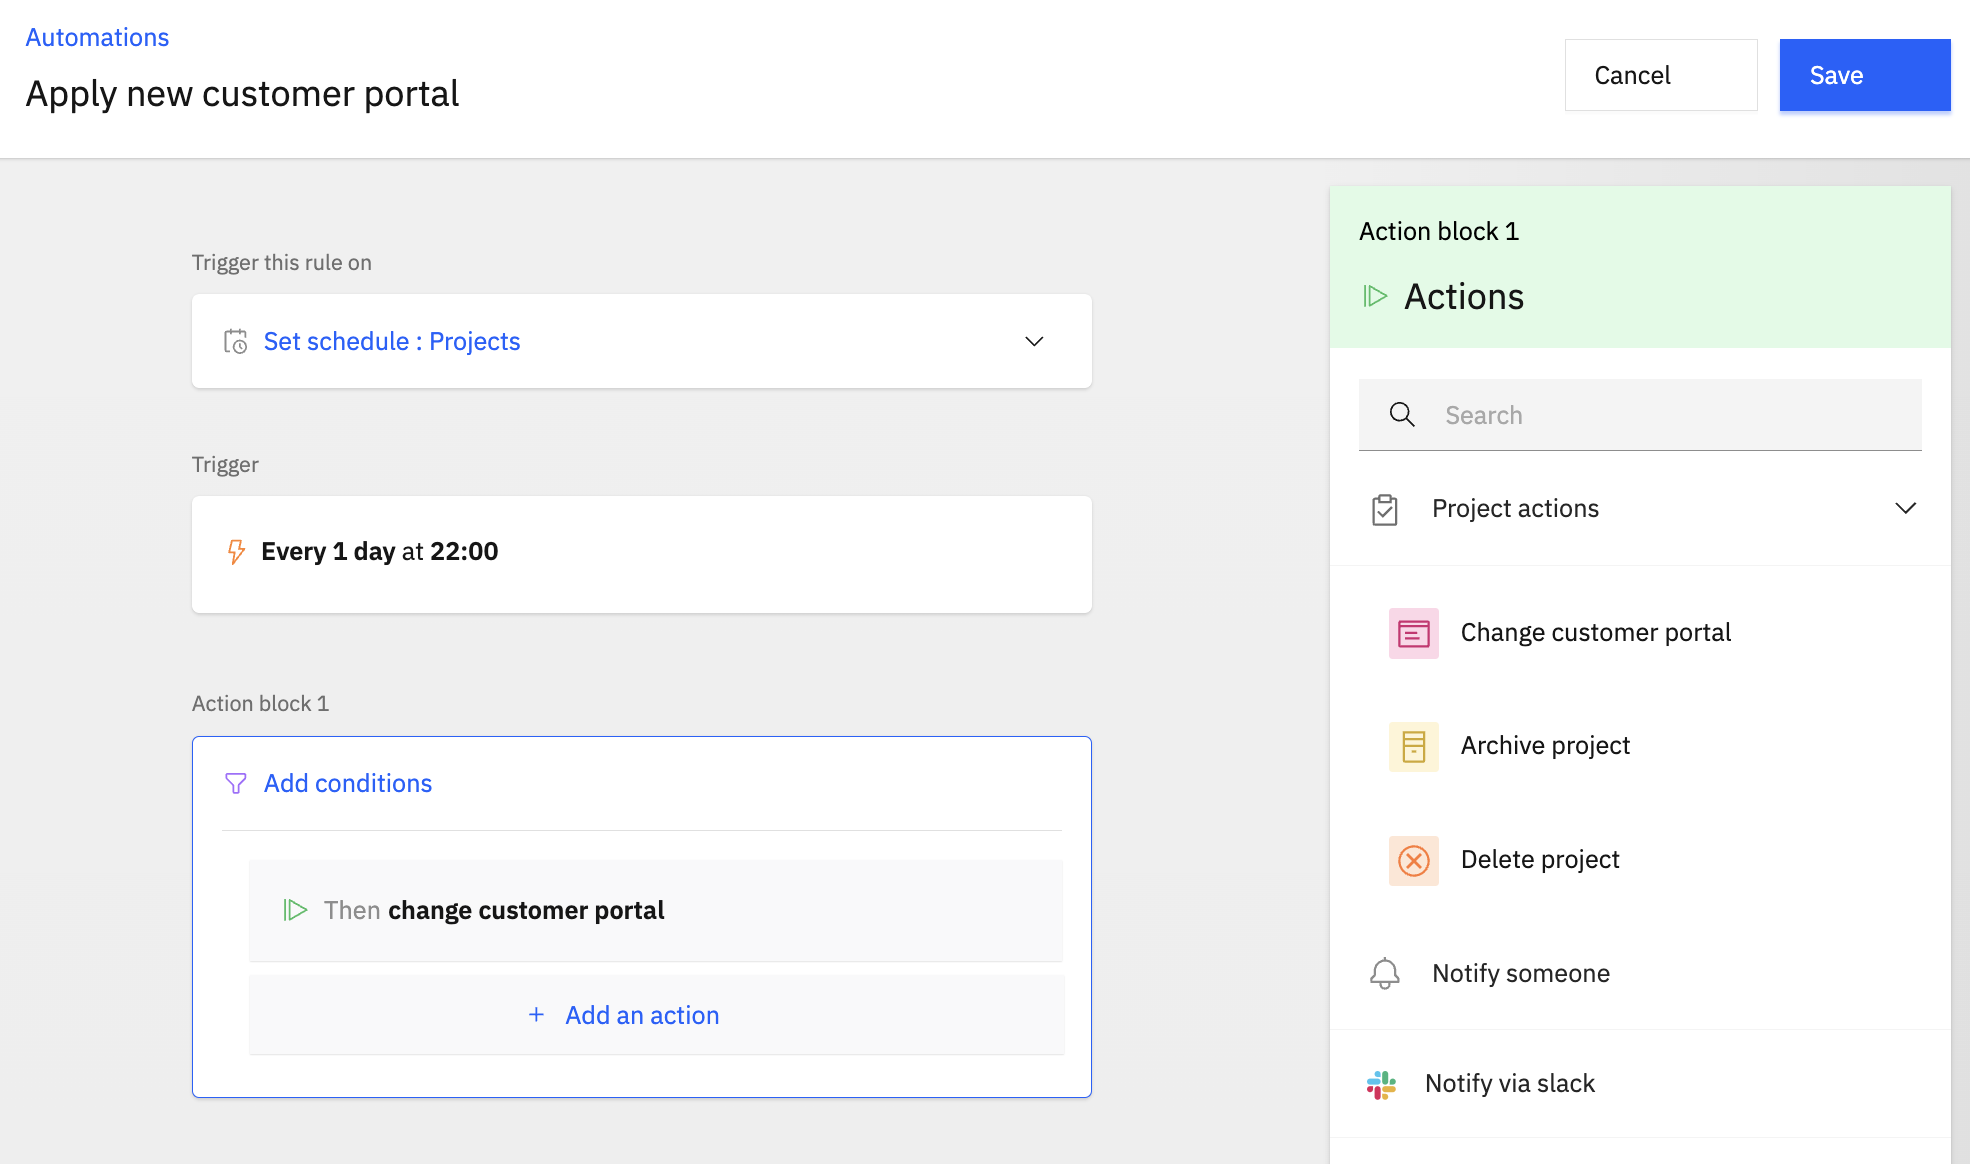
To update older projects to the new Customer Portal, create an automation that changes the portal template for the required projects.
- Click your Profile icon and go to Settings.
- Click Automations, then select New Automation.
- Choose Blank Slate to create the automation from scratch.
- In the Trigger section, select Set Schedule.
- In the dialog box, choose Projects from the Set Schedule On dropdown.
- Set Repeats Every to 1 day, and specify the start date, time, and timezone.
- In the action block, select Change Portal and choose the Customer Portal template you want to assign to the project.
Apply the new Customer Portal to new projects
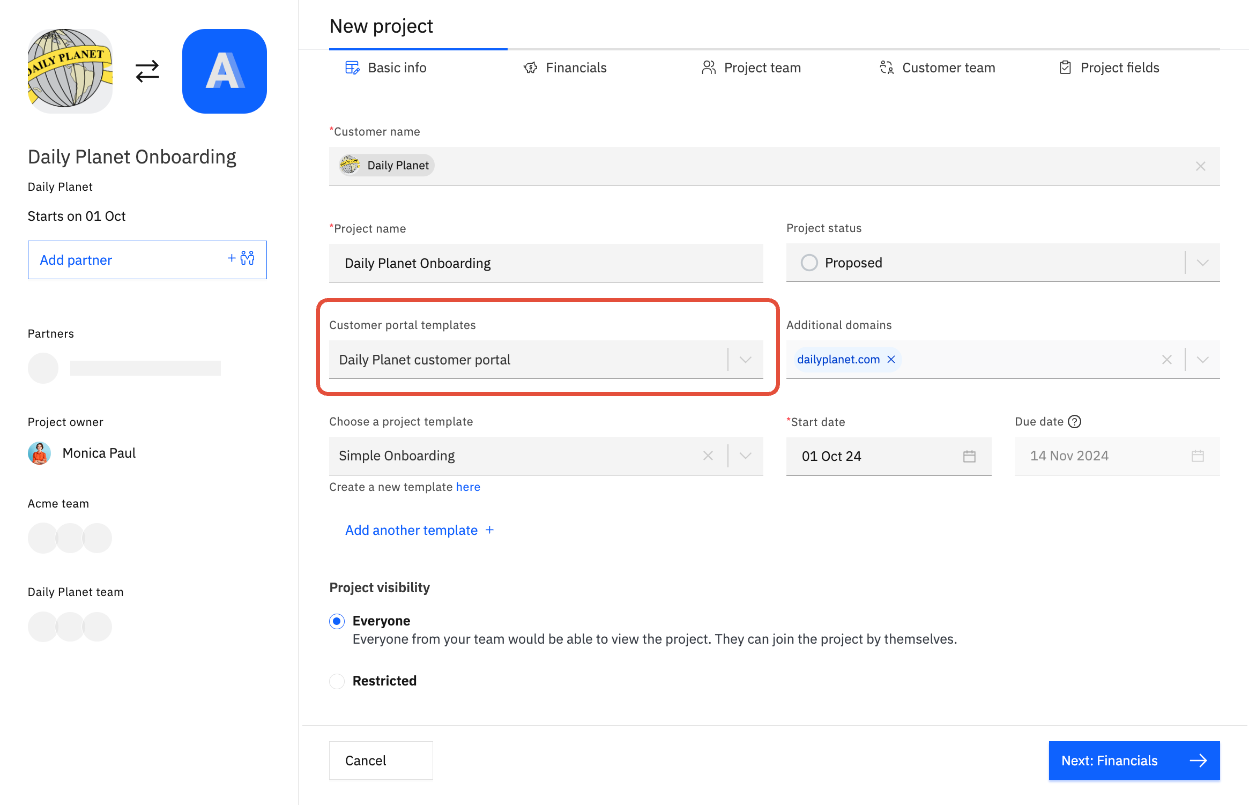
When creating a new project, select the Customer Portal template you want to use in the project creation flow. For example, if you select SMB Onboarding CP Template, the new project will inherit that template.
If no Customer Portal template is selected during project creation, the project will inherit the default Customer Portal from the Customer Portal templates section.
Apply the new Customer Portal to CRM-created projects
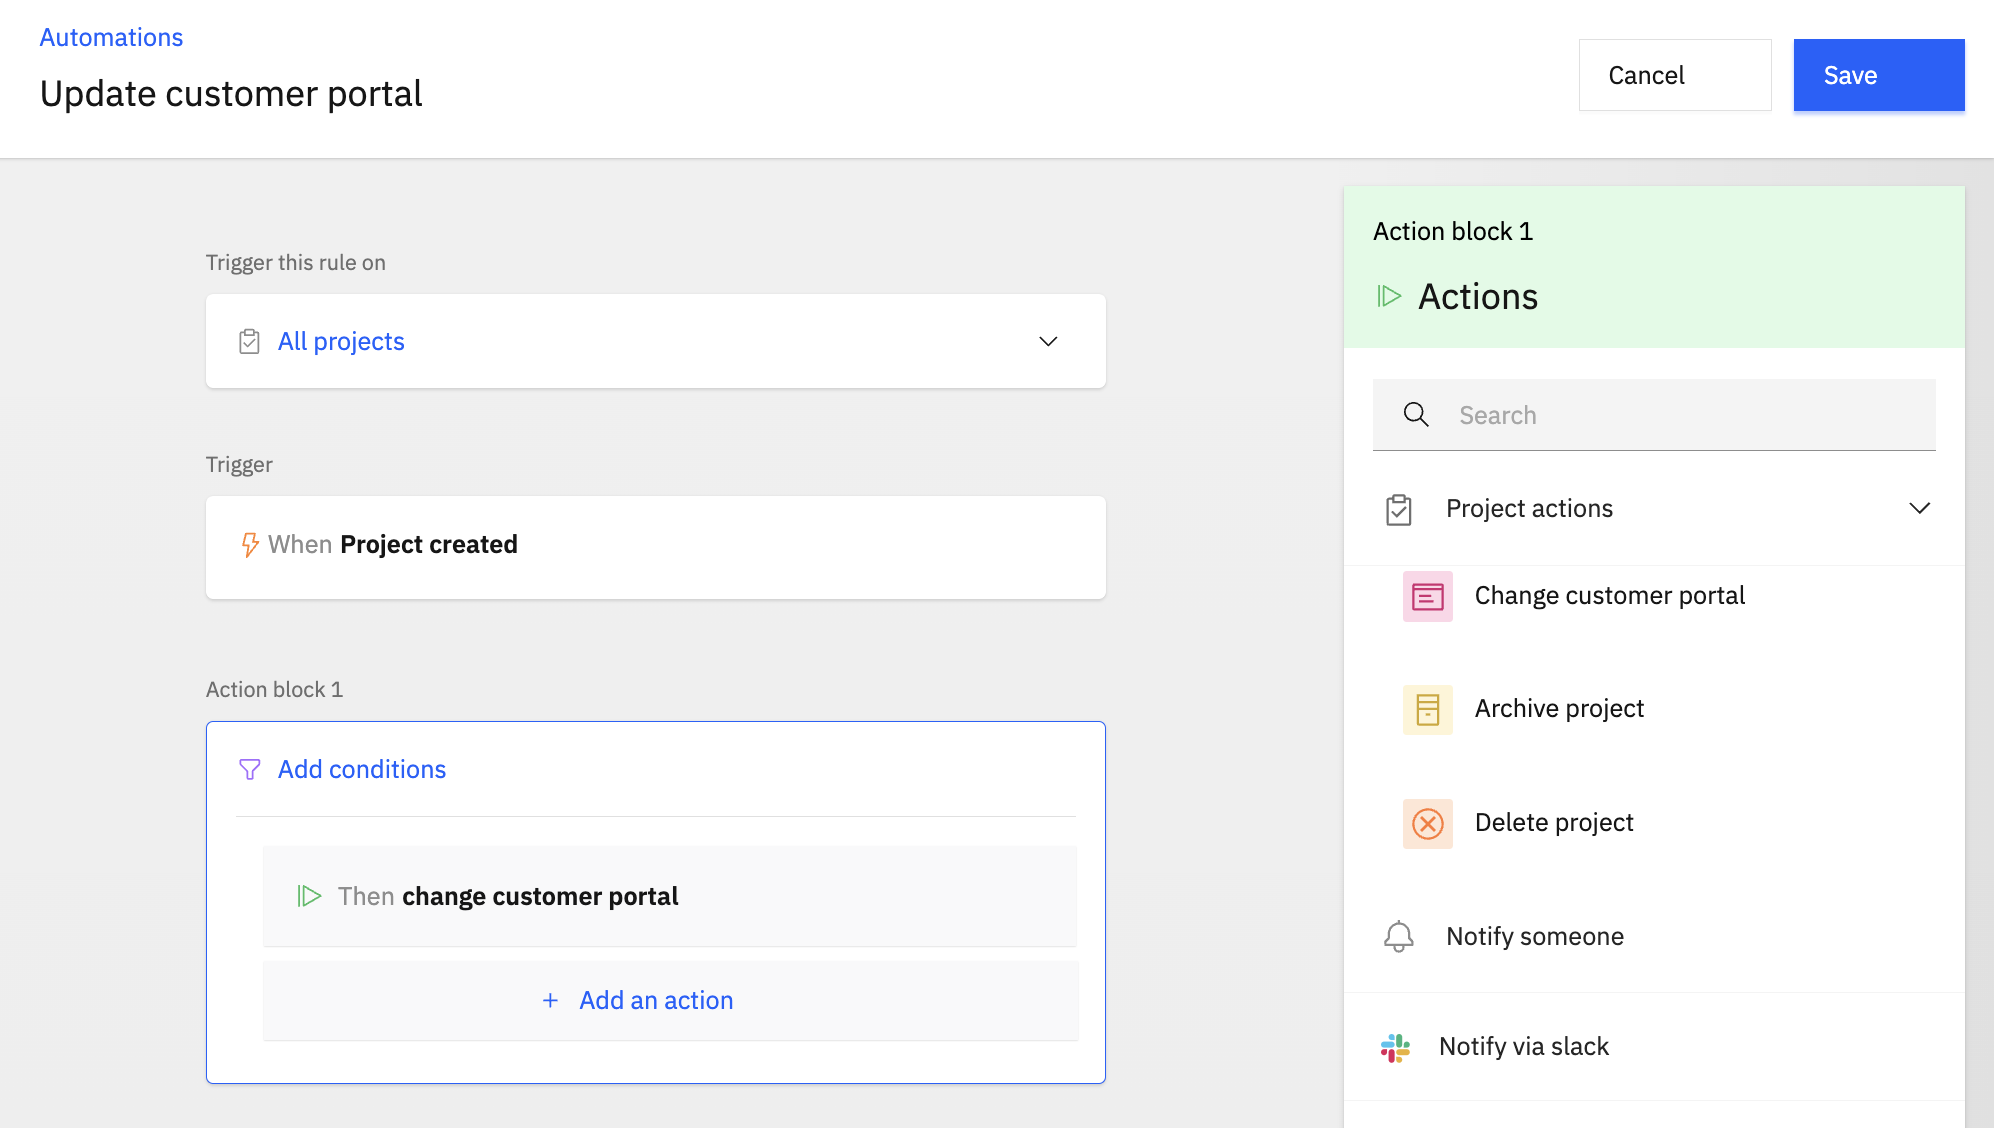
If projects are created through CRM integrations such as Salesforce or HubSpot, create an automation that applies the required Customer Portal template when a project is created.
- Click your Profile icon, go to Settings, and open Automations.
- Create a new automation using the Blank Slate option.
- In the Trigger section, choose All Projects.
- Set the trigger as When Project is Created. Add conditions if required.
- Add an action and select Change Customer Portal. In the dialog box, choose the Customer Portal template you want to apply to the project.