In this article
Rocketlane now supports SCIM-based user provisioning via Microsoft Entra ID (formerly Azure Active Directory). This integration helps automate user creation, updates, and deactivation, so your IT team no longer has to manage users manually in Rocketlane.
With this in place, Rocketlane mirrors user changes from Entra, streamlining identity and access management for growing teams.
Overview of SCIM Provisioning Capabilities
Once enabled, SCIM-based provisioning automatically handles:
- User Creation: Users assigned to the Rocketlane app in Entra are created in Rocketlane.
- User Updates: Updates to user attributes, such as name or email, in Entra are synced to Rocketlane.
- User Deactivation: Unassigned users in Entra are disabled or removed in Rocketlane.
Step 1: Set Up the Rocketlane Application in Entra ID
- Log in to your Entra Admin Center.
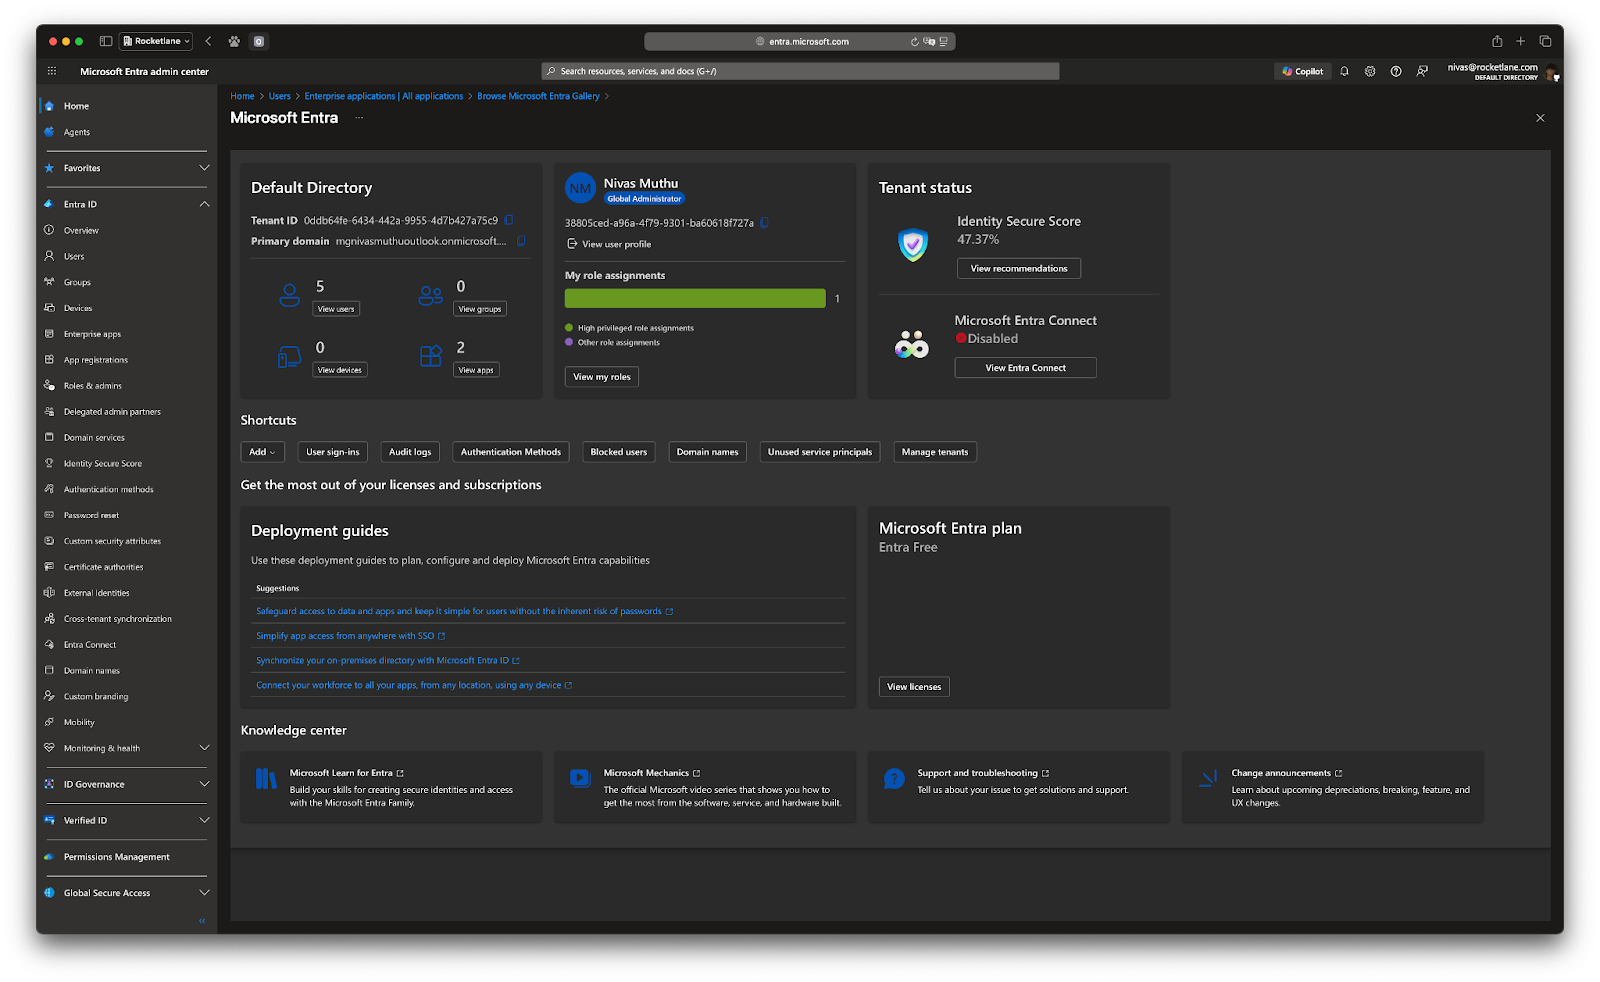
- Navigate to Enterprise apps > All Application > New Application > Create your own application.
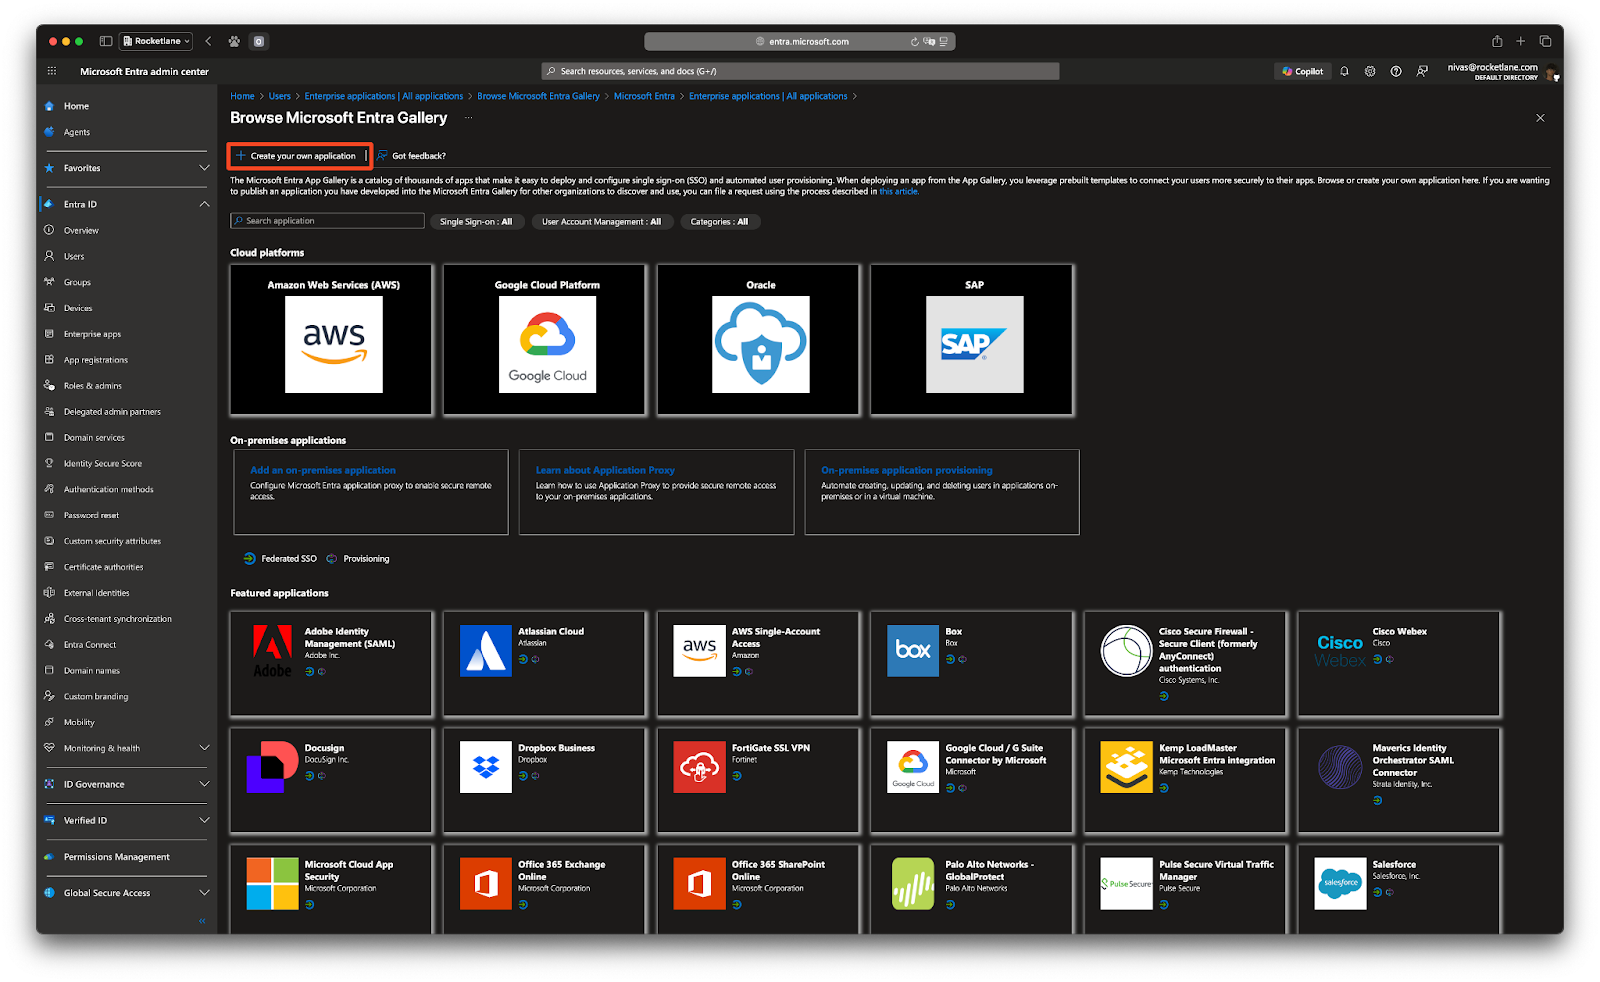
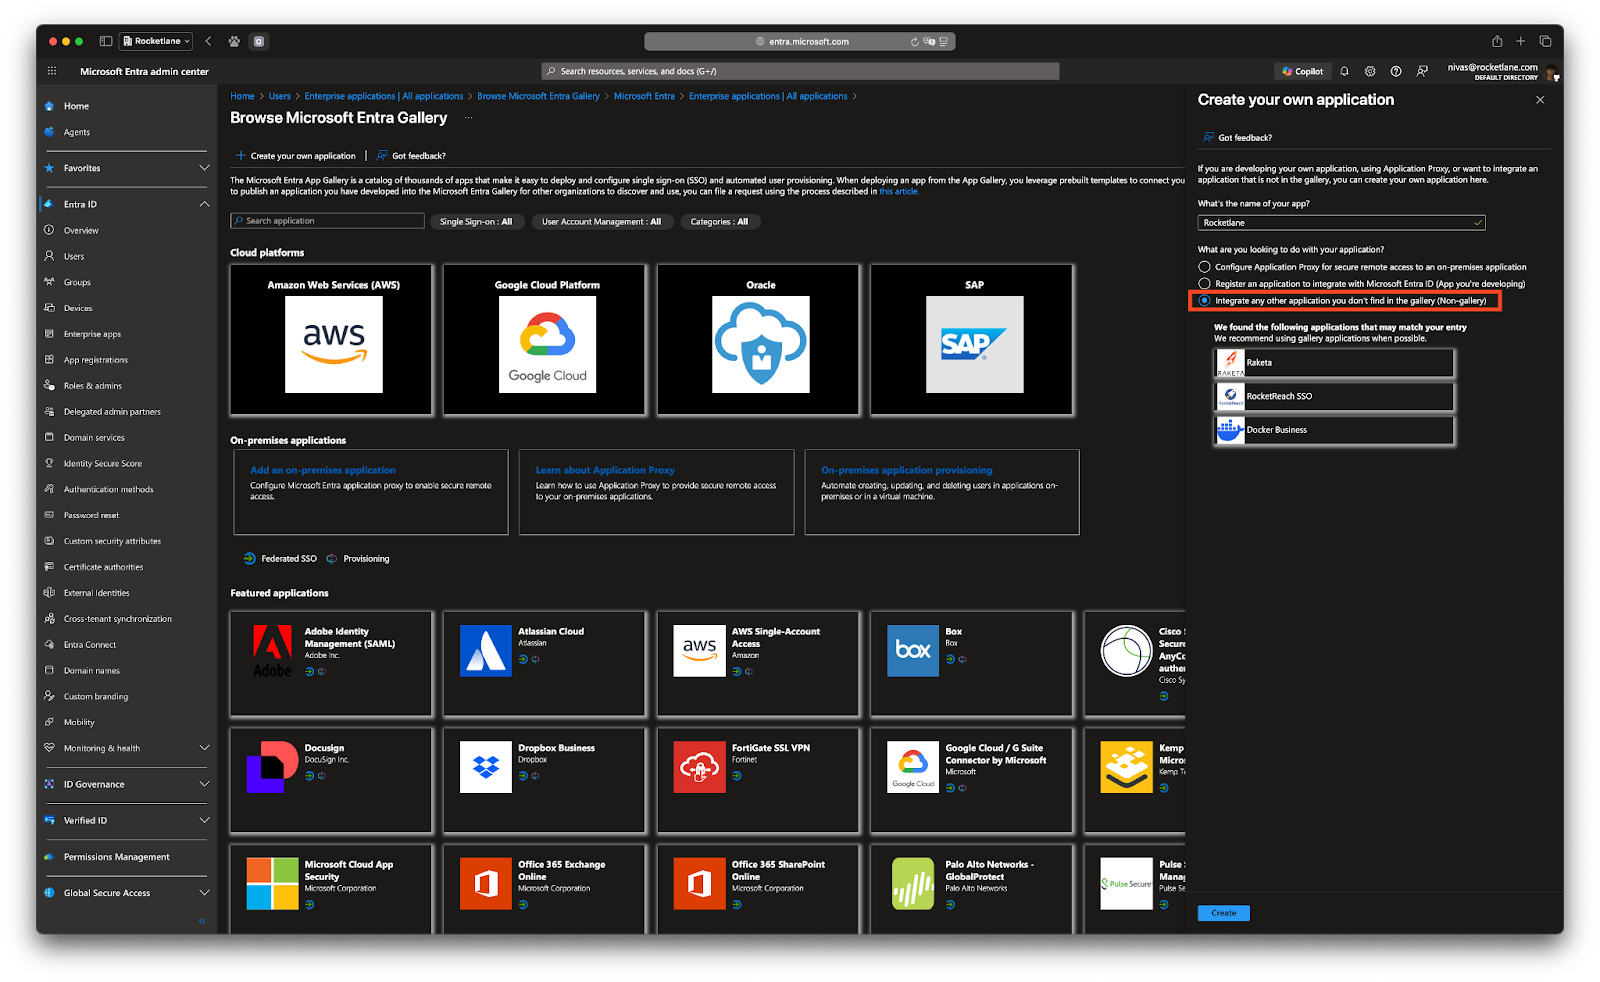
- Name the app, for example,
Rocketlane. - Choose “Integrate any other application you don’t find in the gallery (Non-gallery)” and click Create.
Step 2: Generate API Token in Rocketlane
To connect Entra with Rocketlane, you’ll need an API token that authorizes SCIM operations.
- Go to Settings in your Rocketlane account.
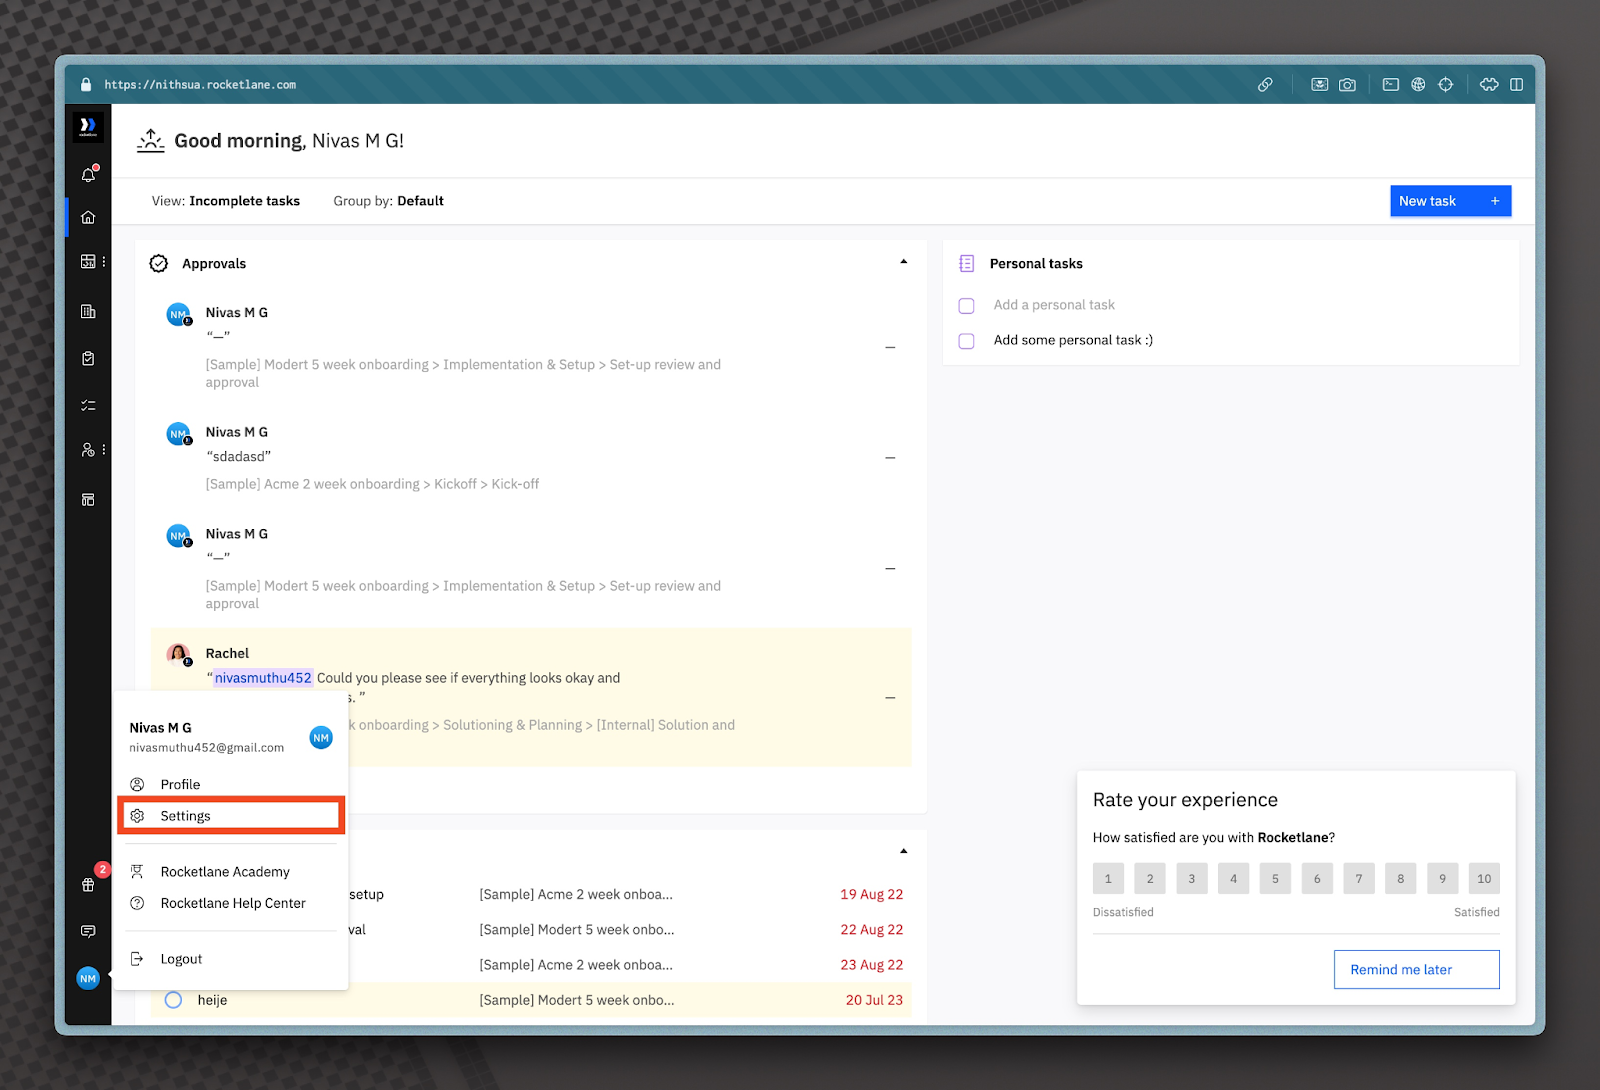
- Scroll to API Settings.
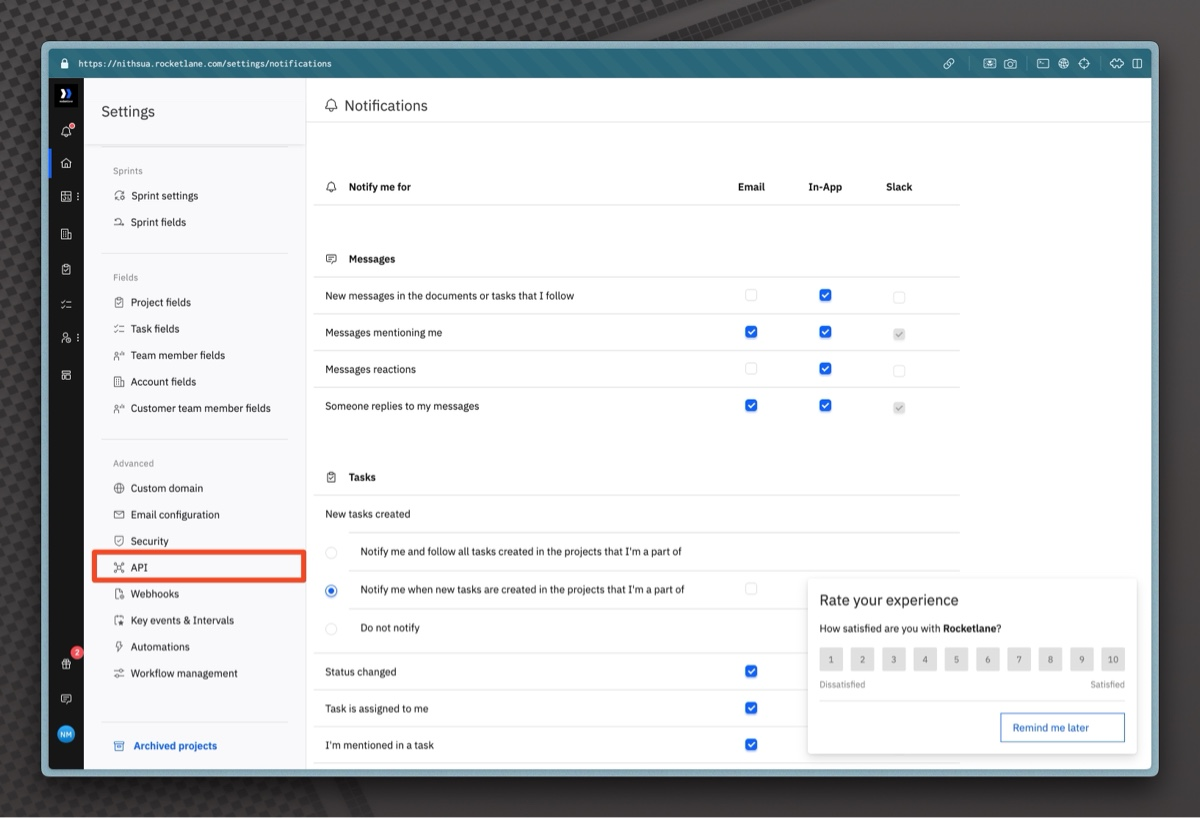
- Click Create API Key.
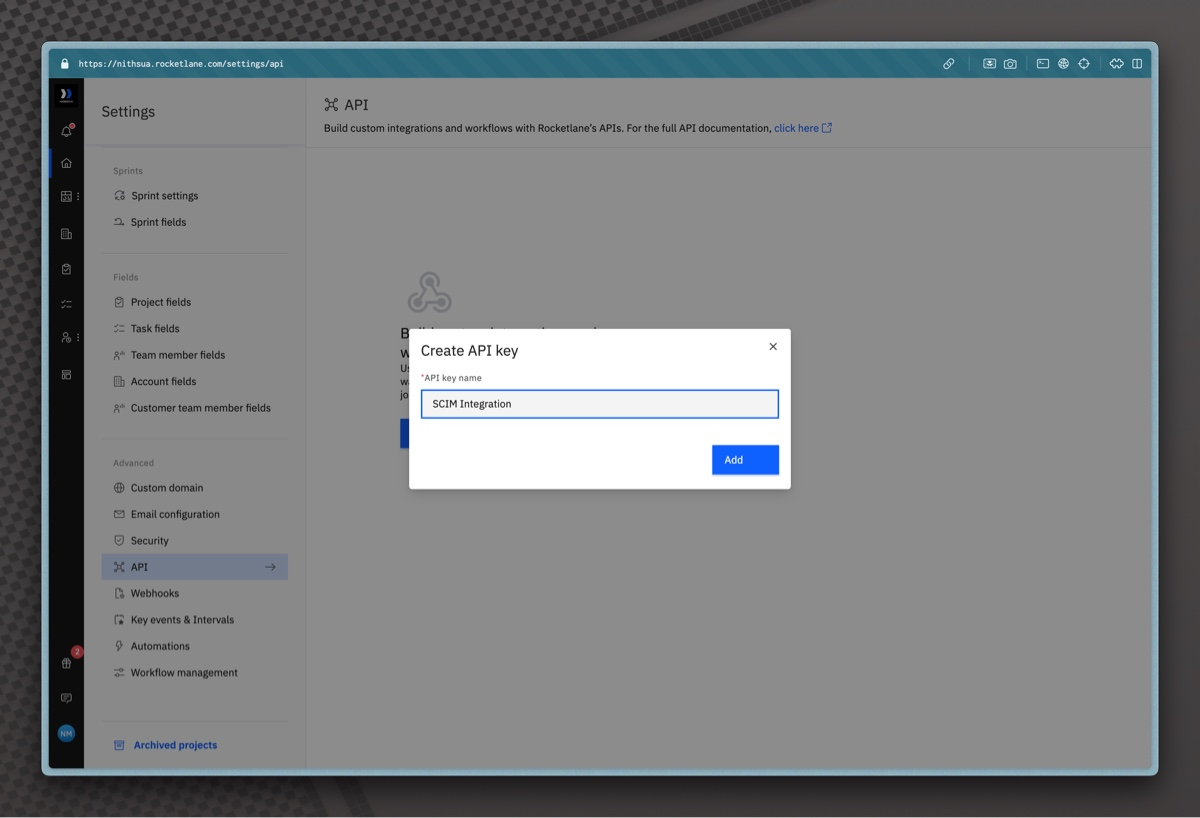
- Name the key clearly, for example, Entra SCIM Integration.
- Copy the generated API key. You’ll use this in the Entra setup.
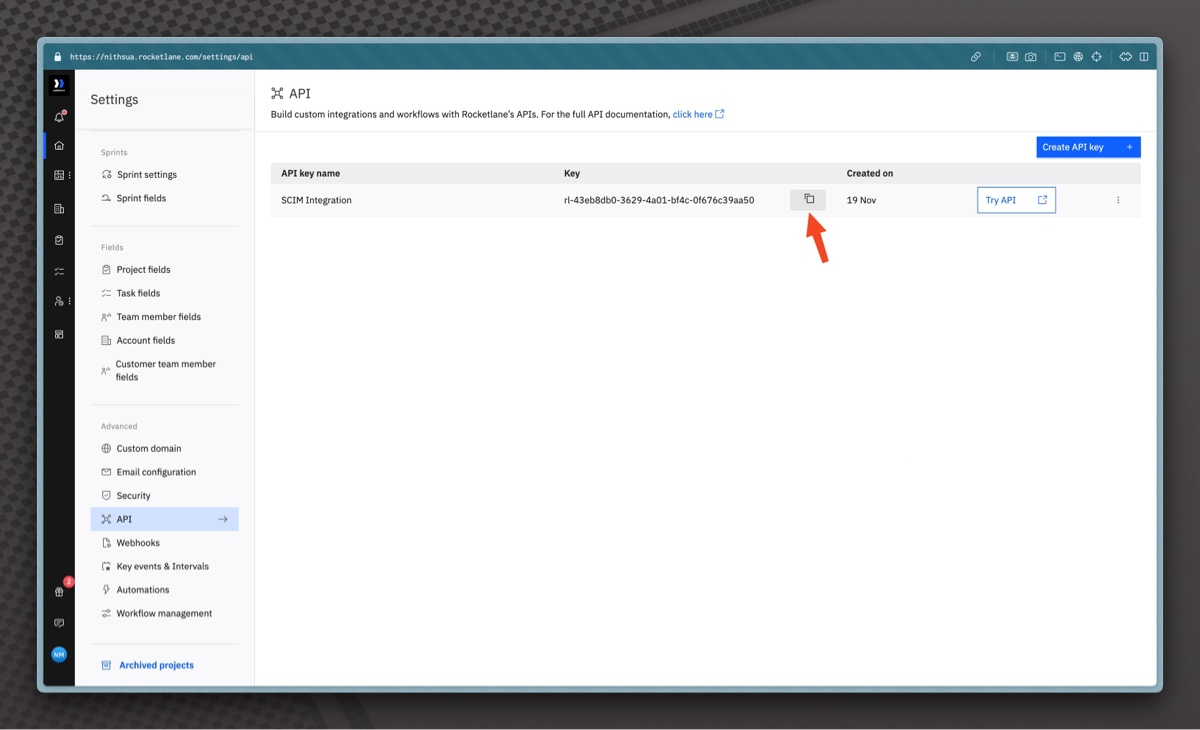
ImportantCopy and store the API key securely when it is generated. You will need to paste it into Entra as the secret token.
Step 3: Configure SCIM Provisioning in Entra
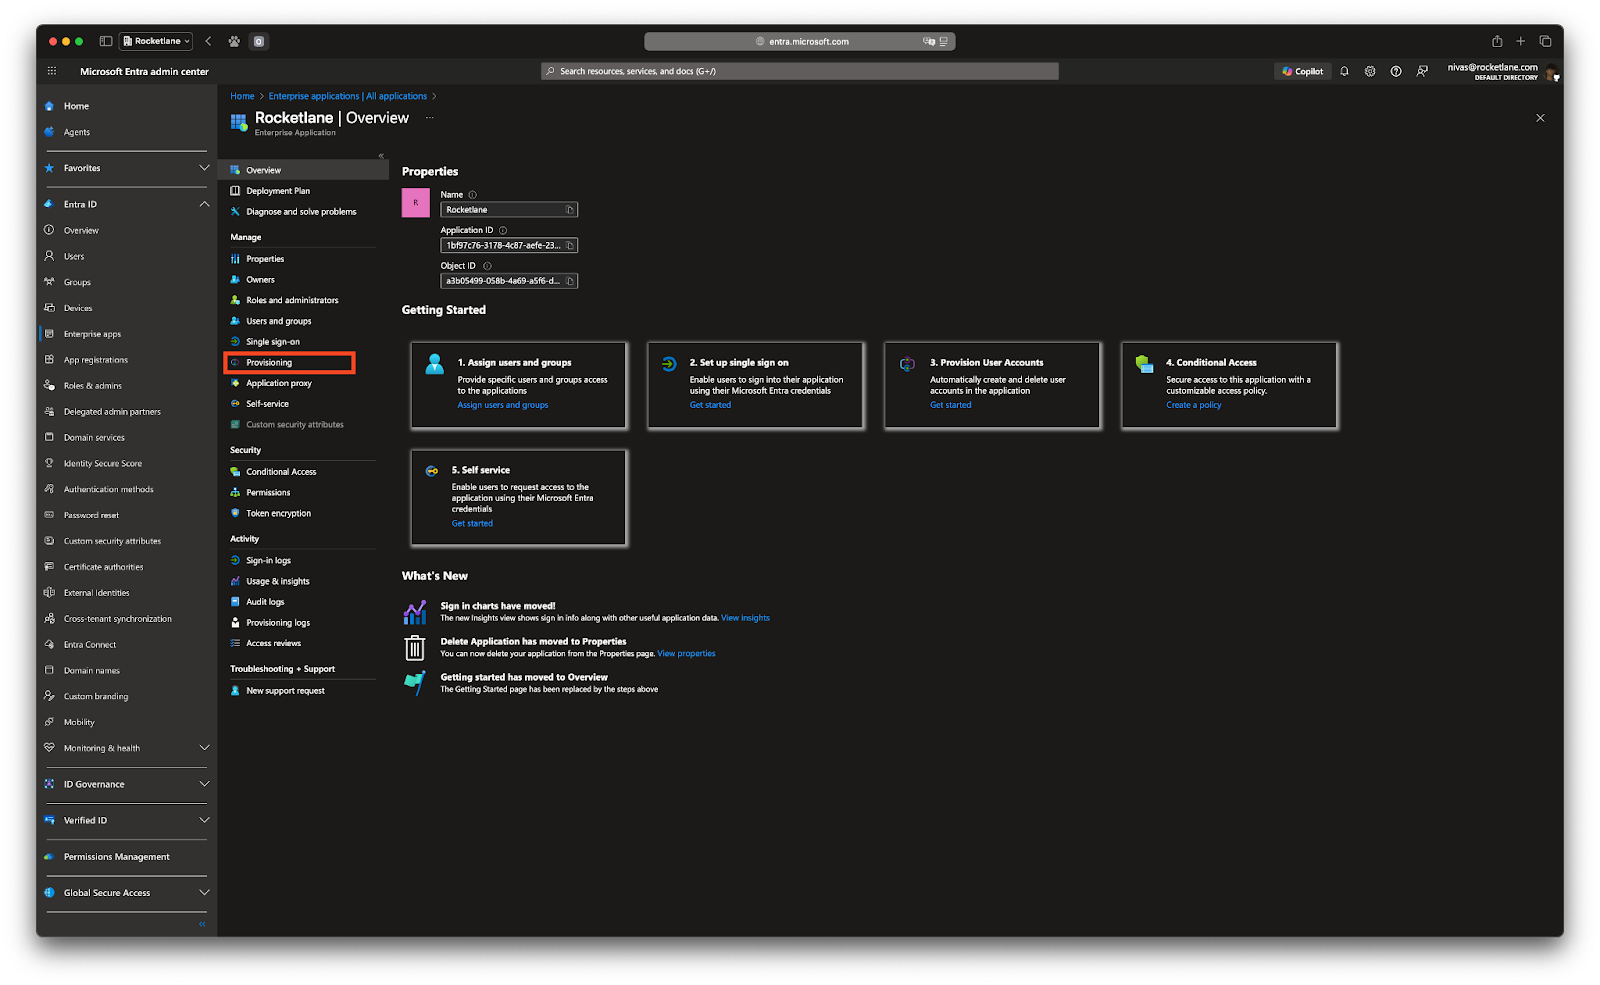
- Go to the Rocketlane application in Entra. Navigate to Provisioning > Get Started.
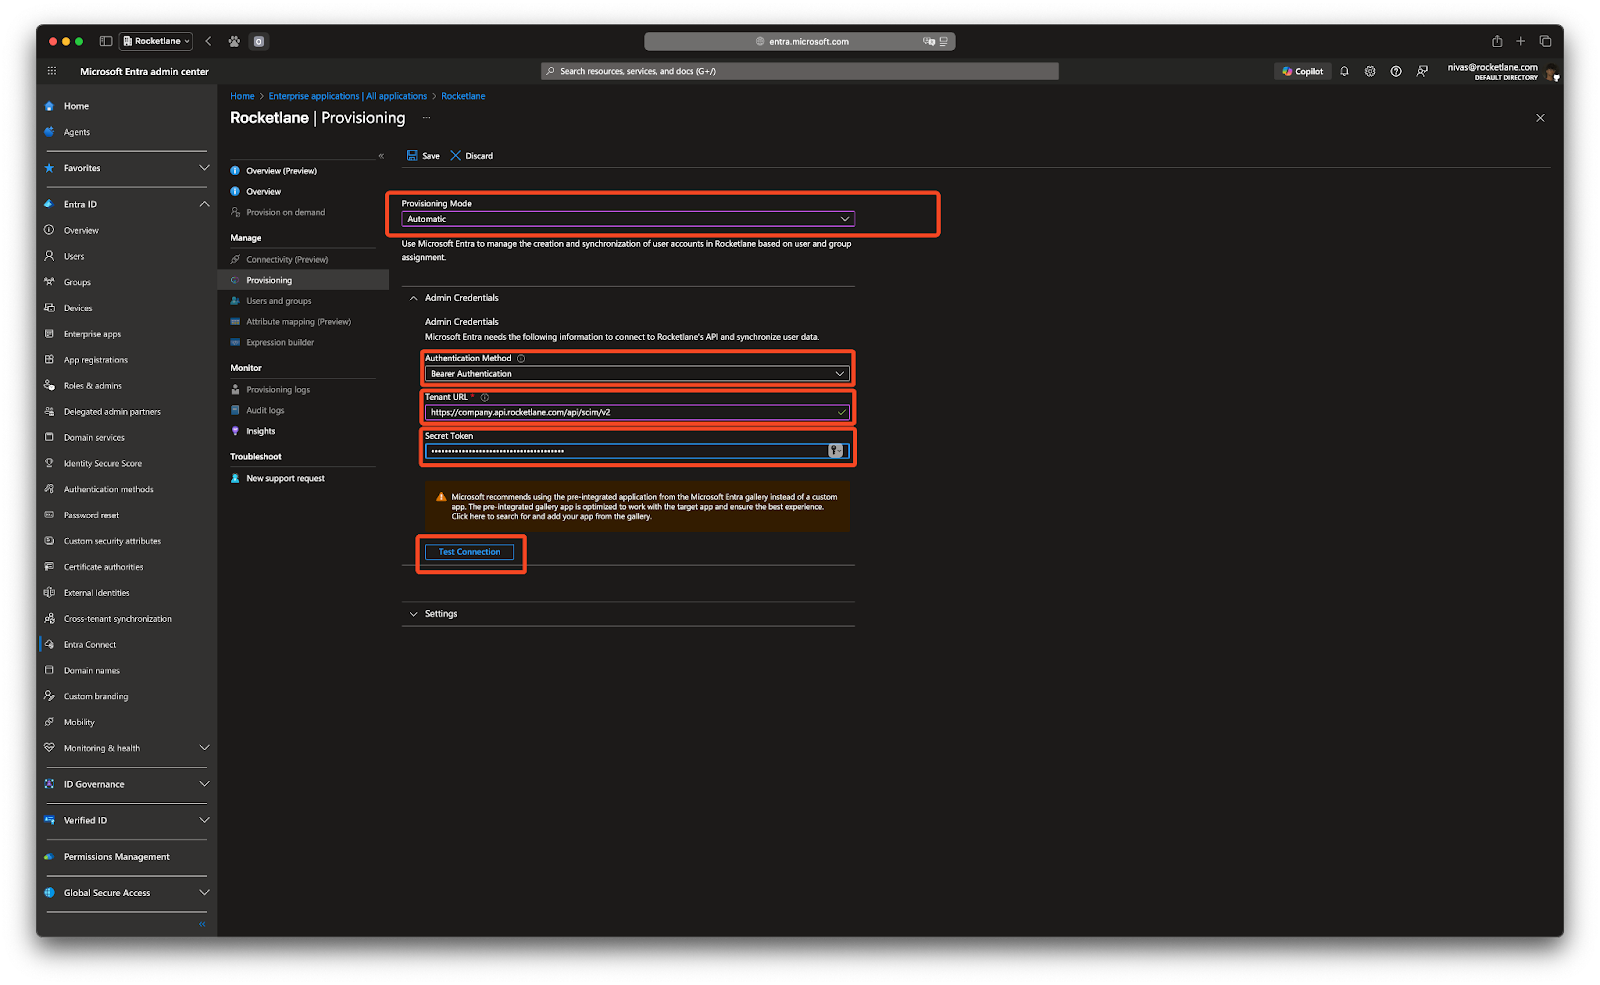
- Fill in the following fields:
- Provisioning Mode: Automatic
- Authentication Method: Bearer Authentication
- Tenant URL:
https://<your-subdomain>.api.rocketlane.com/api/scim/v2 - Example: If your Rocketlane domain is
acme.rocketlane.com, the SCIM Base URL would behttps://acme.api.rocketlane.com/api/scim/v2 - Secret Token: Paste the API key you generated from Rocketlane.
- Click Test Connection to verify.
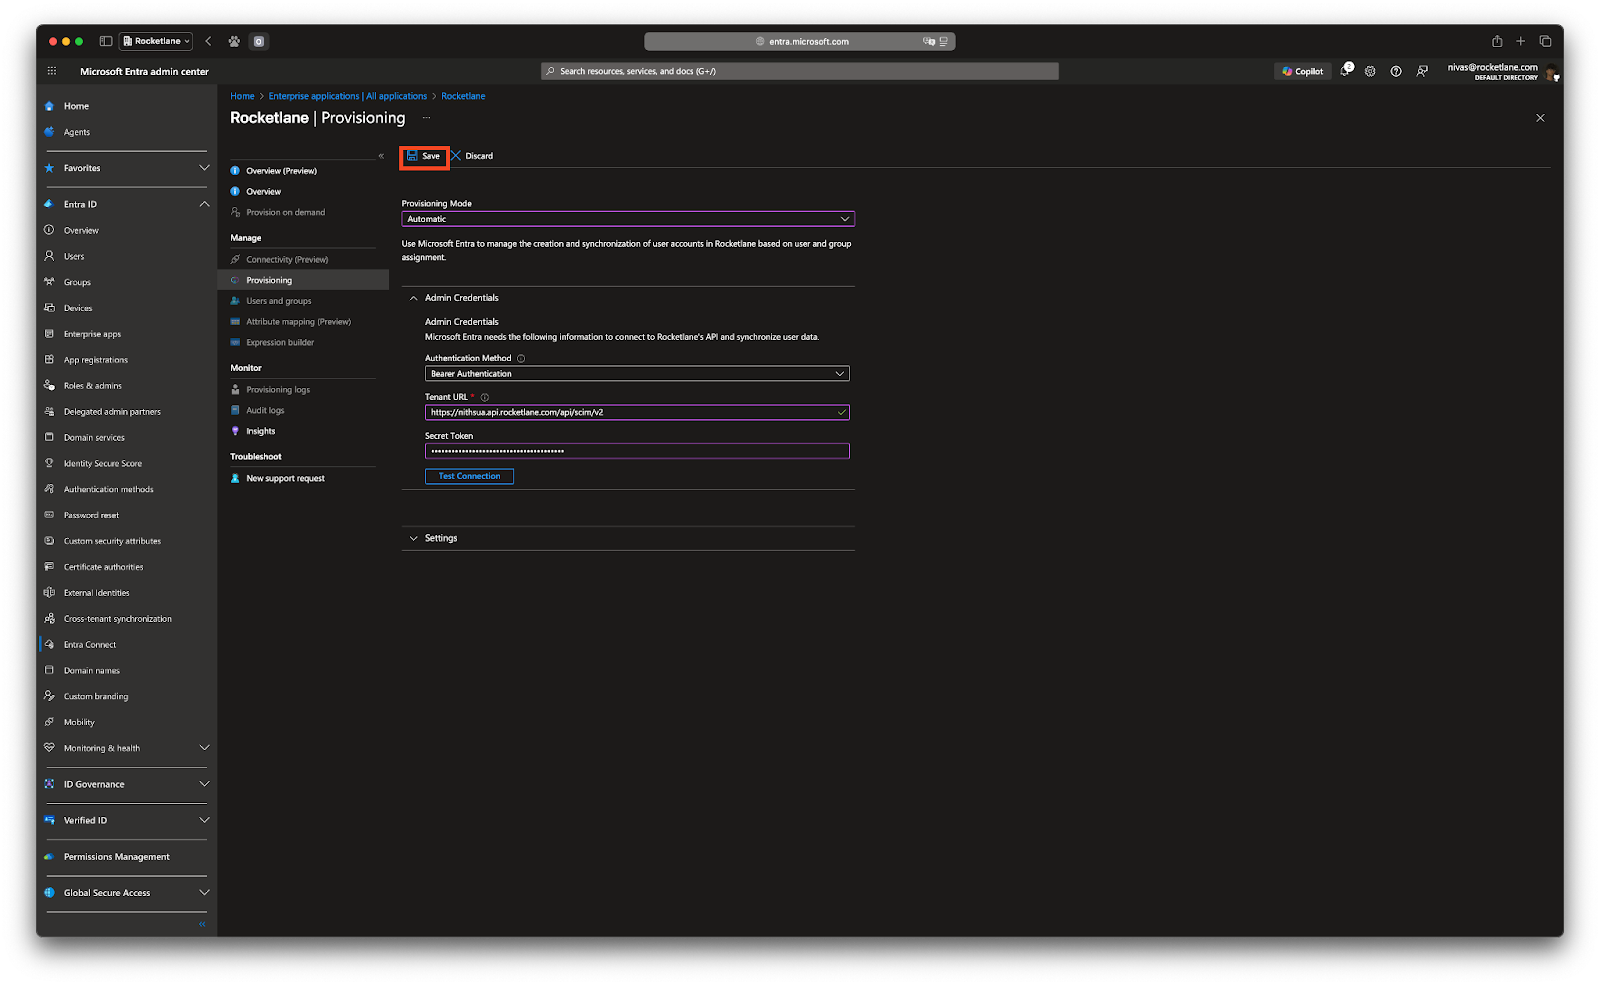
- On success, click Save to confirm and enable the integration.
Step 4: Configure Microsoft Entra ID Mapping
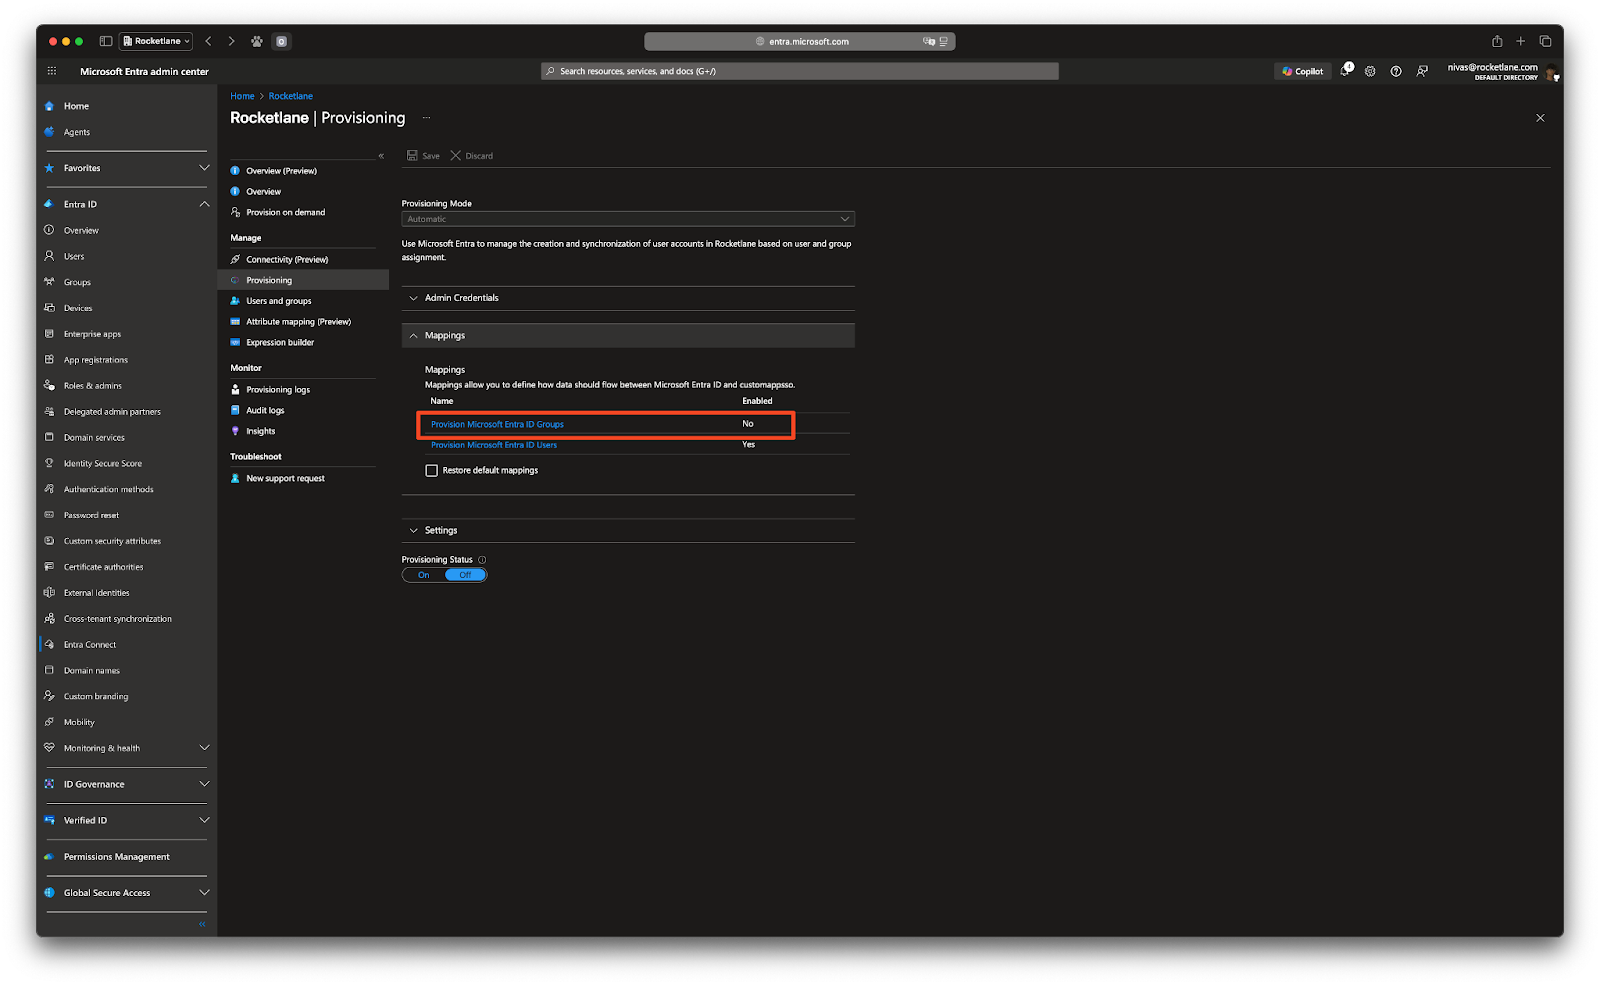
- After saving the configuration, you should be able to see the option to configure attribute mapping.
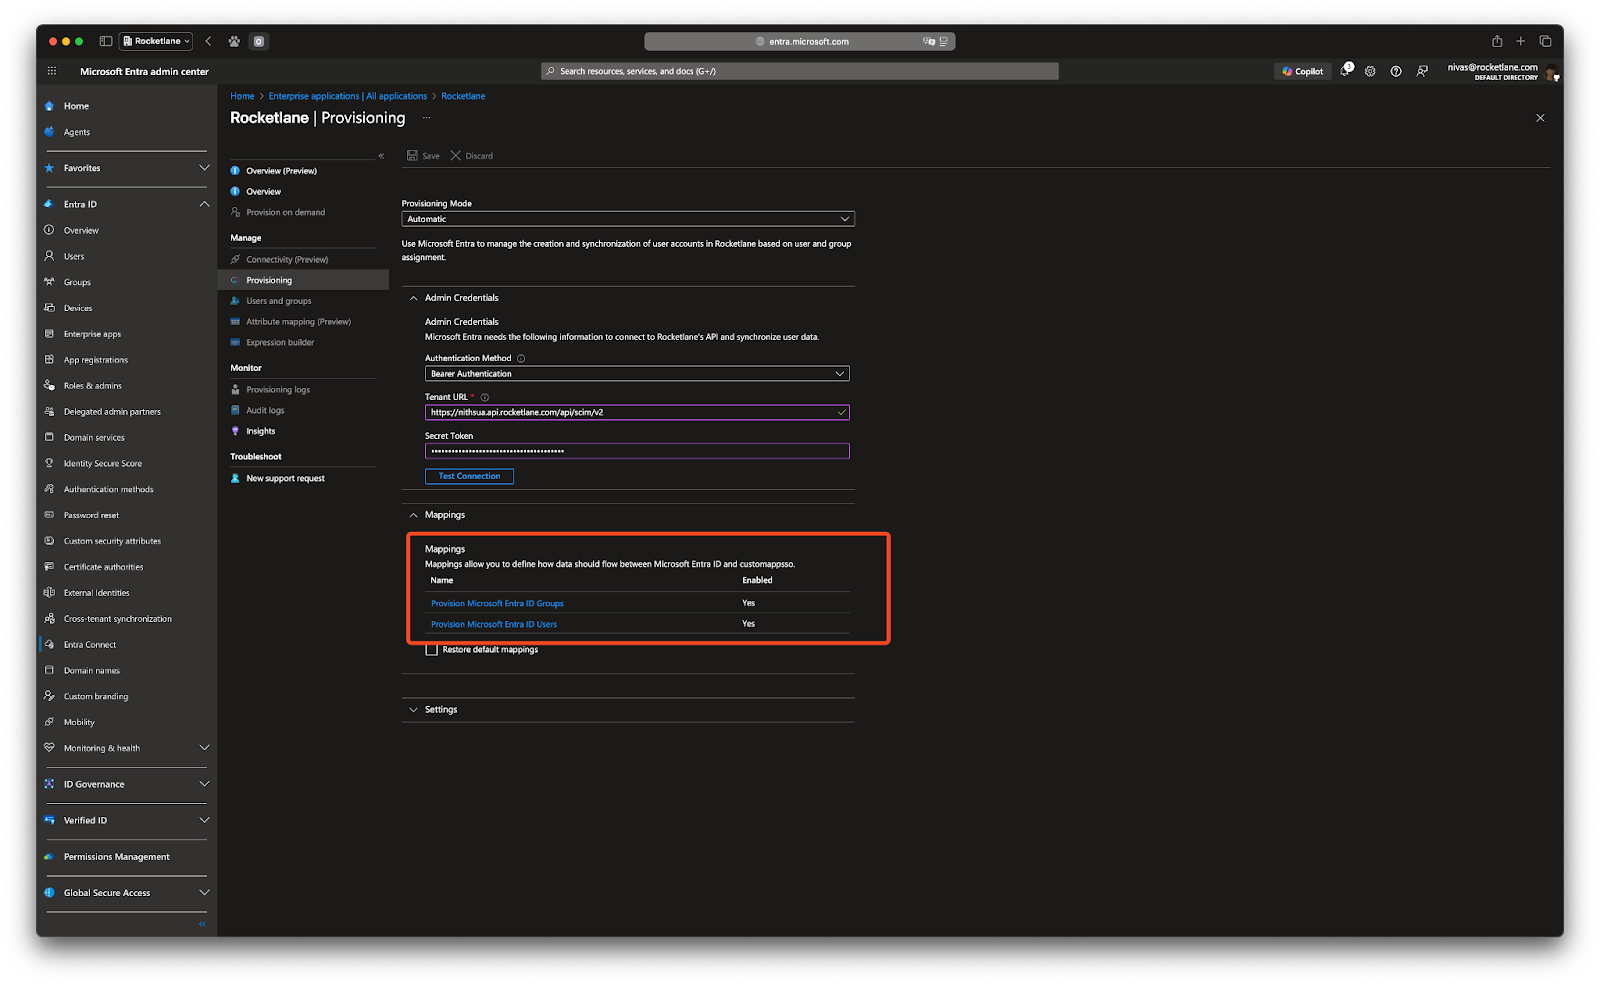
- Disable Provision Microsoft Entra ID Groups.
- Configure Provision Microsoft Entra ID User’s Attribute Mapping so that it looks like the figure below.
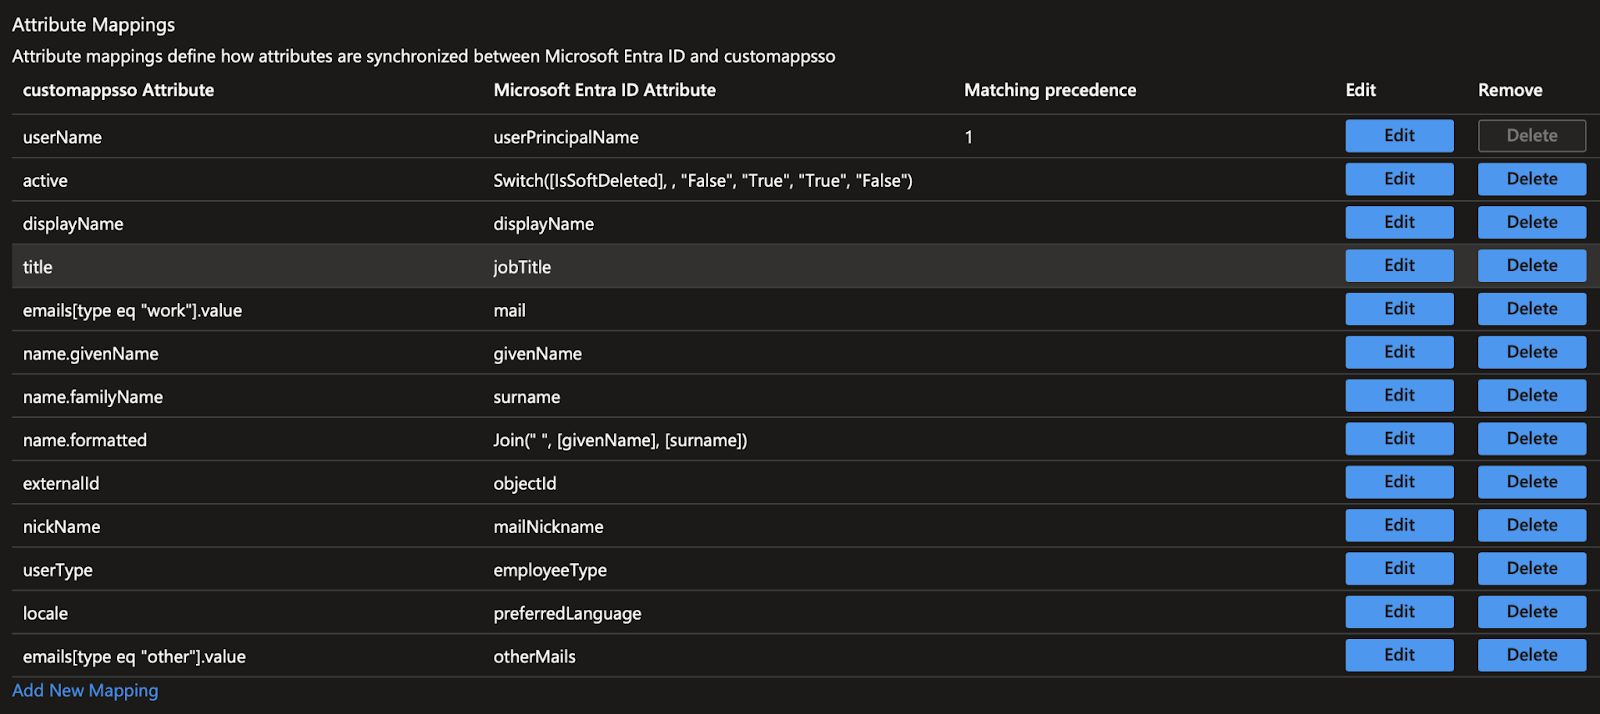
- Make sure Provision Microsoft Entra ID Users is enabled and Target Object Actions has Create, Update, and Delete enabled as well. Once done, click Save.

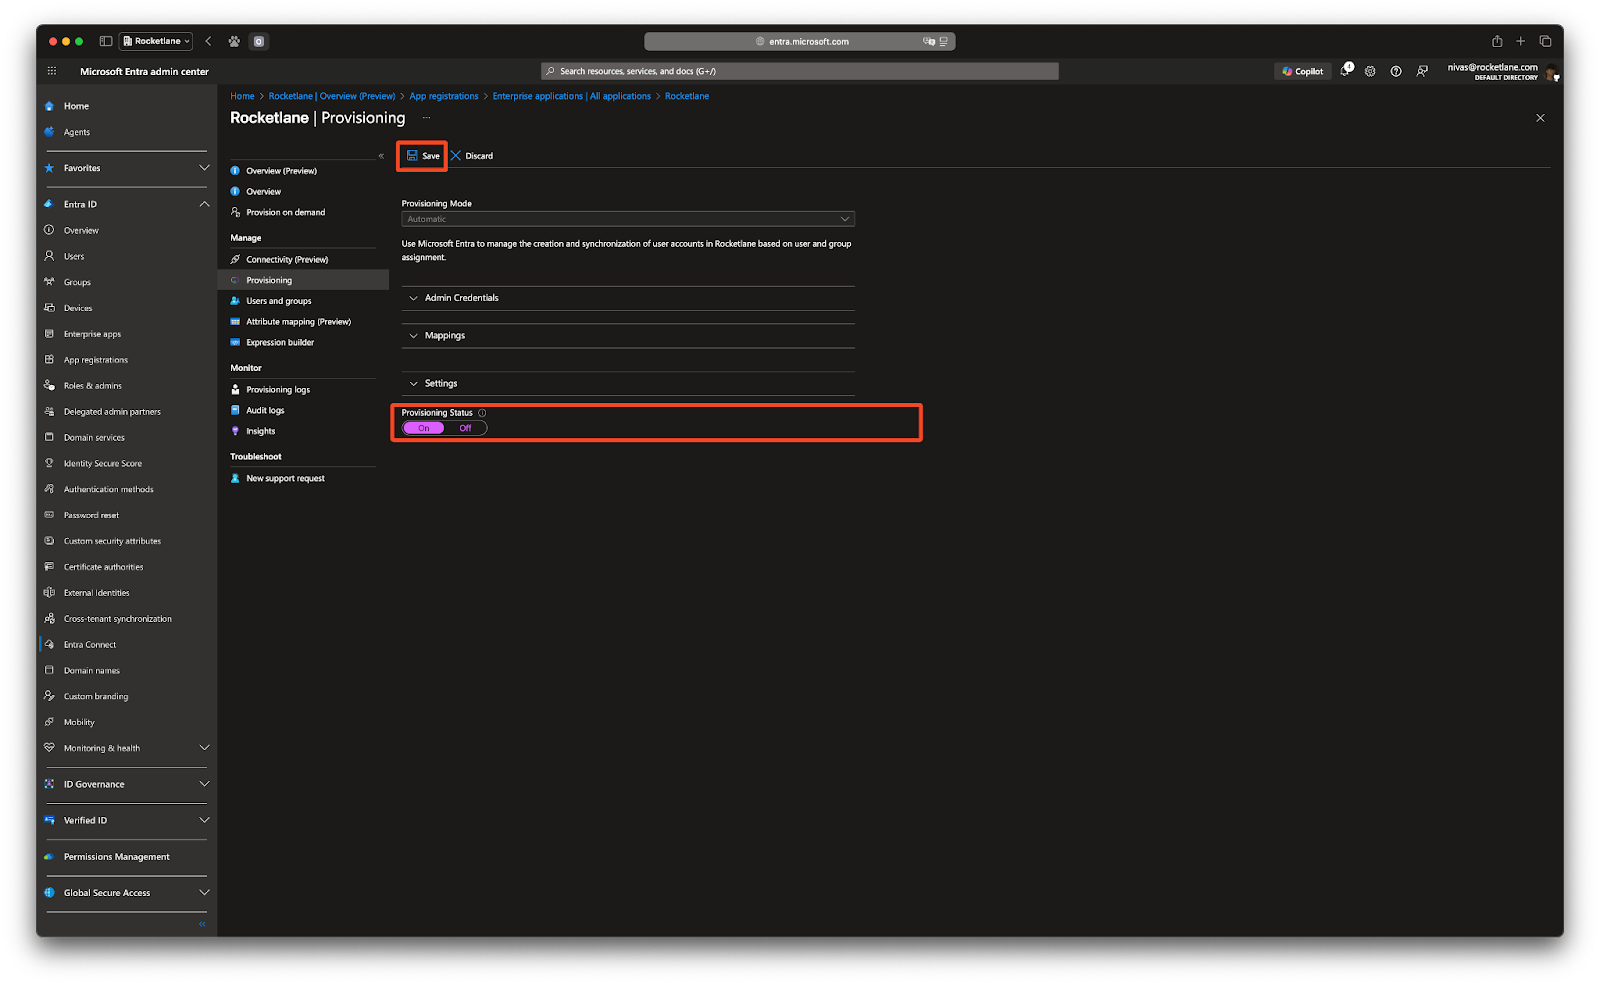
- Turn Provisioning Status to On and click Save.
Step 5: Enable SCIM in Rocketlane
- Log in to your Rocketlane instance.
- Navigate to Settings > SCIM.
- Click Set up SCIM integration.
- Under Choose Integration, select AzureAD.
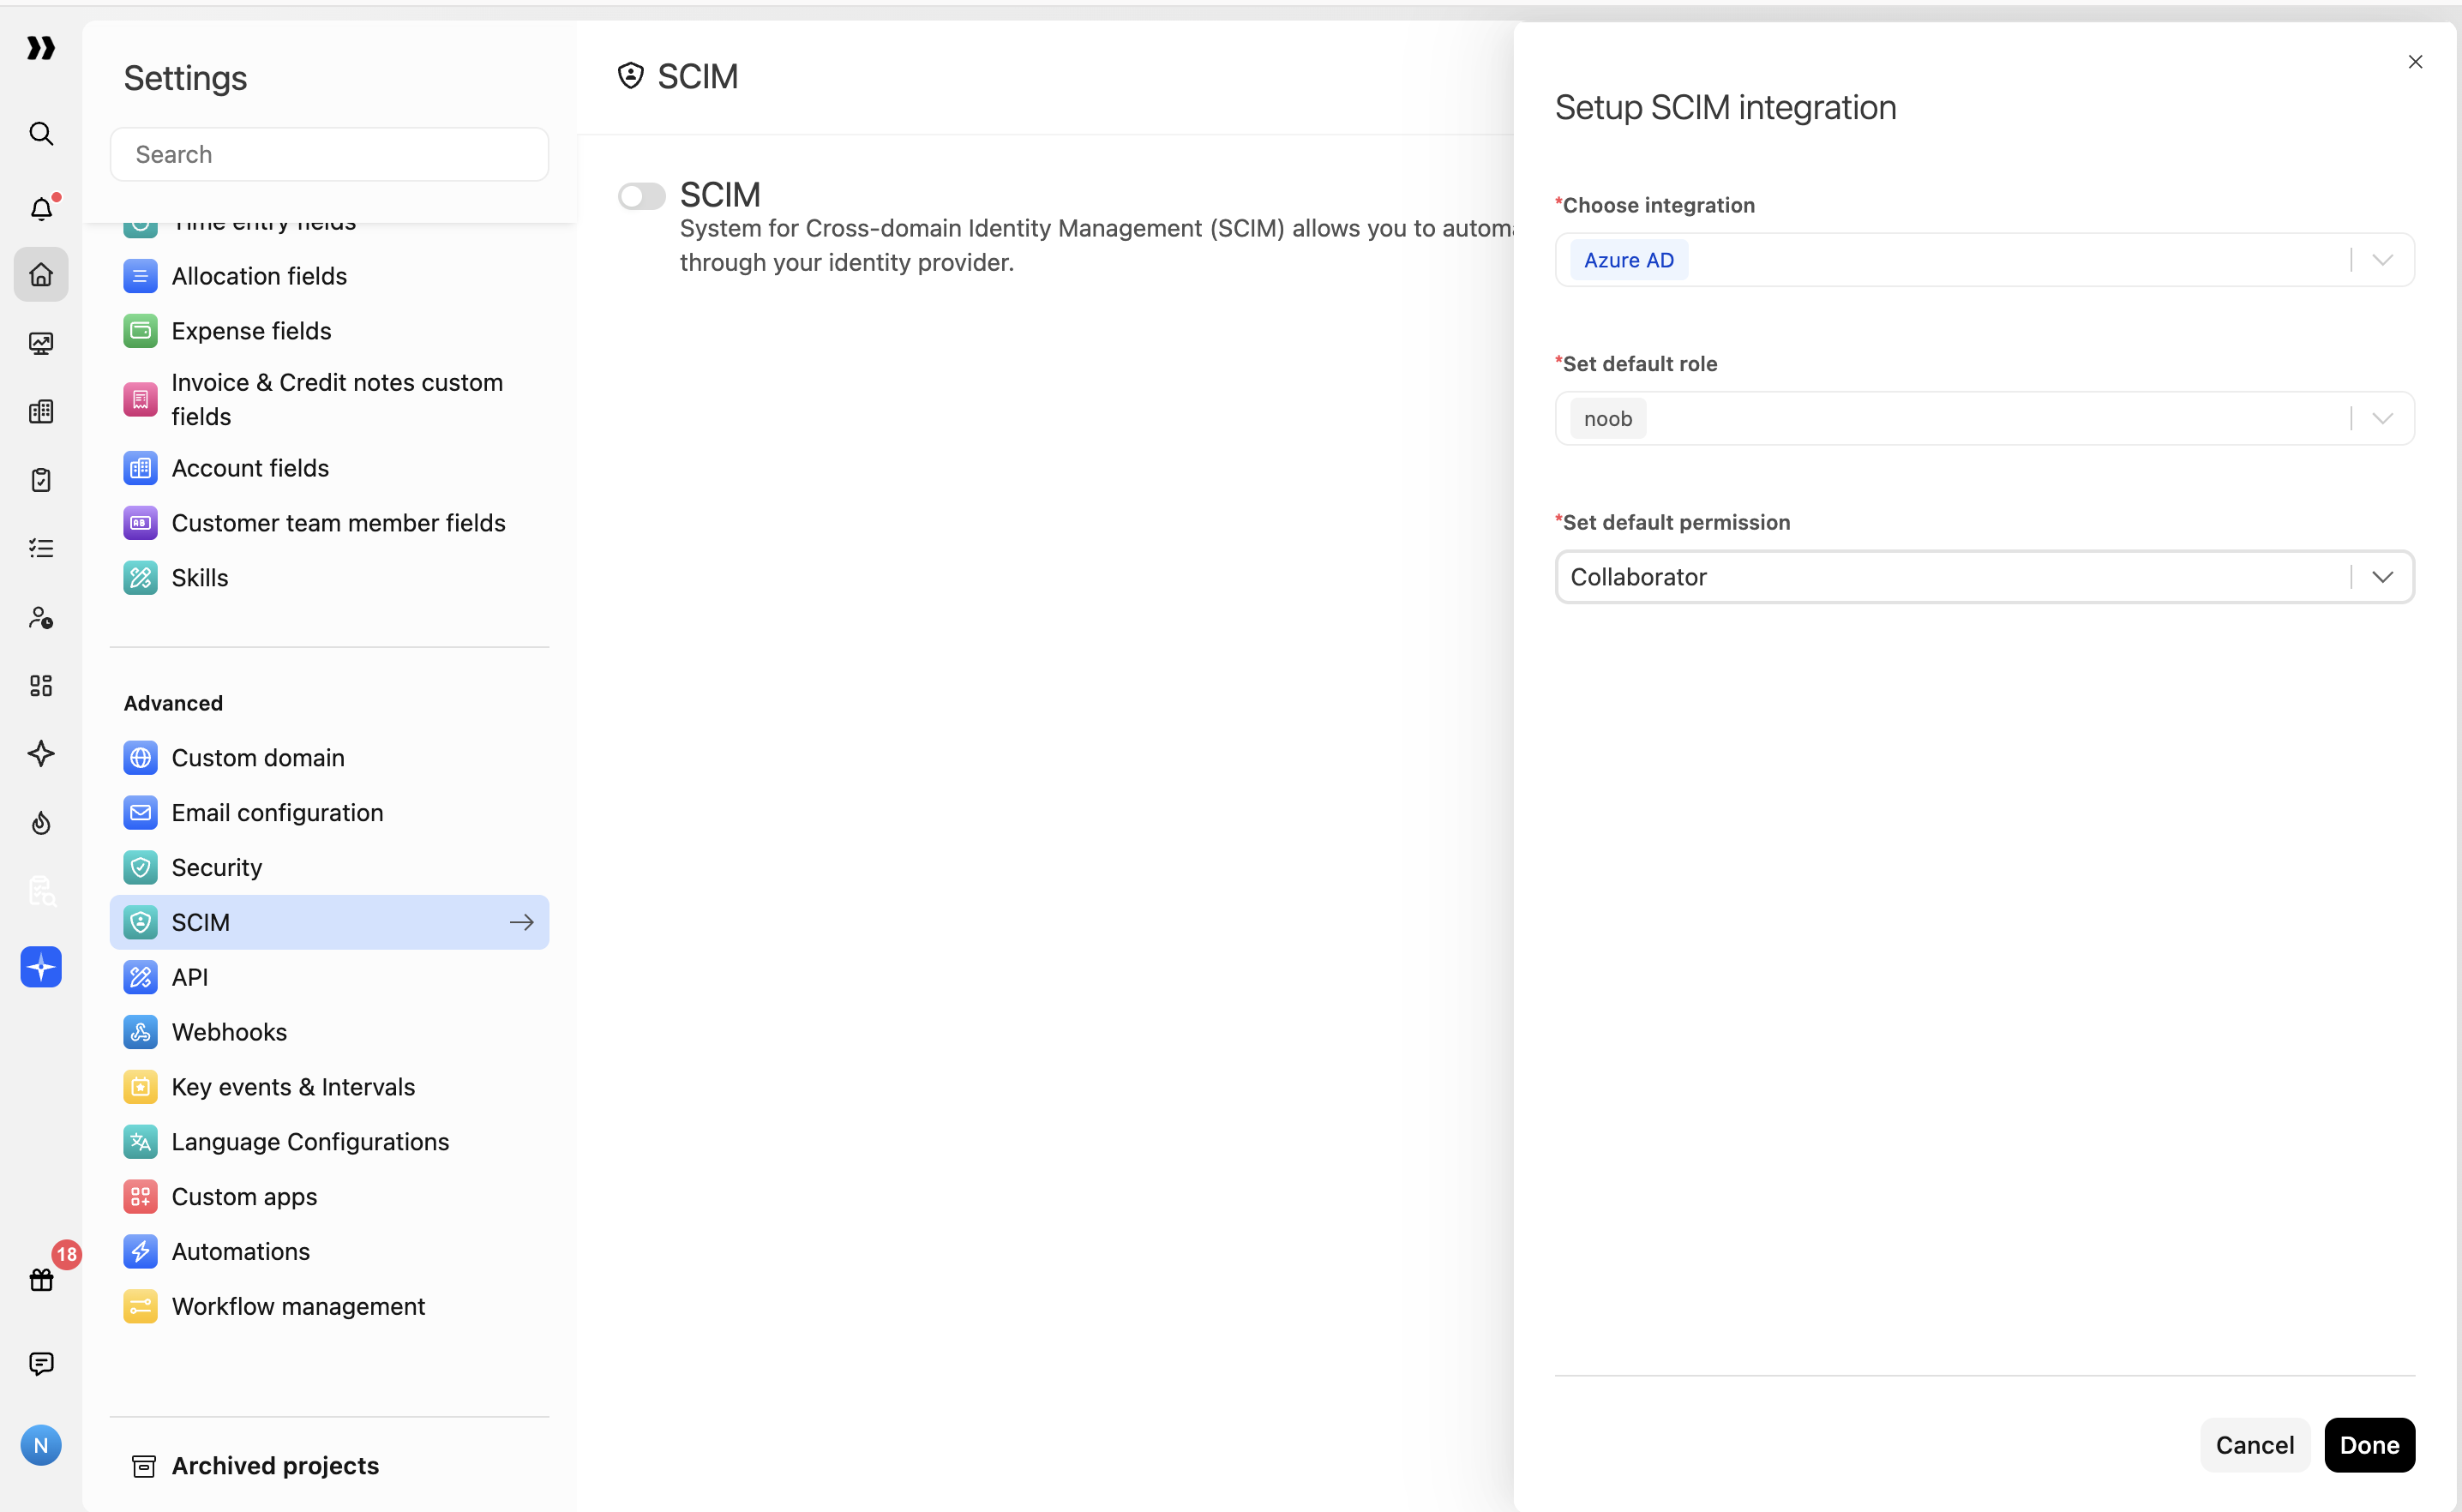
- Set a Default Role and Permission Set.
- Recommendation: Choose the lowest-privilege role and permissions to avoid giving unnecessary access by default.
- Click Enable. Once enabled, provisioning actions from Entra ID will begin syncing with Rocketlane.
Step 6: Test the Integration
After enabling SCIM, verify that provisioning is working correctly:
- Assign a user in Entra ID to the Rocketlane application.
- Confirm that the user is created in Rocketlane.
- Update user details, such as email or name, in Entra and check that changes reflect in Rocketlane.
- Unassign or deactivate a user in Entra and verify that the user is deactivated in Rocketlane.