In this article
- Prerequisites
- Step 1: Enable SCIM in Rocketlane
- Step 2: Create an API Key for SCIM in Rocketlane
- Step 3: Add Rocketlane SCIM Application in Okta
- Step 4: Configure API Integration in Okta
- Step 5: Enable SCIM Provisioning Features in Okta
- Step 6: Assign Users from Okta to Rocketlane
- Step 7: Sync Role Changes from Okta to Rocketlane
- Step 8: Configure Role Mapping in Rocketlane
- Step 9: Configure Field Mapping (Optional)
Rocketlane supports SCIM-based provisioning with Okta, allowing your organization to automatically create, update, and deactivate users directly from Okta. This ensures centralized identity management and reduces manual user administration.
This article walks you through setting up the Okta > Rocketlane SCIM integration.
Prerequisites
Before you begin:
- You must be an admin in both Rocketlane and Okta.
- You must know your Rocketlane subdomain, for example,
yourcompany.rocketlane.com.
Step 1: Enable SCIM in Rocketlane
- Log in to your Rocketlane instance.
- Navigate to Settings > SCIM.
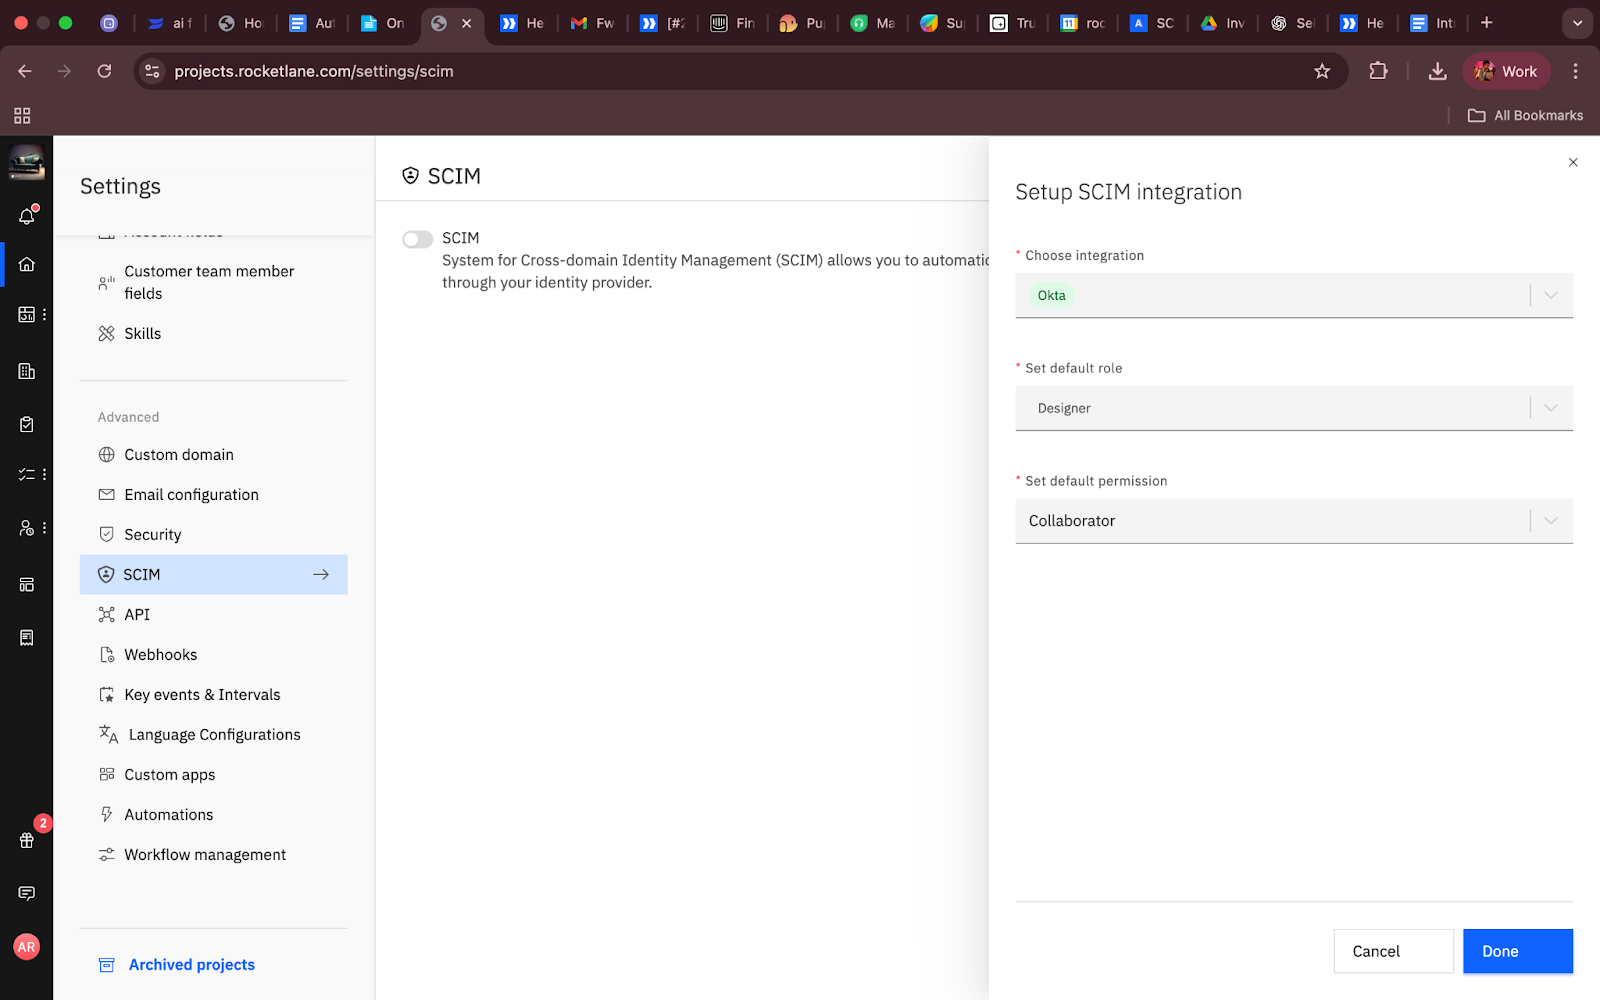
- Click Set up SCIM integration.
- Under Choose Integration, select Okta.
- Set a Default Role and Permission Set.
- Recommendation: Choose the lowest-privilege role and permissions to avoid giving unnecessary access by default.
- Click Enable.
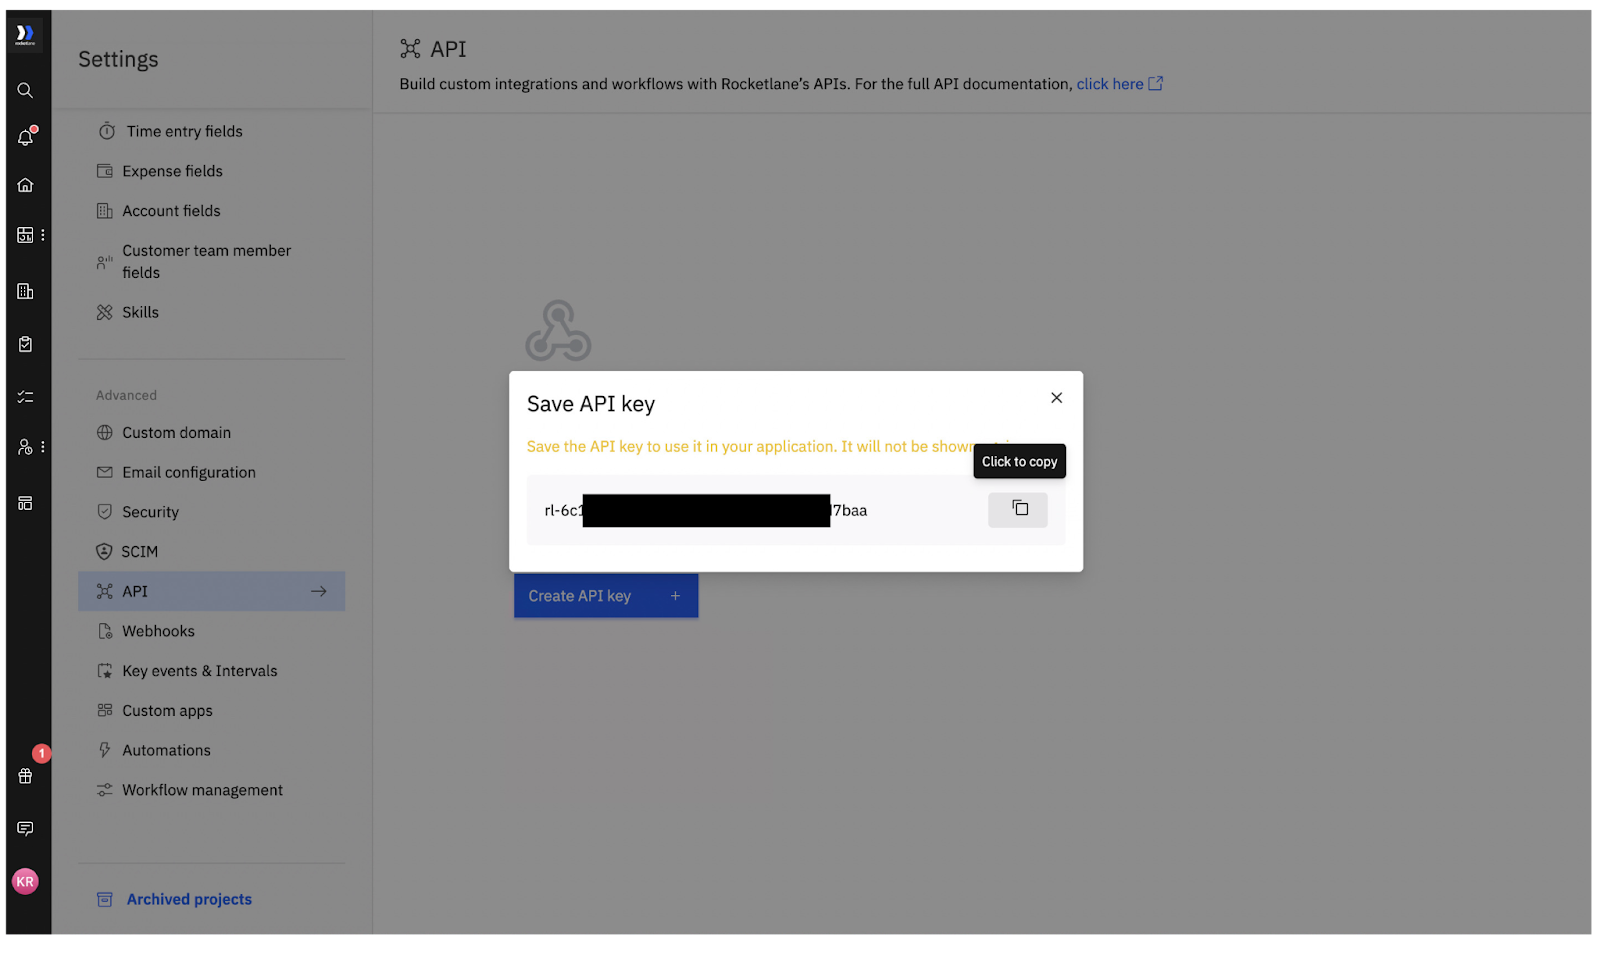
Step 2: Create an API Key for SCIM in Rocketlane
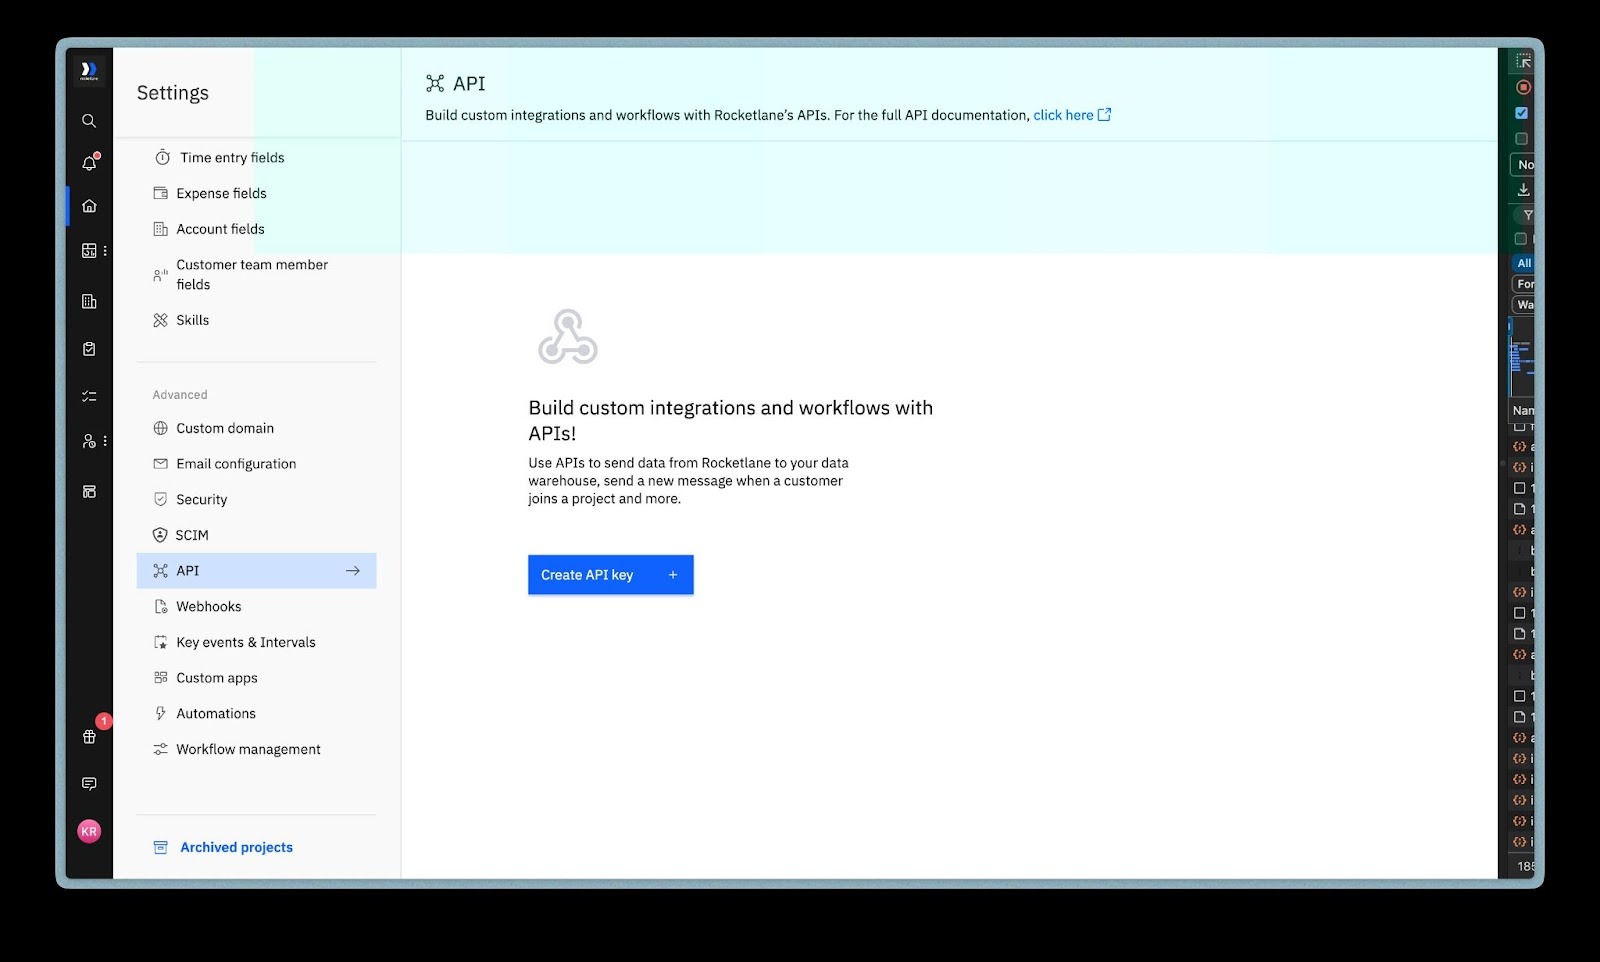
- Go to Settings > API.
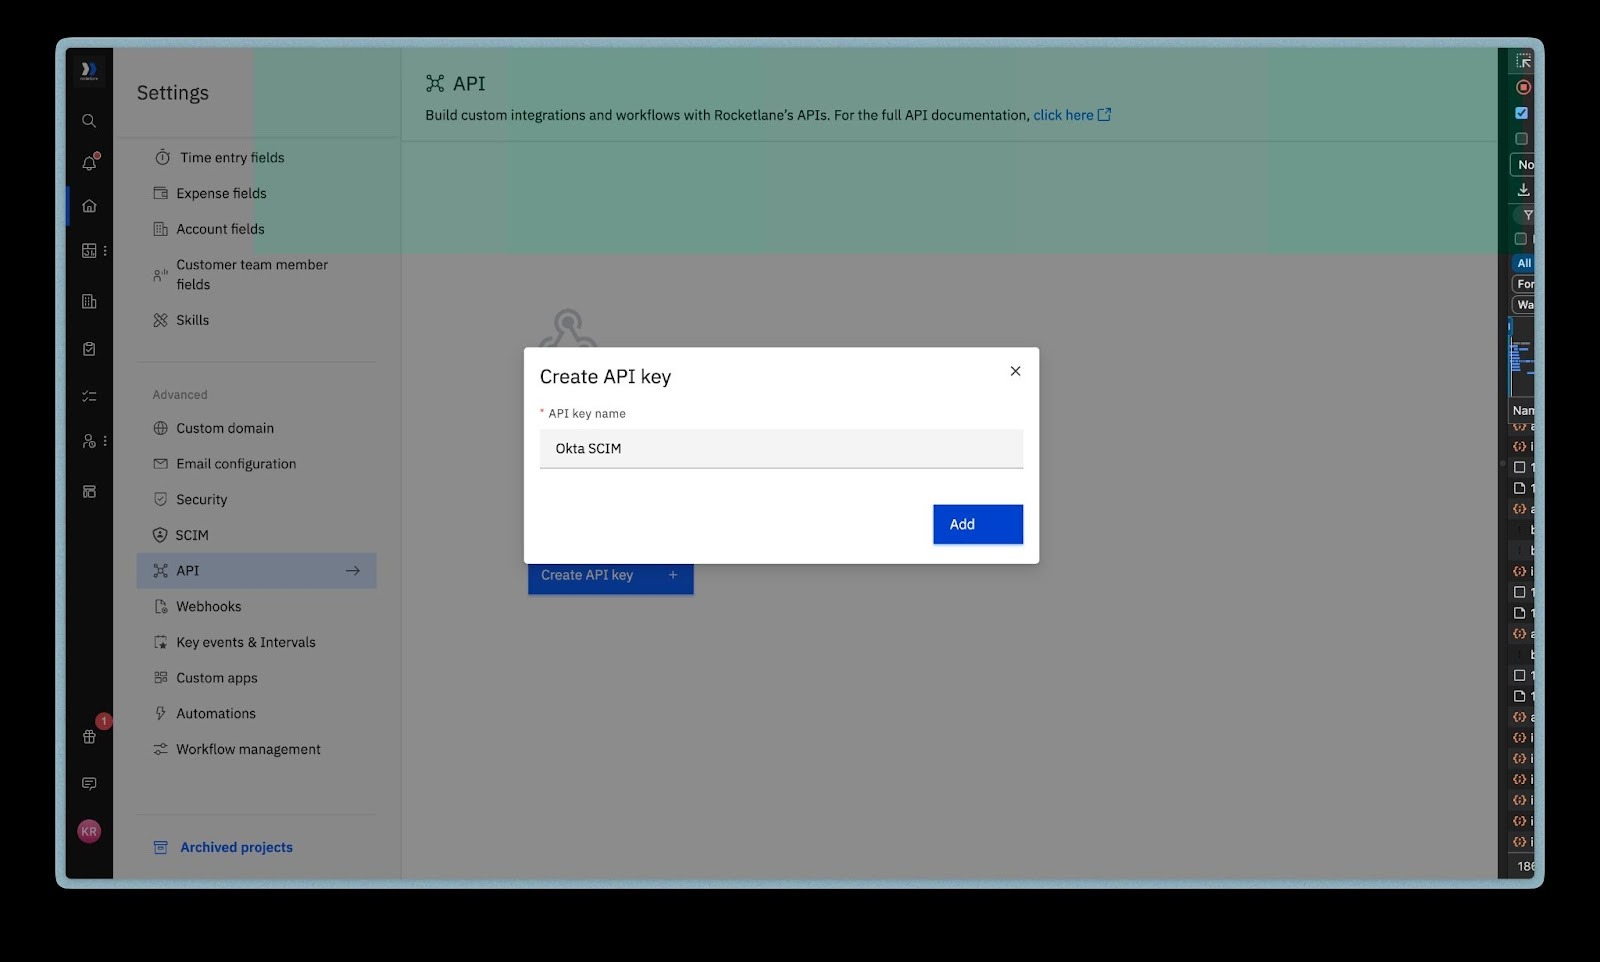
- Click Create API Key.
- Name it something identifiable like "Okta SCIM".
- Copy the generated API key. You will need it shortly.
Step 3: Add Rocketlane SCIM Application in Okta
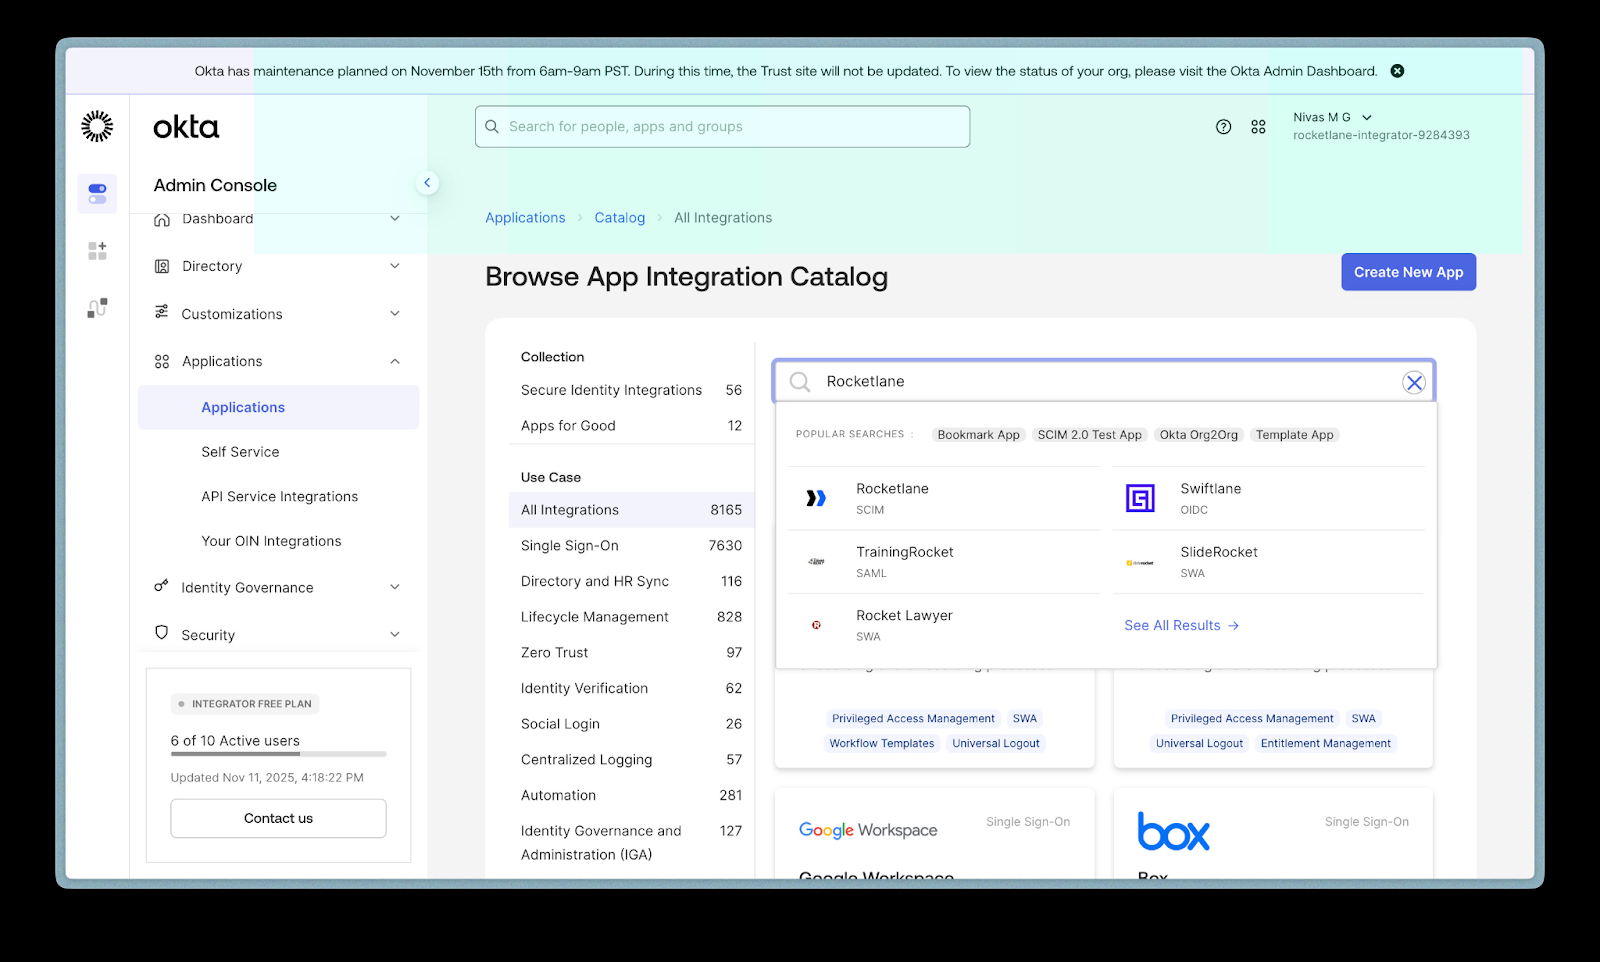
- Open Okta and navigate to Applications > Applications > Browse App Catalog.
- Search for Rocketlane SCIM.
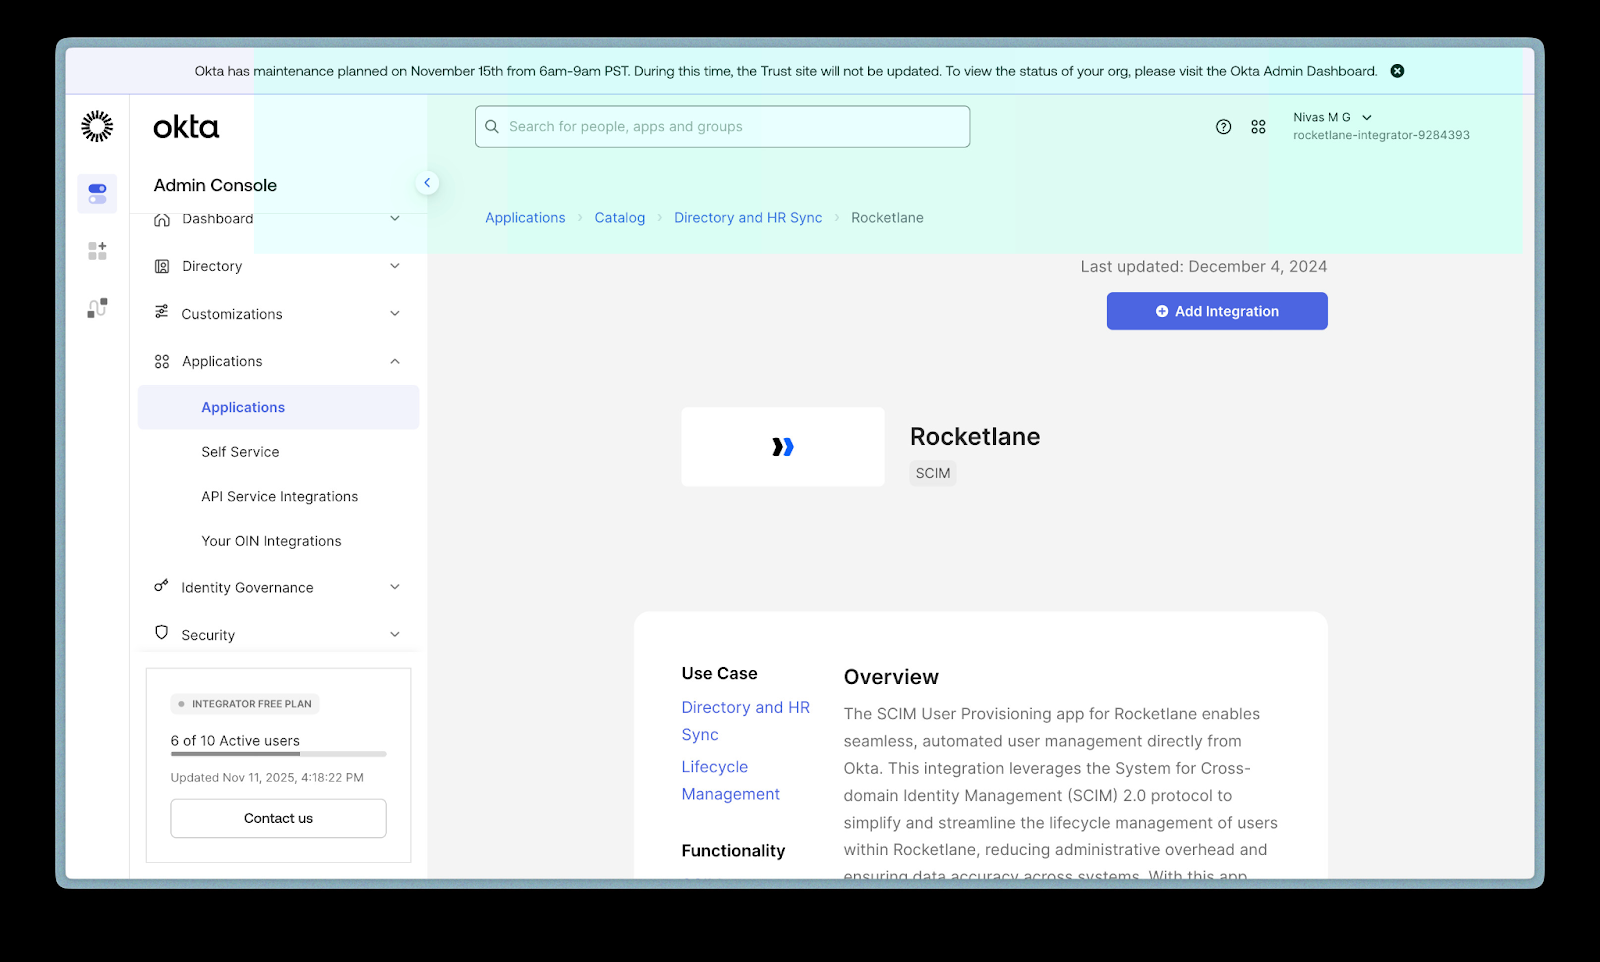
- Click Add Integration.
- Fill the application details:
- Application Label: Rocketlane SCIM, or any name.
- Entity ID: Your Rocketlane URL.
- ACS URL: Your Rocketlane URL.
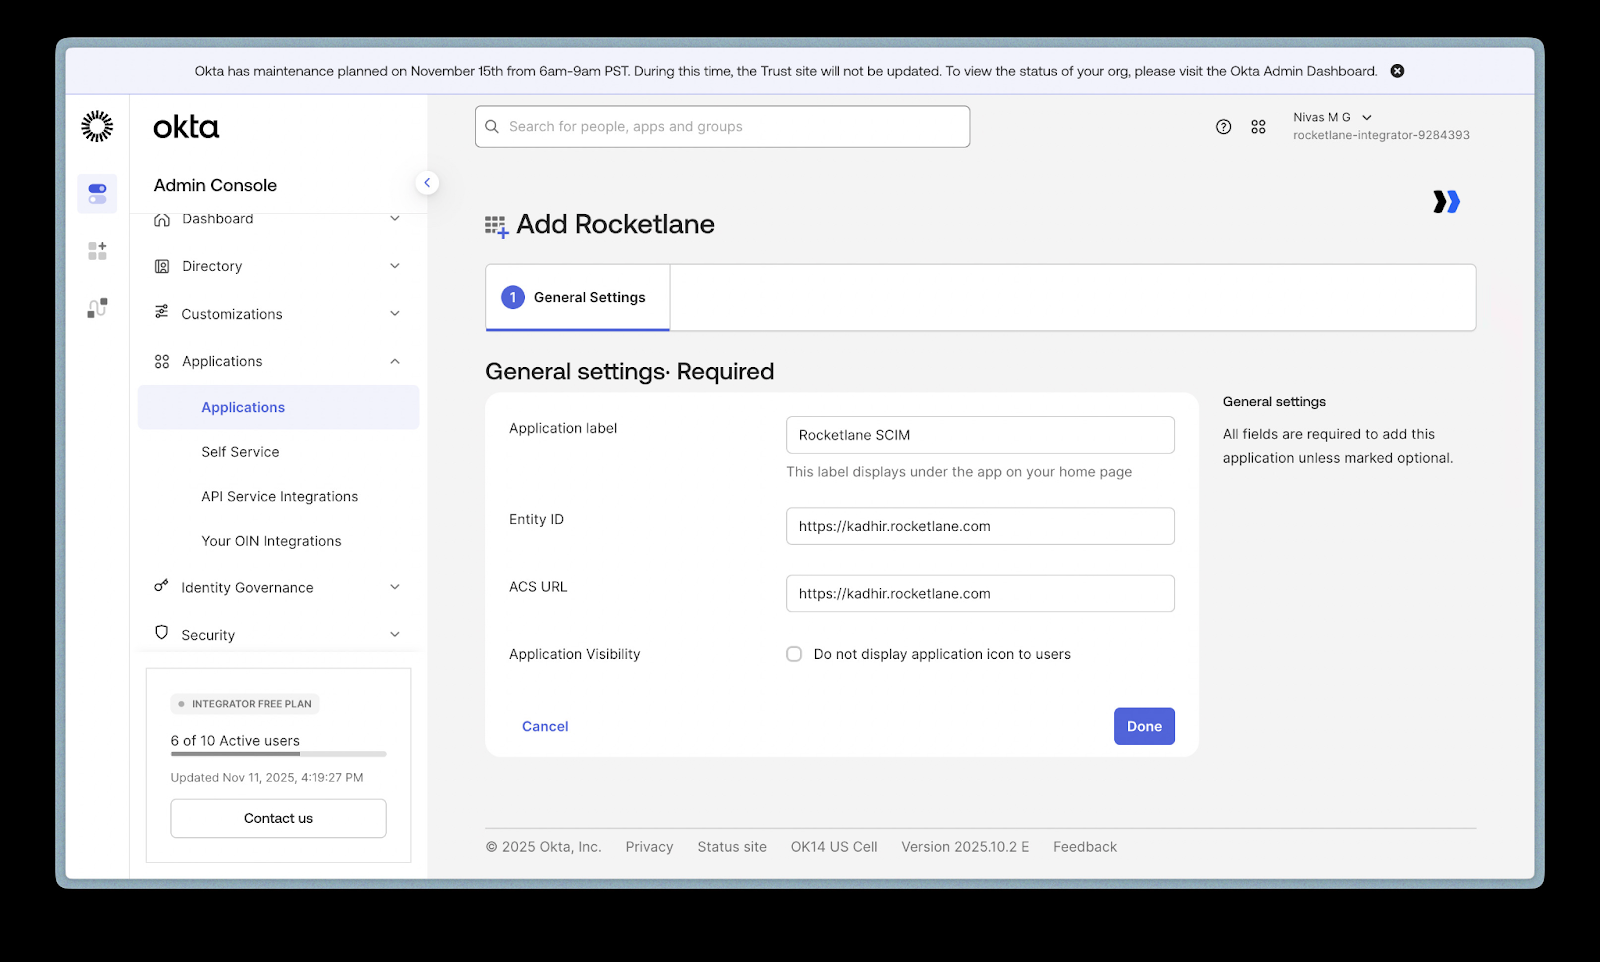
- Click Done.
Step 4: Configure API Integration in Okta
- Inside the Rocketlane SCIM application in Okta, click Provisioning in the top menu.
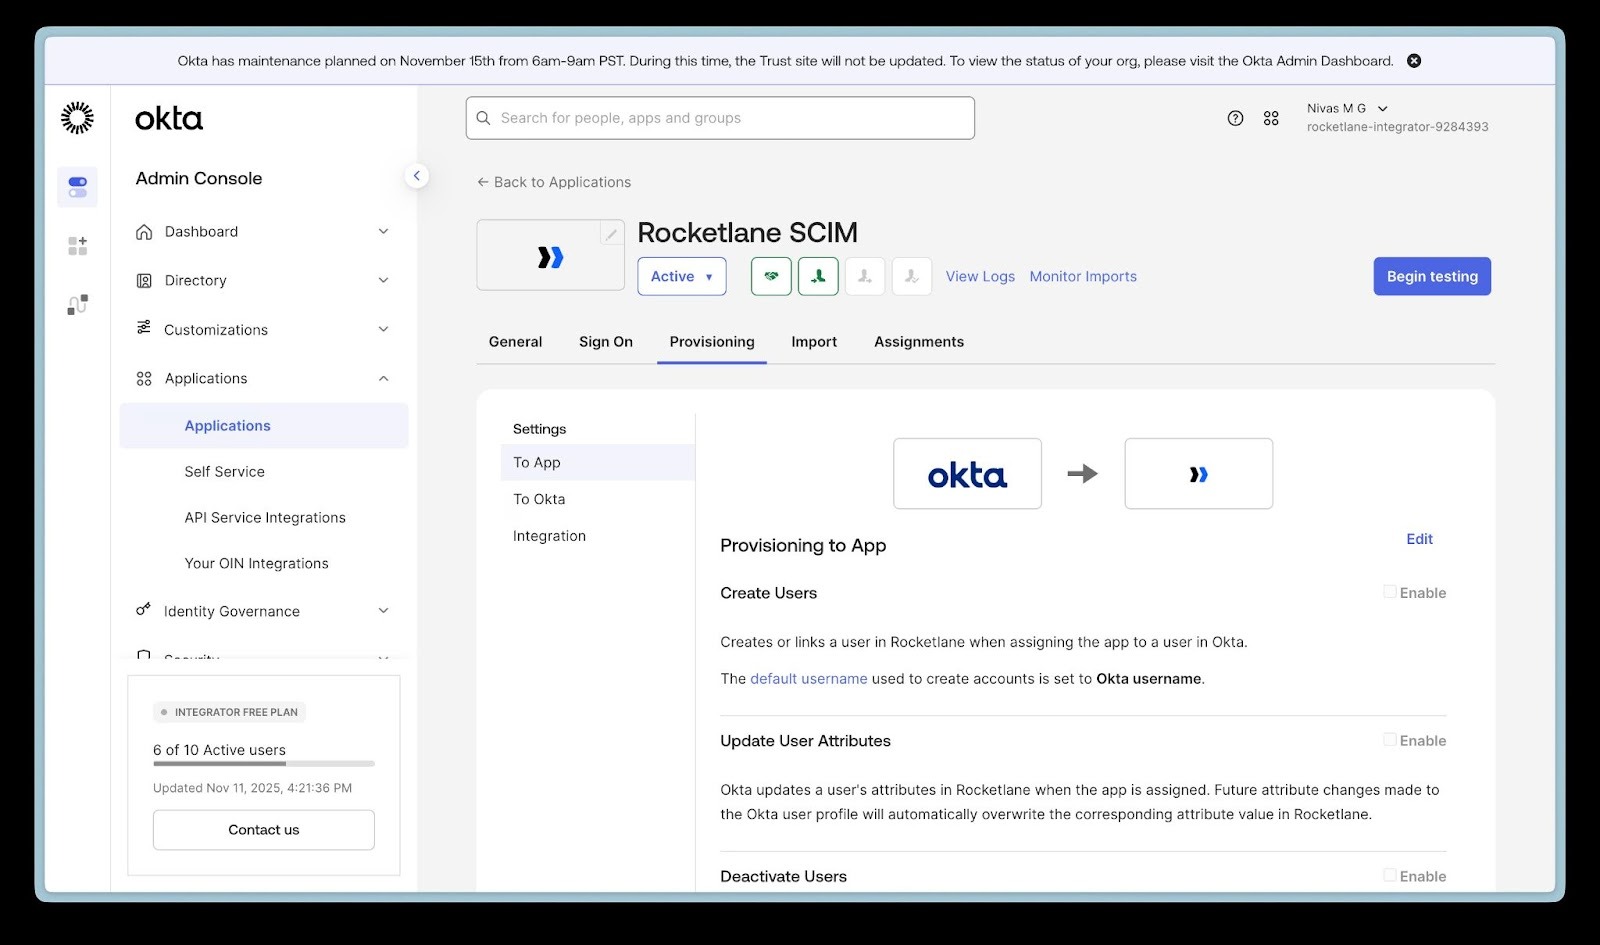
- Click Configure API Integration.
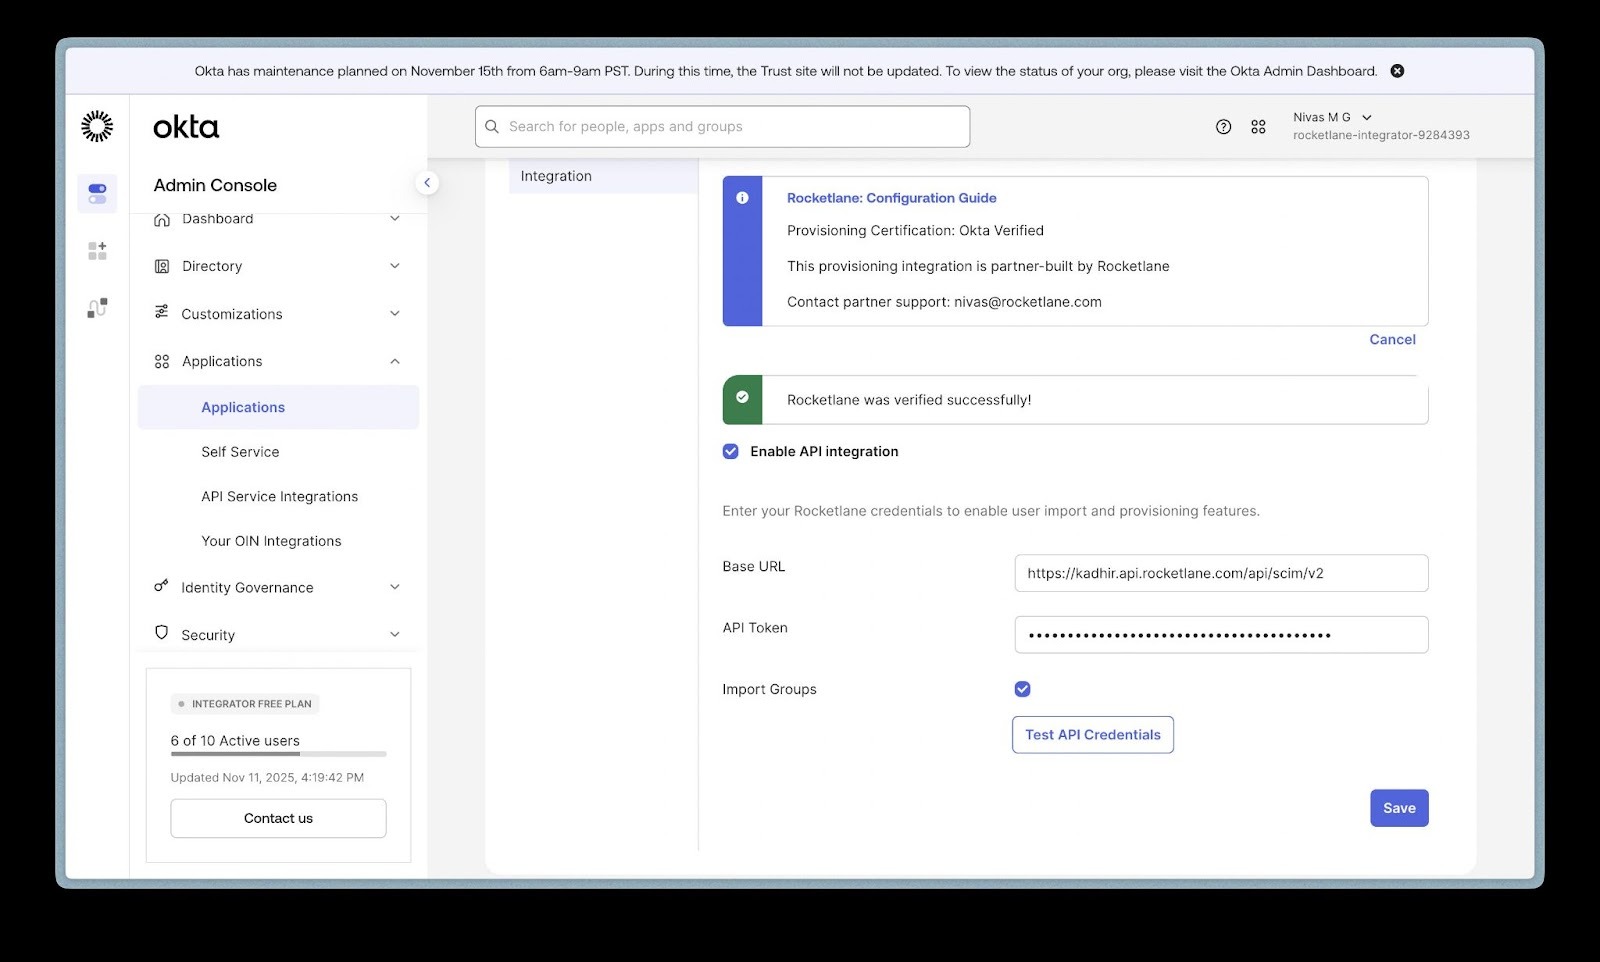
- Check Enable API Integration.
- Enter the following:
- Base URL:
https://<your-subdomain>.api.rocketlane.com/api/scim/v2 - Example: If your Rocketlane URL is
acme.rocketlane.com, usehttps://acme.api.rocketlane.com/api/scim/v2. - API Token: Paste the API key you created earlier.
- Base URL:
- Click Test Credentials.
- Once validated, click Save.
Step 5: Enable SCIM Provisioning Features in Okta
- Navigate to Provisioning > To App.
- Click Edit.
- Enable:
- Create Users
- Update User Attributes
- Deactivate Users
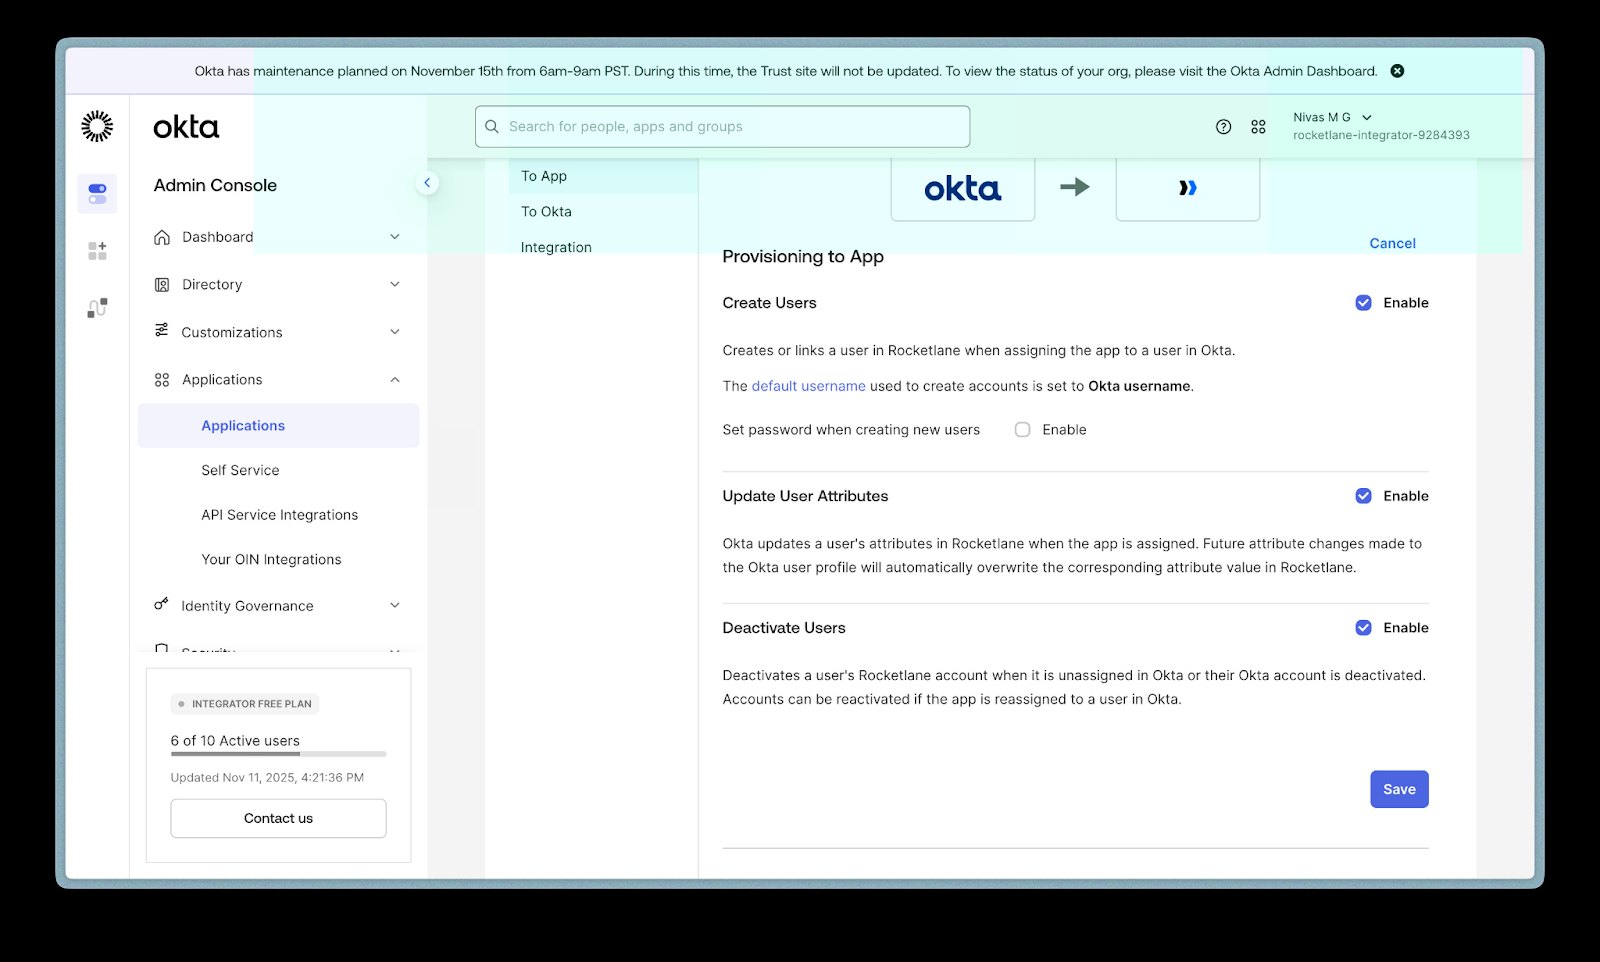
- Disable:
- Set Password on New User
Rocketlane manages passwords separately.
- Set Password on New User
- Click Save.
Step 6: Assign Users from Okta to Rocketlane
- Navigate to Directory > People in Okta.
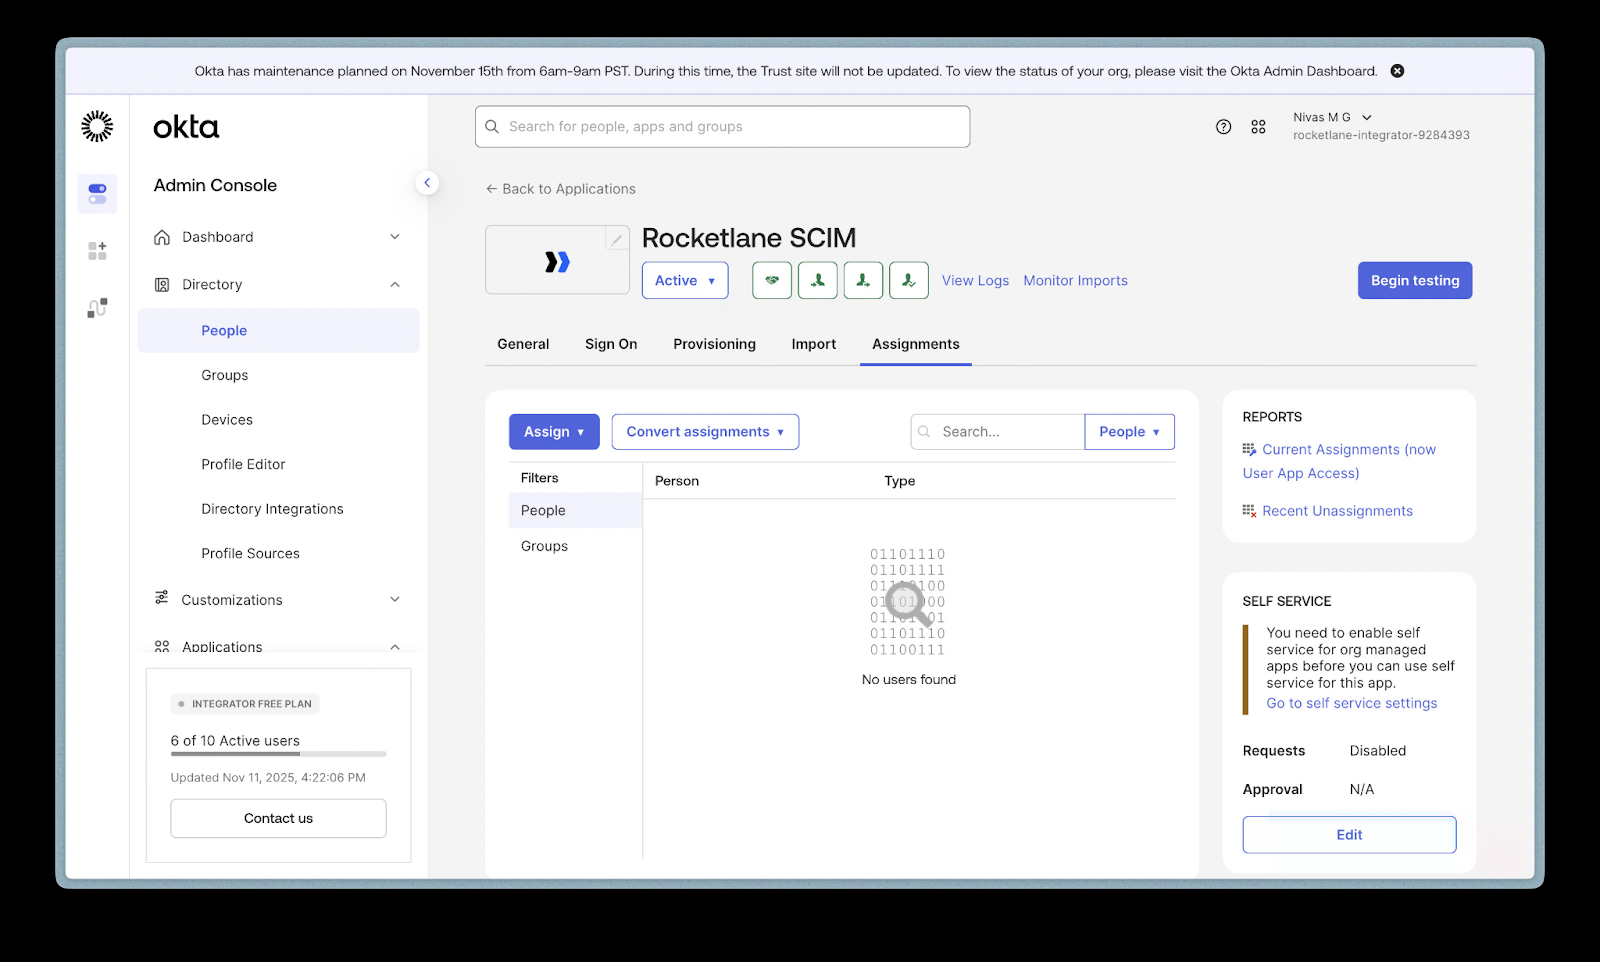
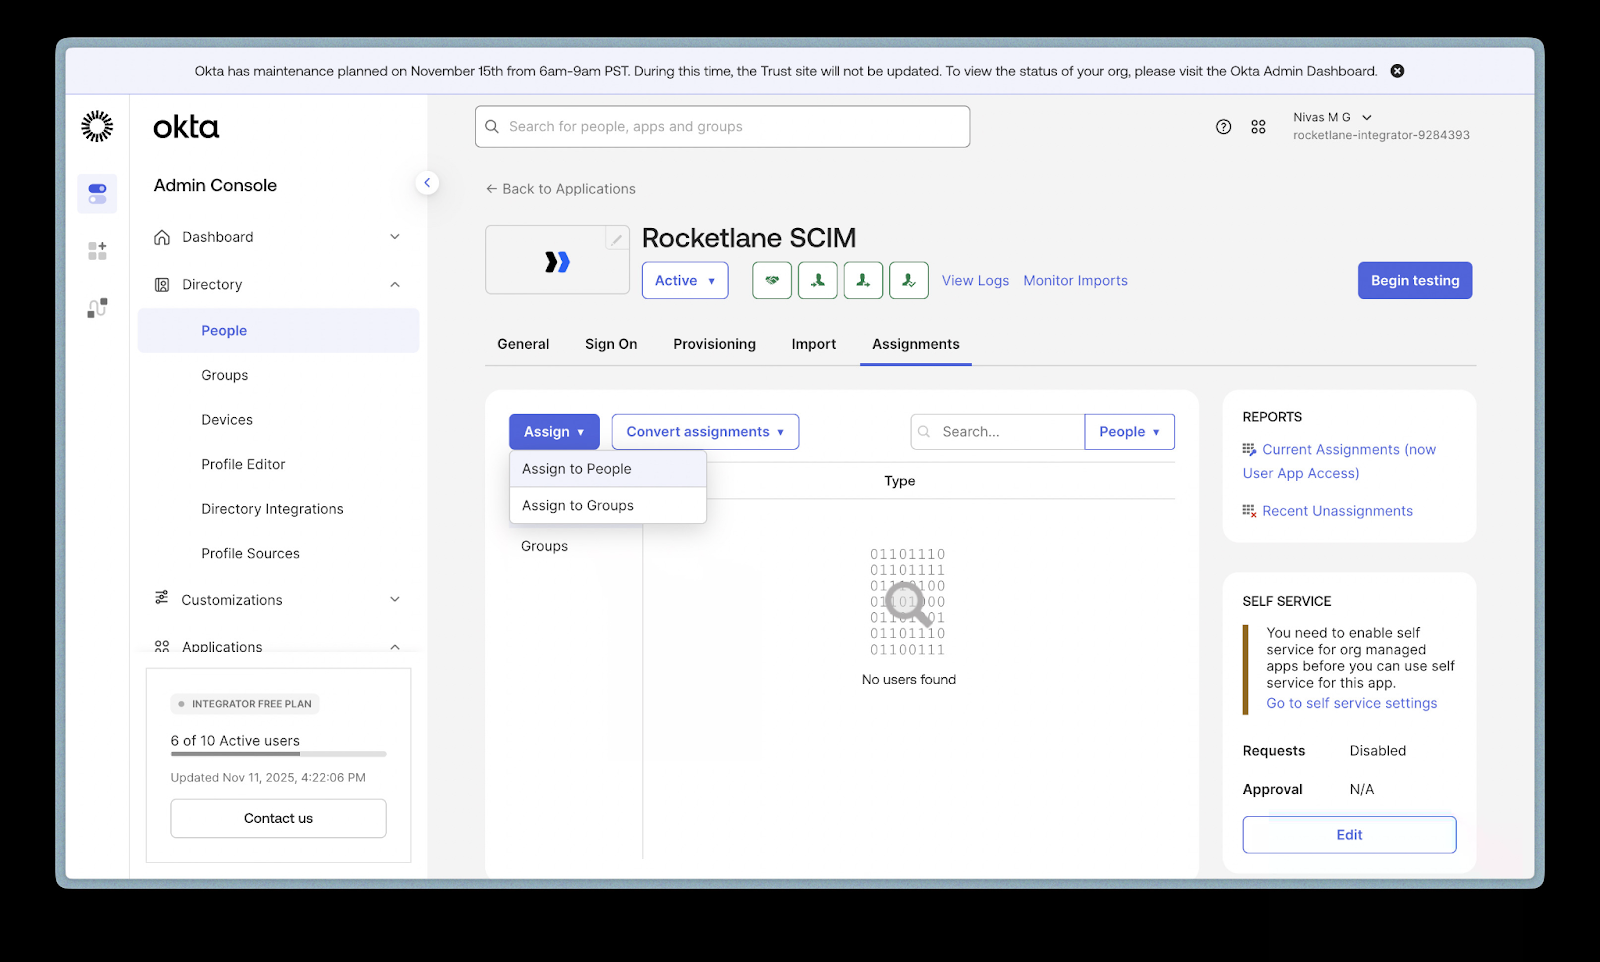
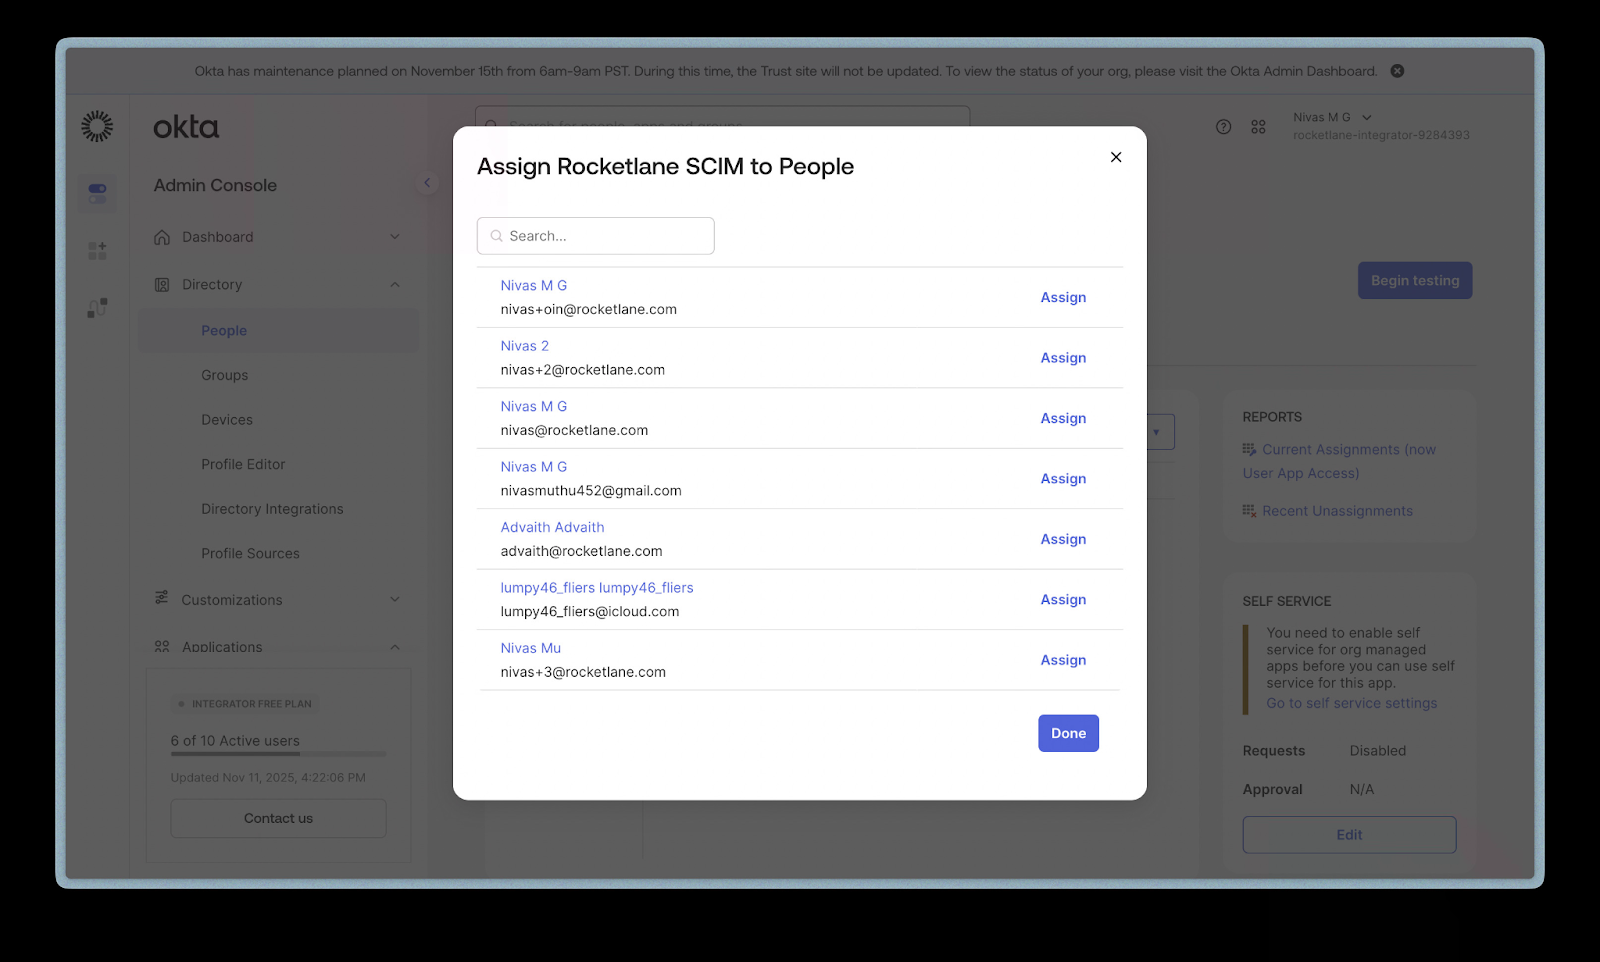
- Choose a user and click Assign > Assign to People.
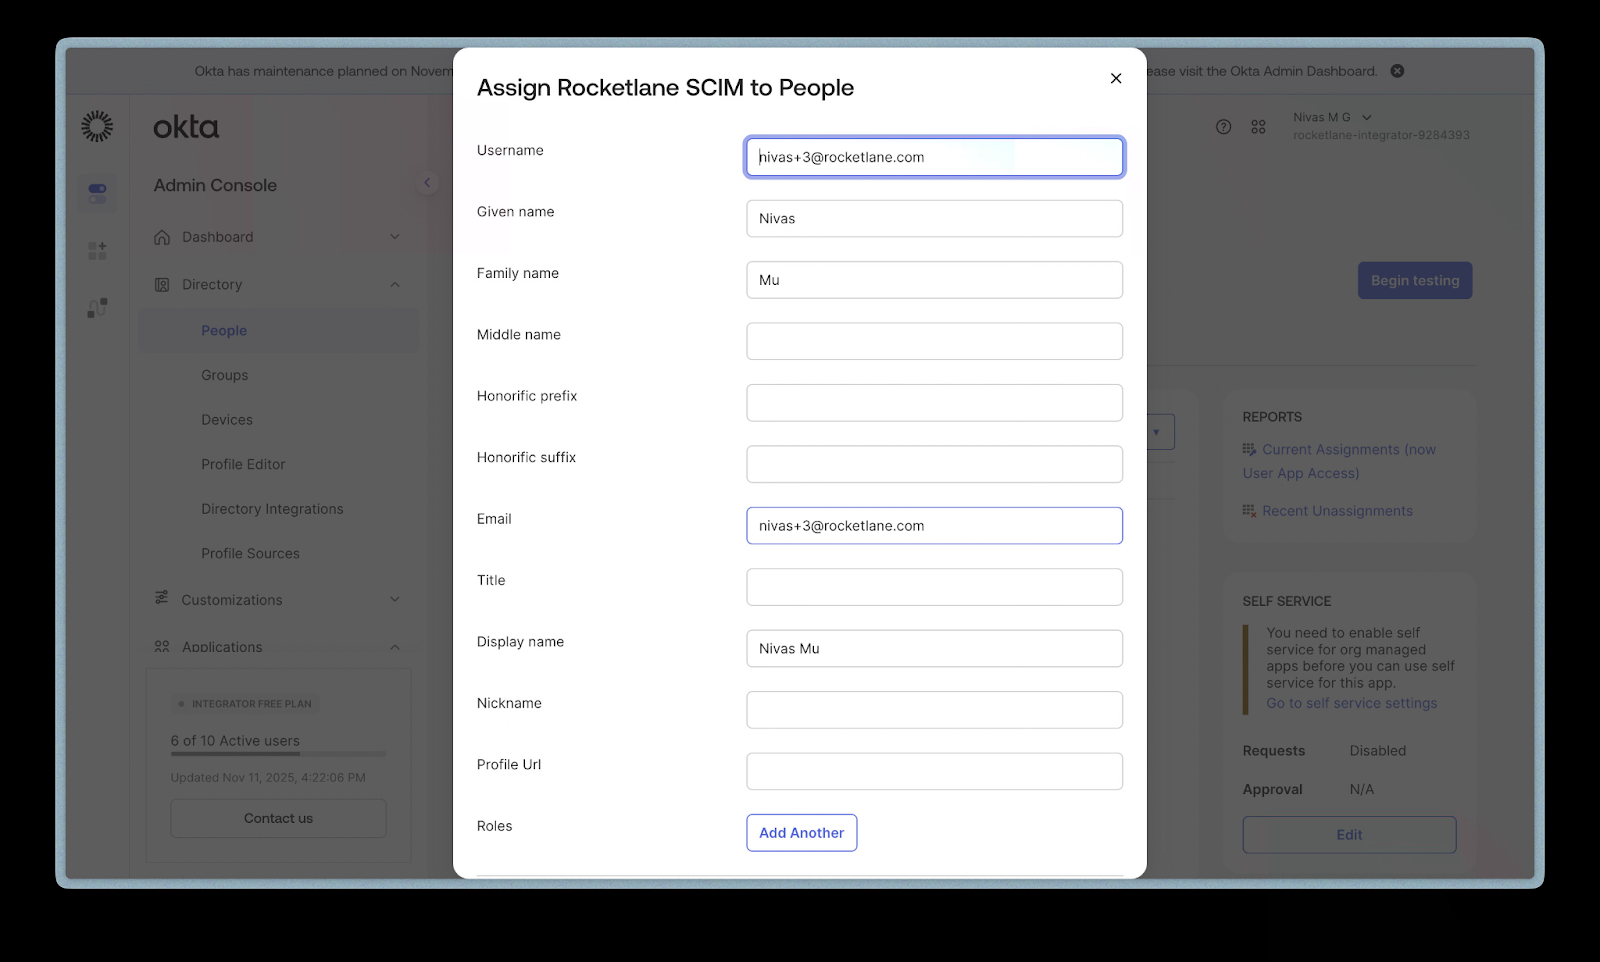
- Edit any required user details and click Save.
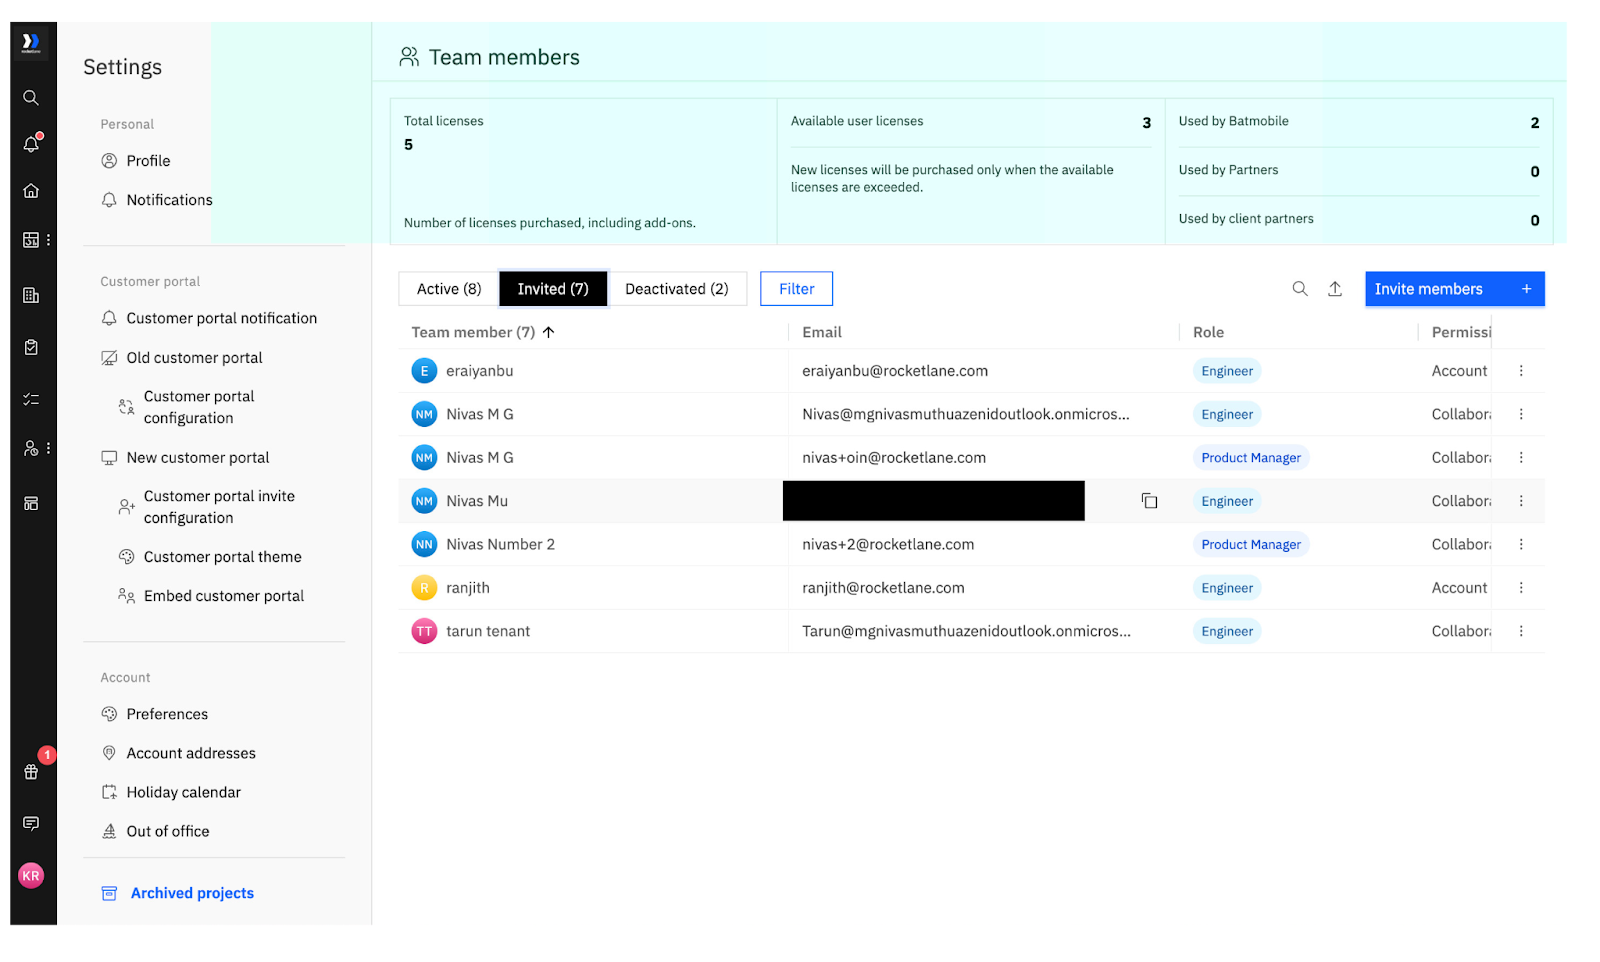
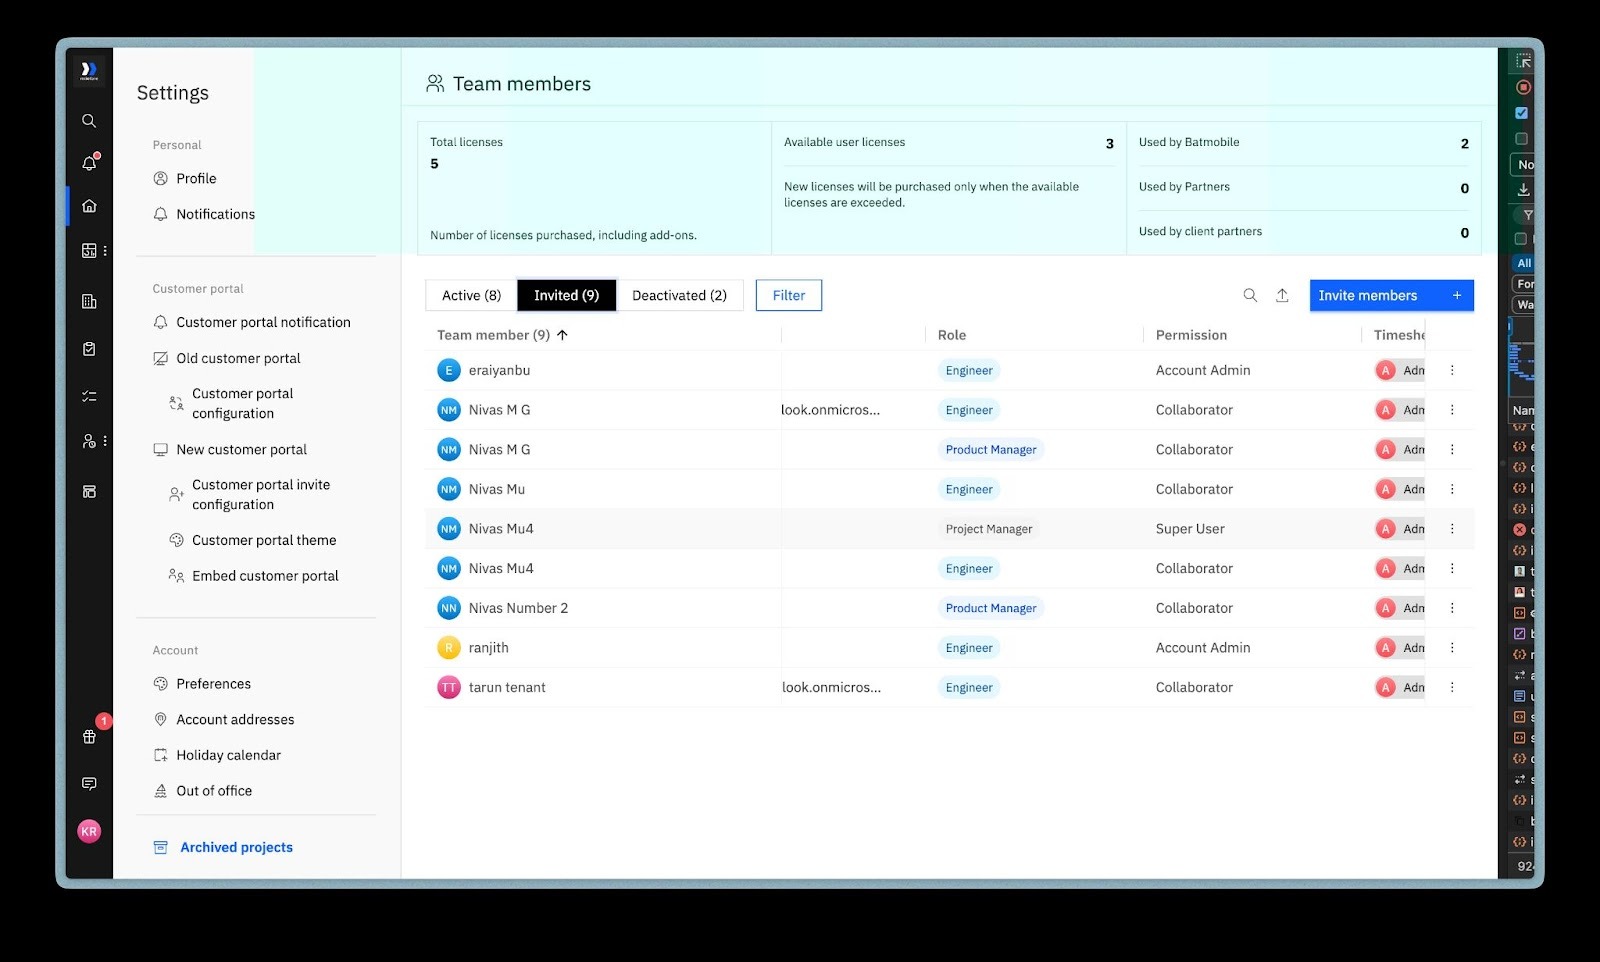
When you check Settings > Team Members in Rocketlane, you will see the newly assigned user automatically added with the default role and permission set.
Step 7: Sync Role Changes from Okta to Rocketlane
- Go back to the user in Okta.
- Click the Edit icon next to their Rocketlane assignment.
- Locate the Roles field.
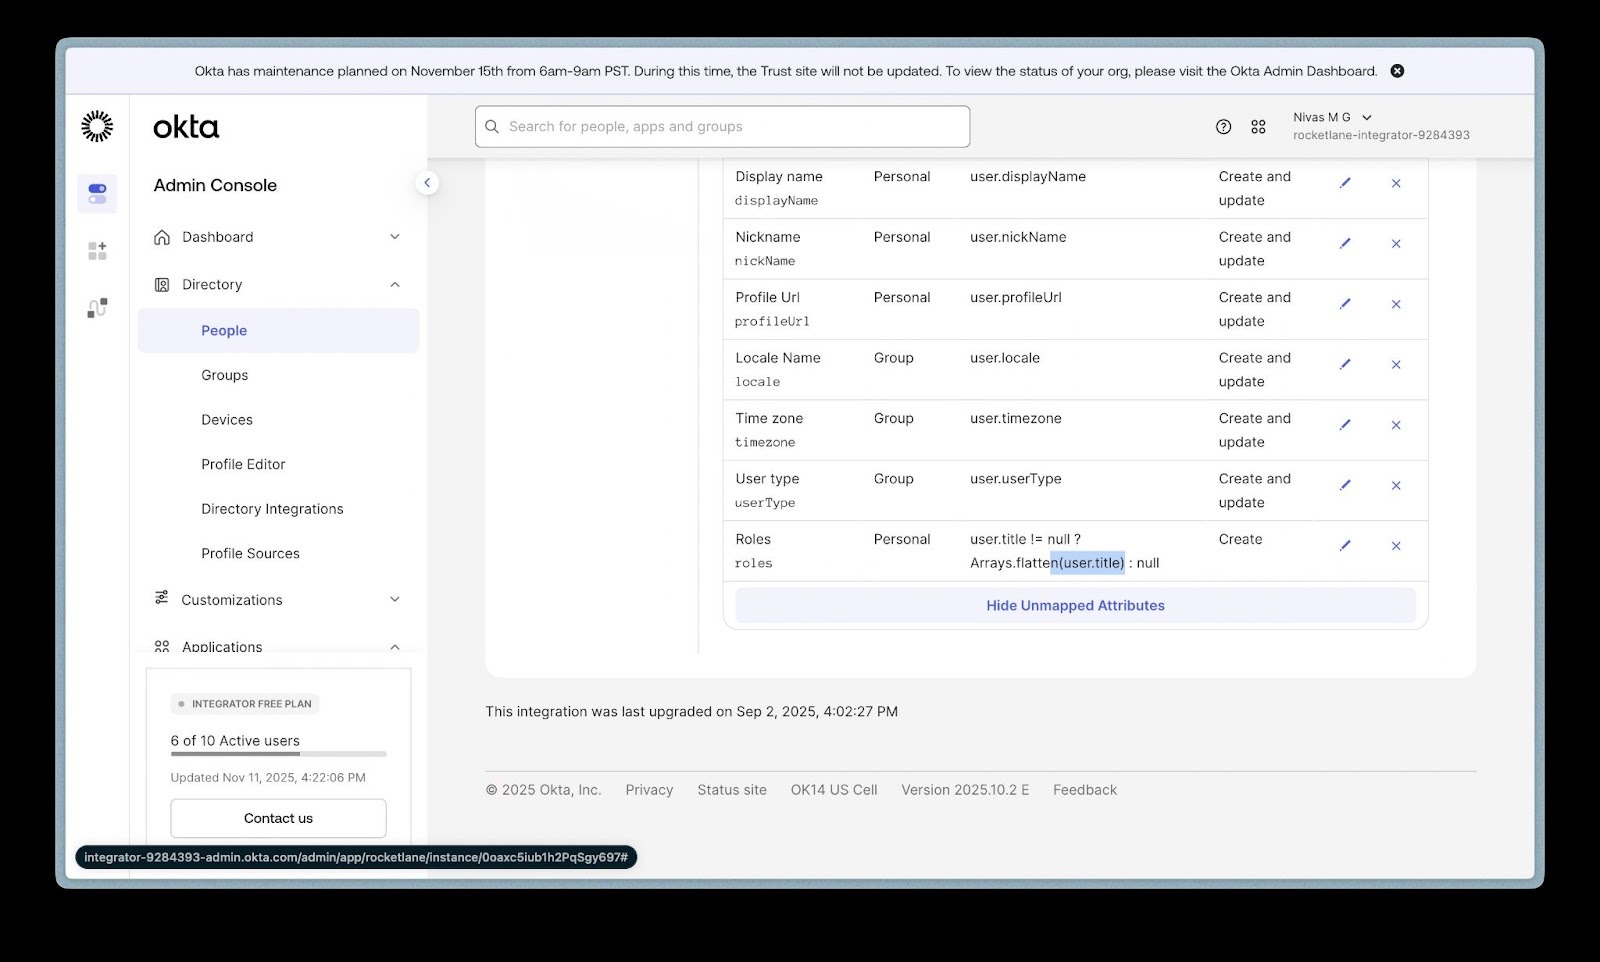
- Change value to create and update, and give any configured role input.
- Save the changes.
When you return to Rocketlane, you’ll see that the user’s role/permission has been updated based on your Okta changes.
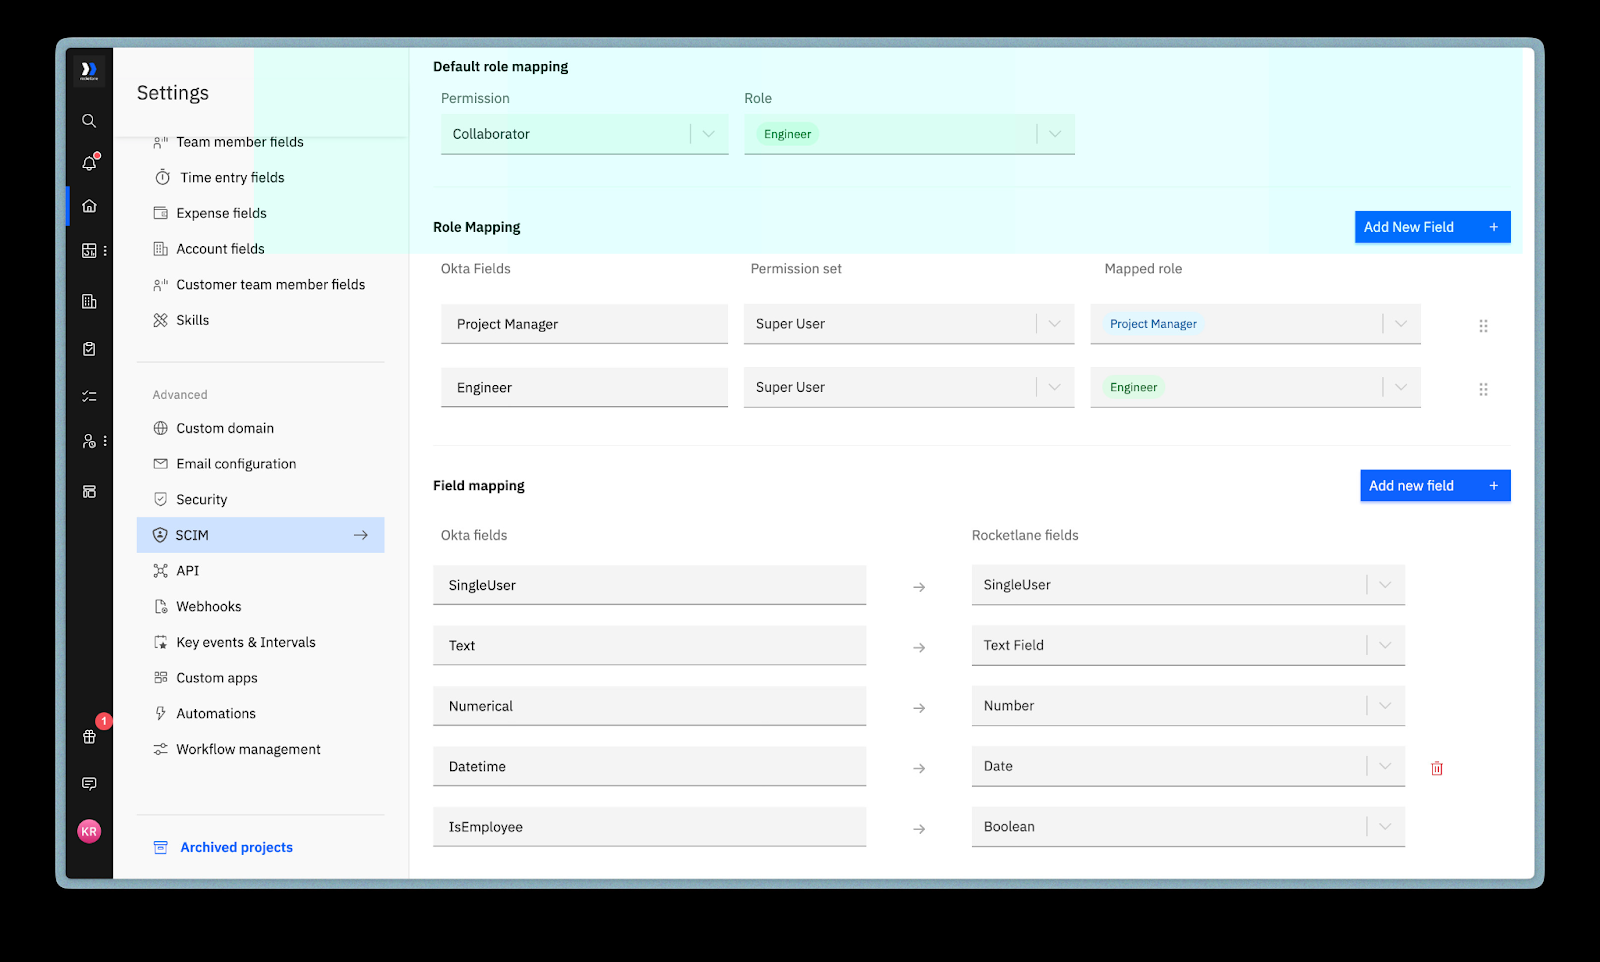
Step 8: Configure Role Mapping in Rocketlane
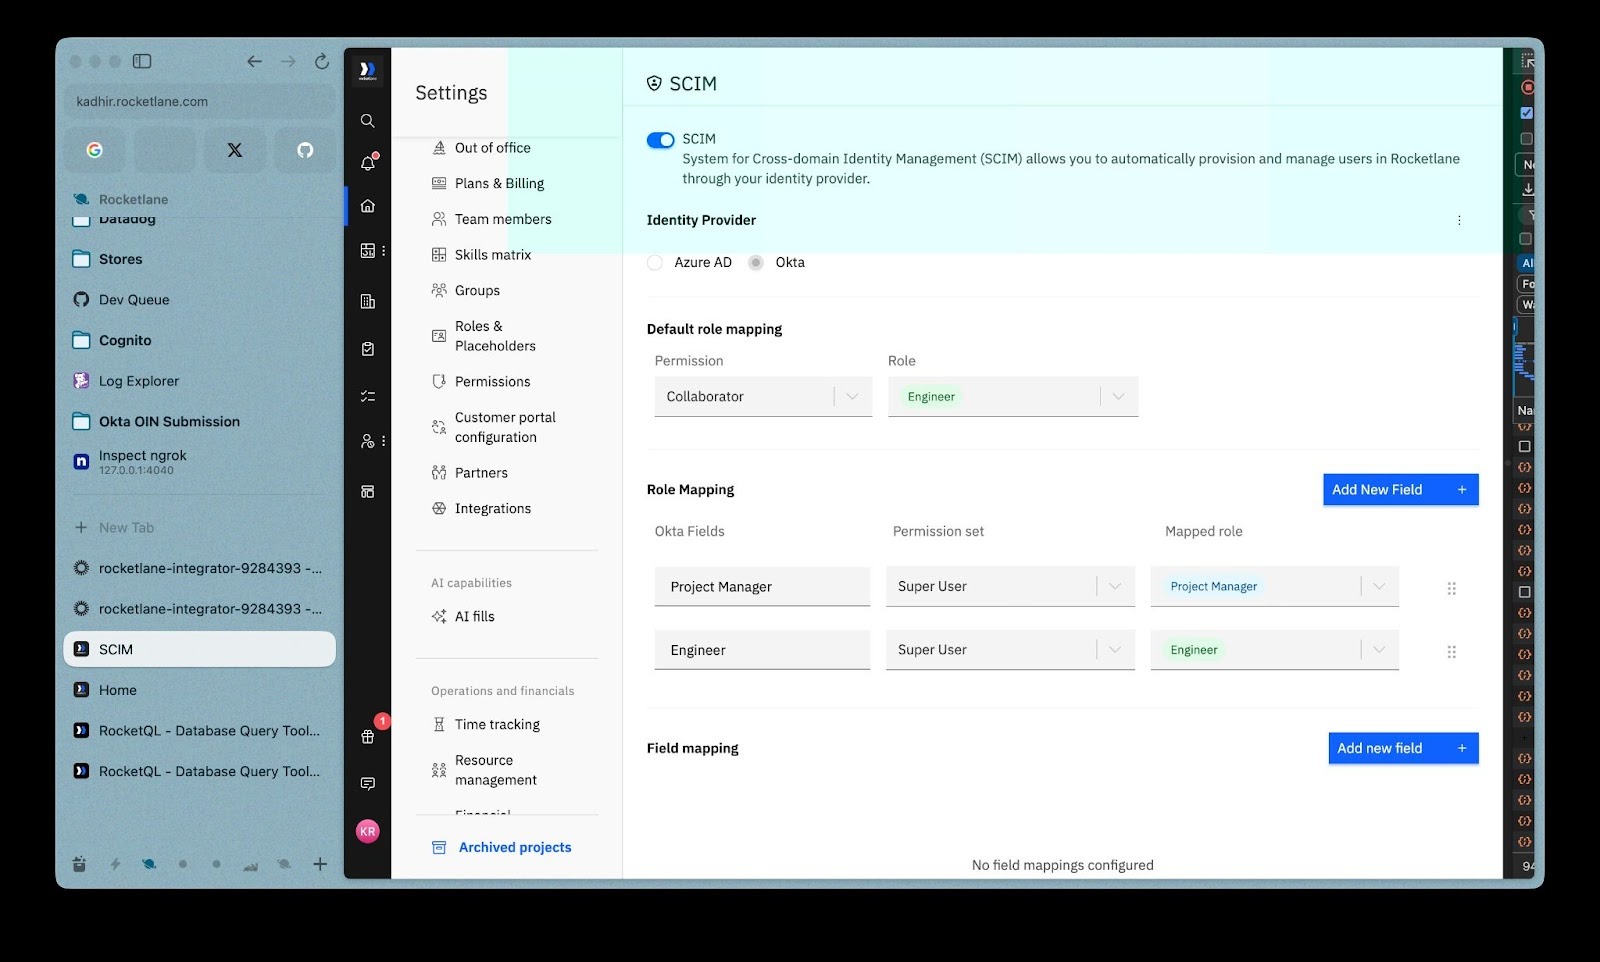
Role Mapping allows Rocketlane to understand how Okta roles should translate into Rocketlane roles.
- Go to Settings > SCIM in Rocketlane.
- Scroll to Role Mapping.
- Click Add New Field.
- Define:
- Okta Role Input, for example, Product Manager
- Mapped Rocketlane Role, for example, Product Manager
- Permission Set, for example, Superuser
This ensures role updates from Okta sync correctly.
Step 9: Configure Field Mapping (Optional)
To map Okta profile fields to Rocketlane fields:
- Go to Field Mapping inside SCIM settings.
- Click Add New Field.
- Select:
- The Okta Attribute, for example,
departmentortitle. - The Rocketlane Field it should sync into.
- The Okta Attribute, for example,
This helps maintain clean and centralized user data.