Nitro Page Templates define the structure that Documentation Agents use to generate documentation. Once configured, a template instructs Rocketlane AI on:
What to extract
How to group the output
Which participants to include
This ensures discussions and decisions from meetings and pages are documented consistently.
Navigating to Nitro Page Templates
Nitro Page Templates are found inside the Templates section.
Click Templates in the left sidebar (grid icon).
In the left panel, scroll to the Templates sub-section (below standard template types such as Project templates and Document templates).
Click Nitro Page Templates.
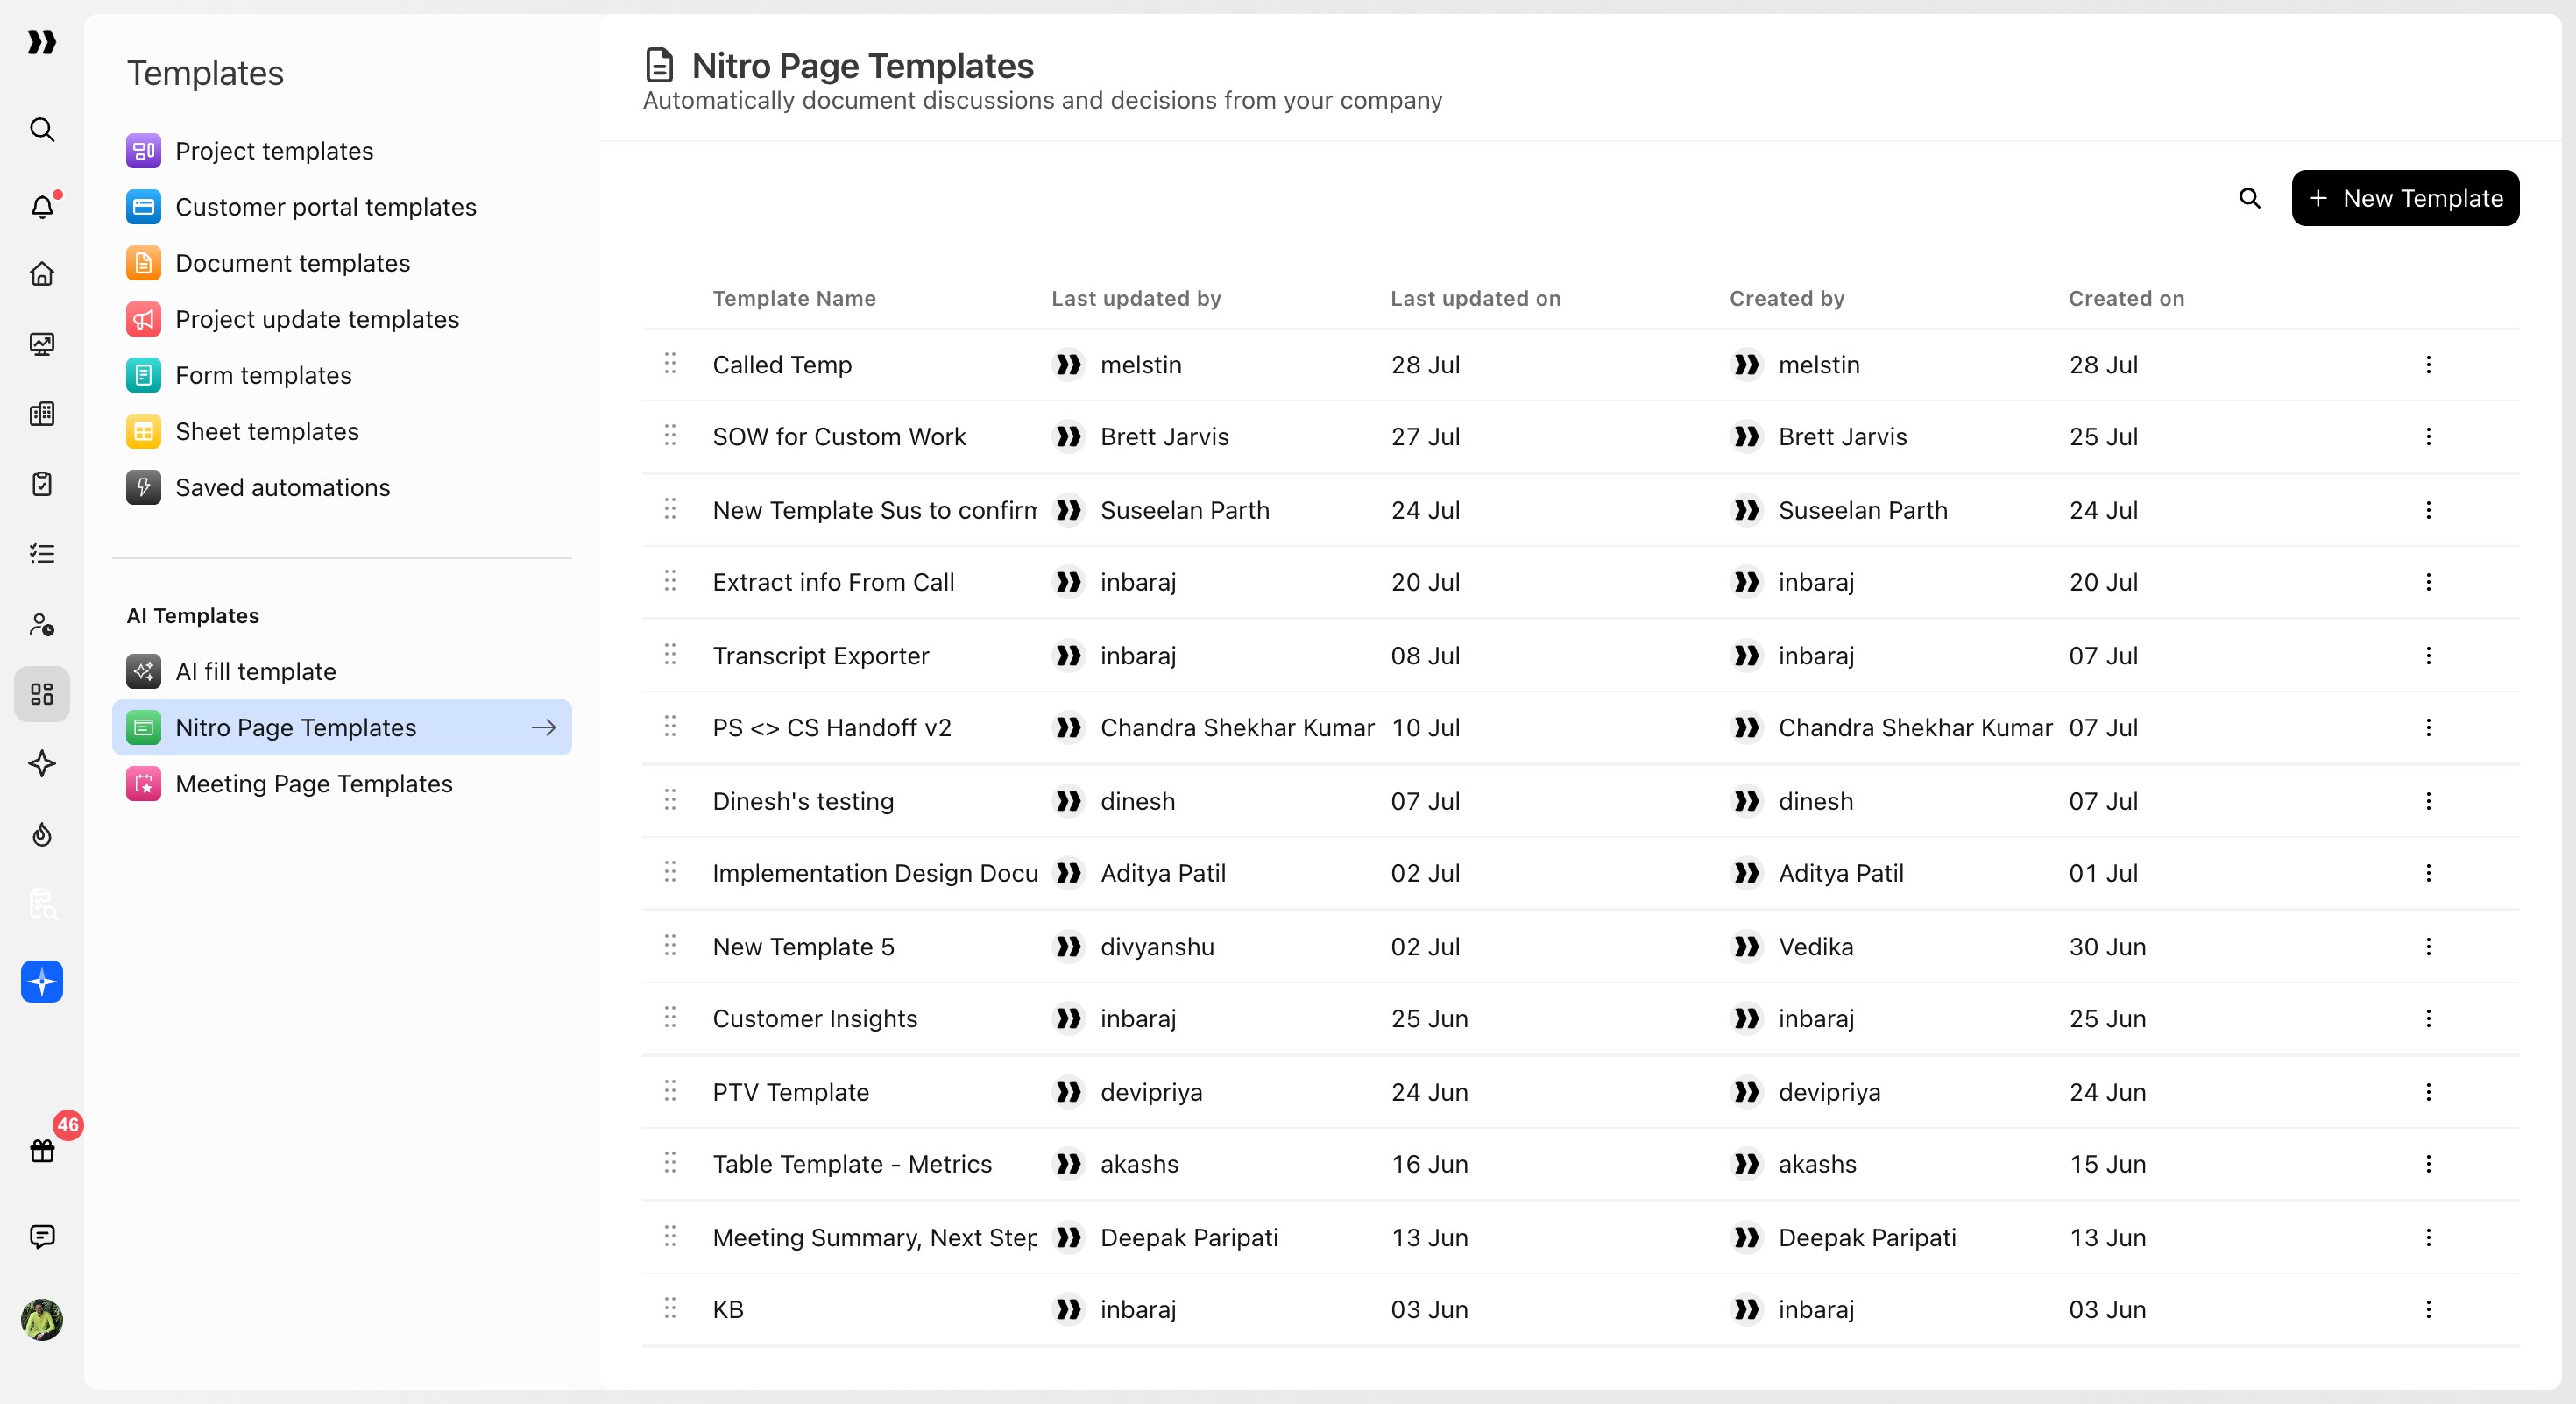
The Nitro Page Templates list opens and displays templates with columns for:
Template Name
Last updated by
Last updated on
Created by
Created on
The page subtitle reads: Automatically document discussions and decisions from your company.
Creating a New Template
Click + New Template in the top-right corner of the Nitro Page Templates list.
The template editor opens with the title New Template and a breadcrumb back to Nitro Page Templates.
A default Summary block appears on the canvas. The block shows placeholder topic chips (Topic 1, Topic 2).
To add more blocks:
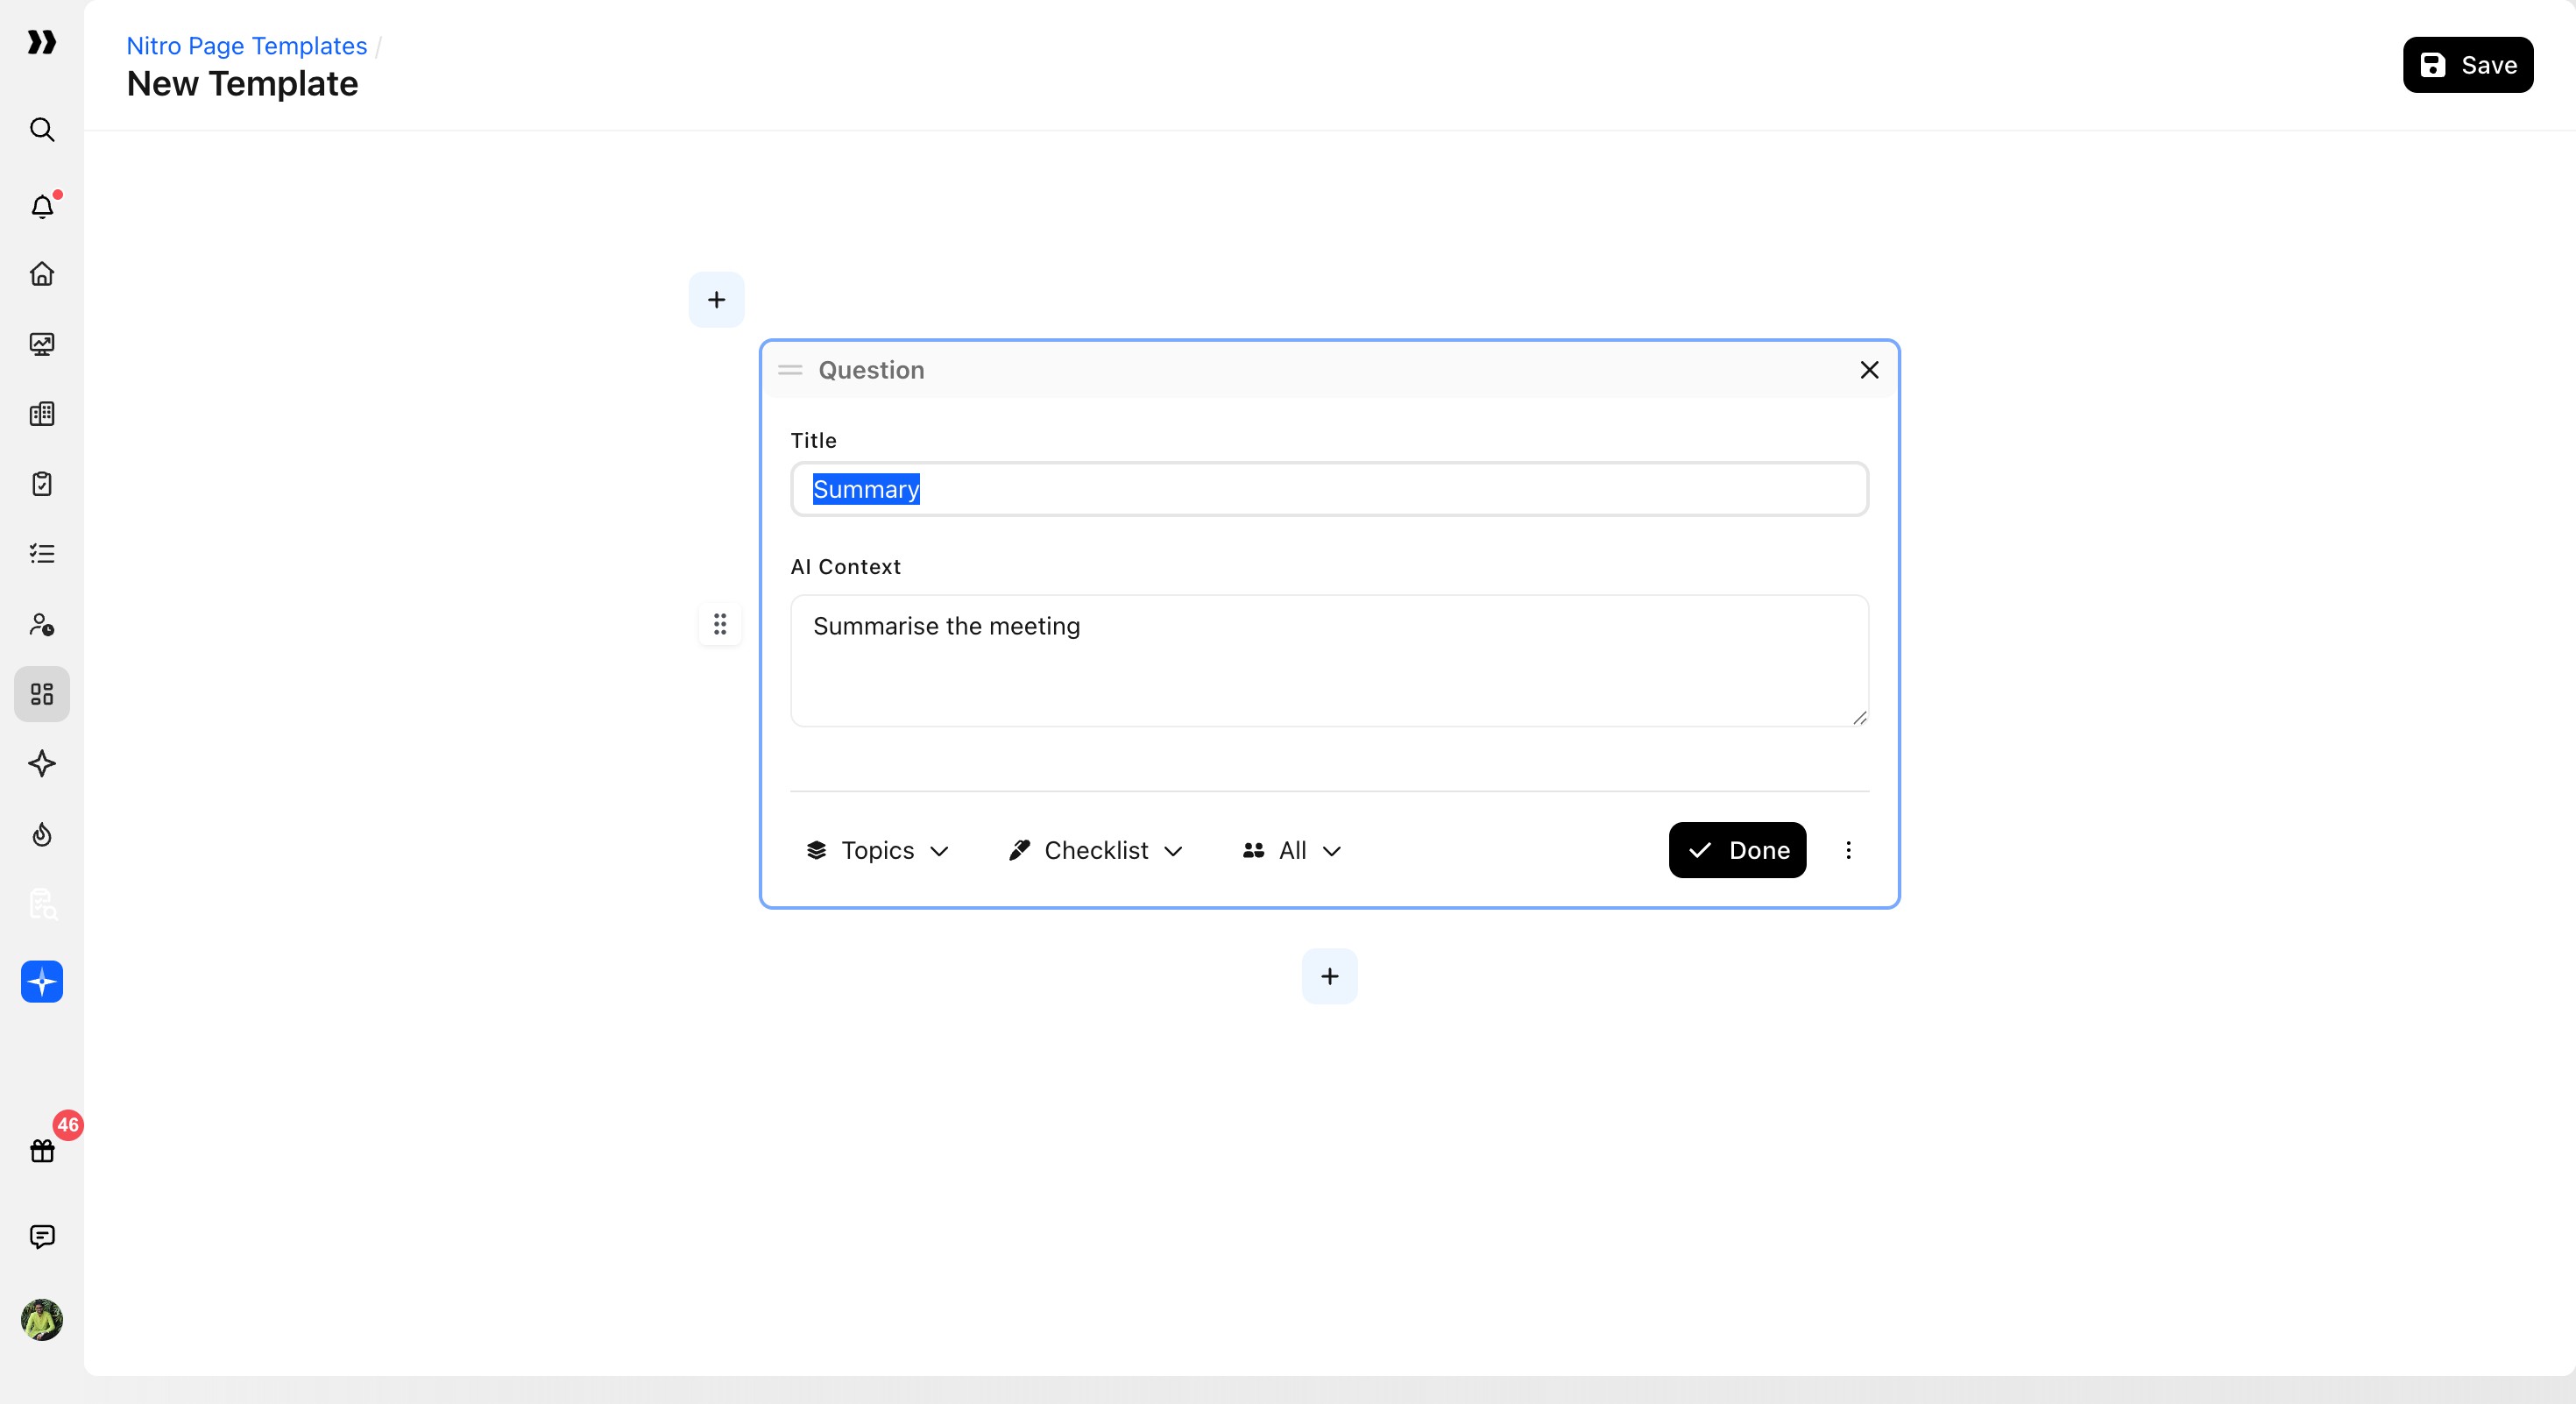
Click the + button below the existing content.
Hovering over the button shows the tooltip Add a new block.
Block Types
Clicking the + button opens the AI sections menu. This menu lists the available block types that can be added to a template:
Question: Ask the AI a specific question about meeting content and output the answer in a structured format.
Action: Extract action items from the meeting.
Extract Info: Extract specific pieces of information from the discussion.
Table Details: Generate a structured table from meeting content.
Multi Questions: Add multiple related questions as a grouped block.
Record Block: Insert a block tied to a specific record type.
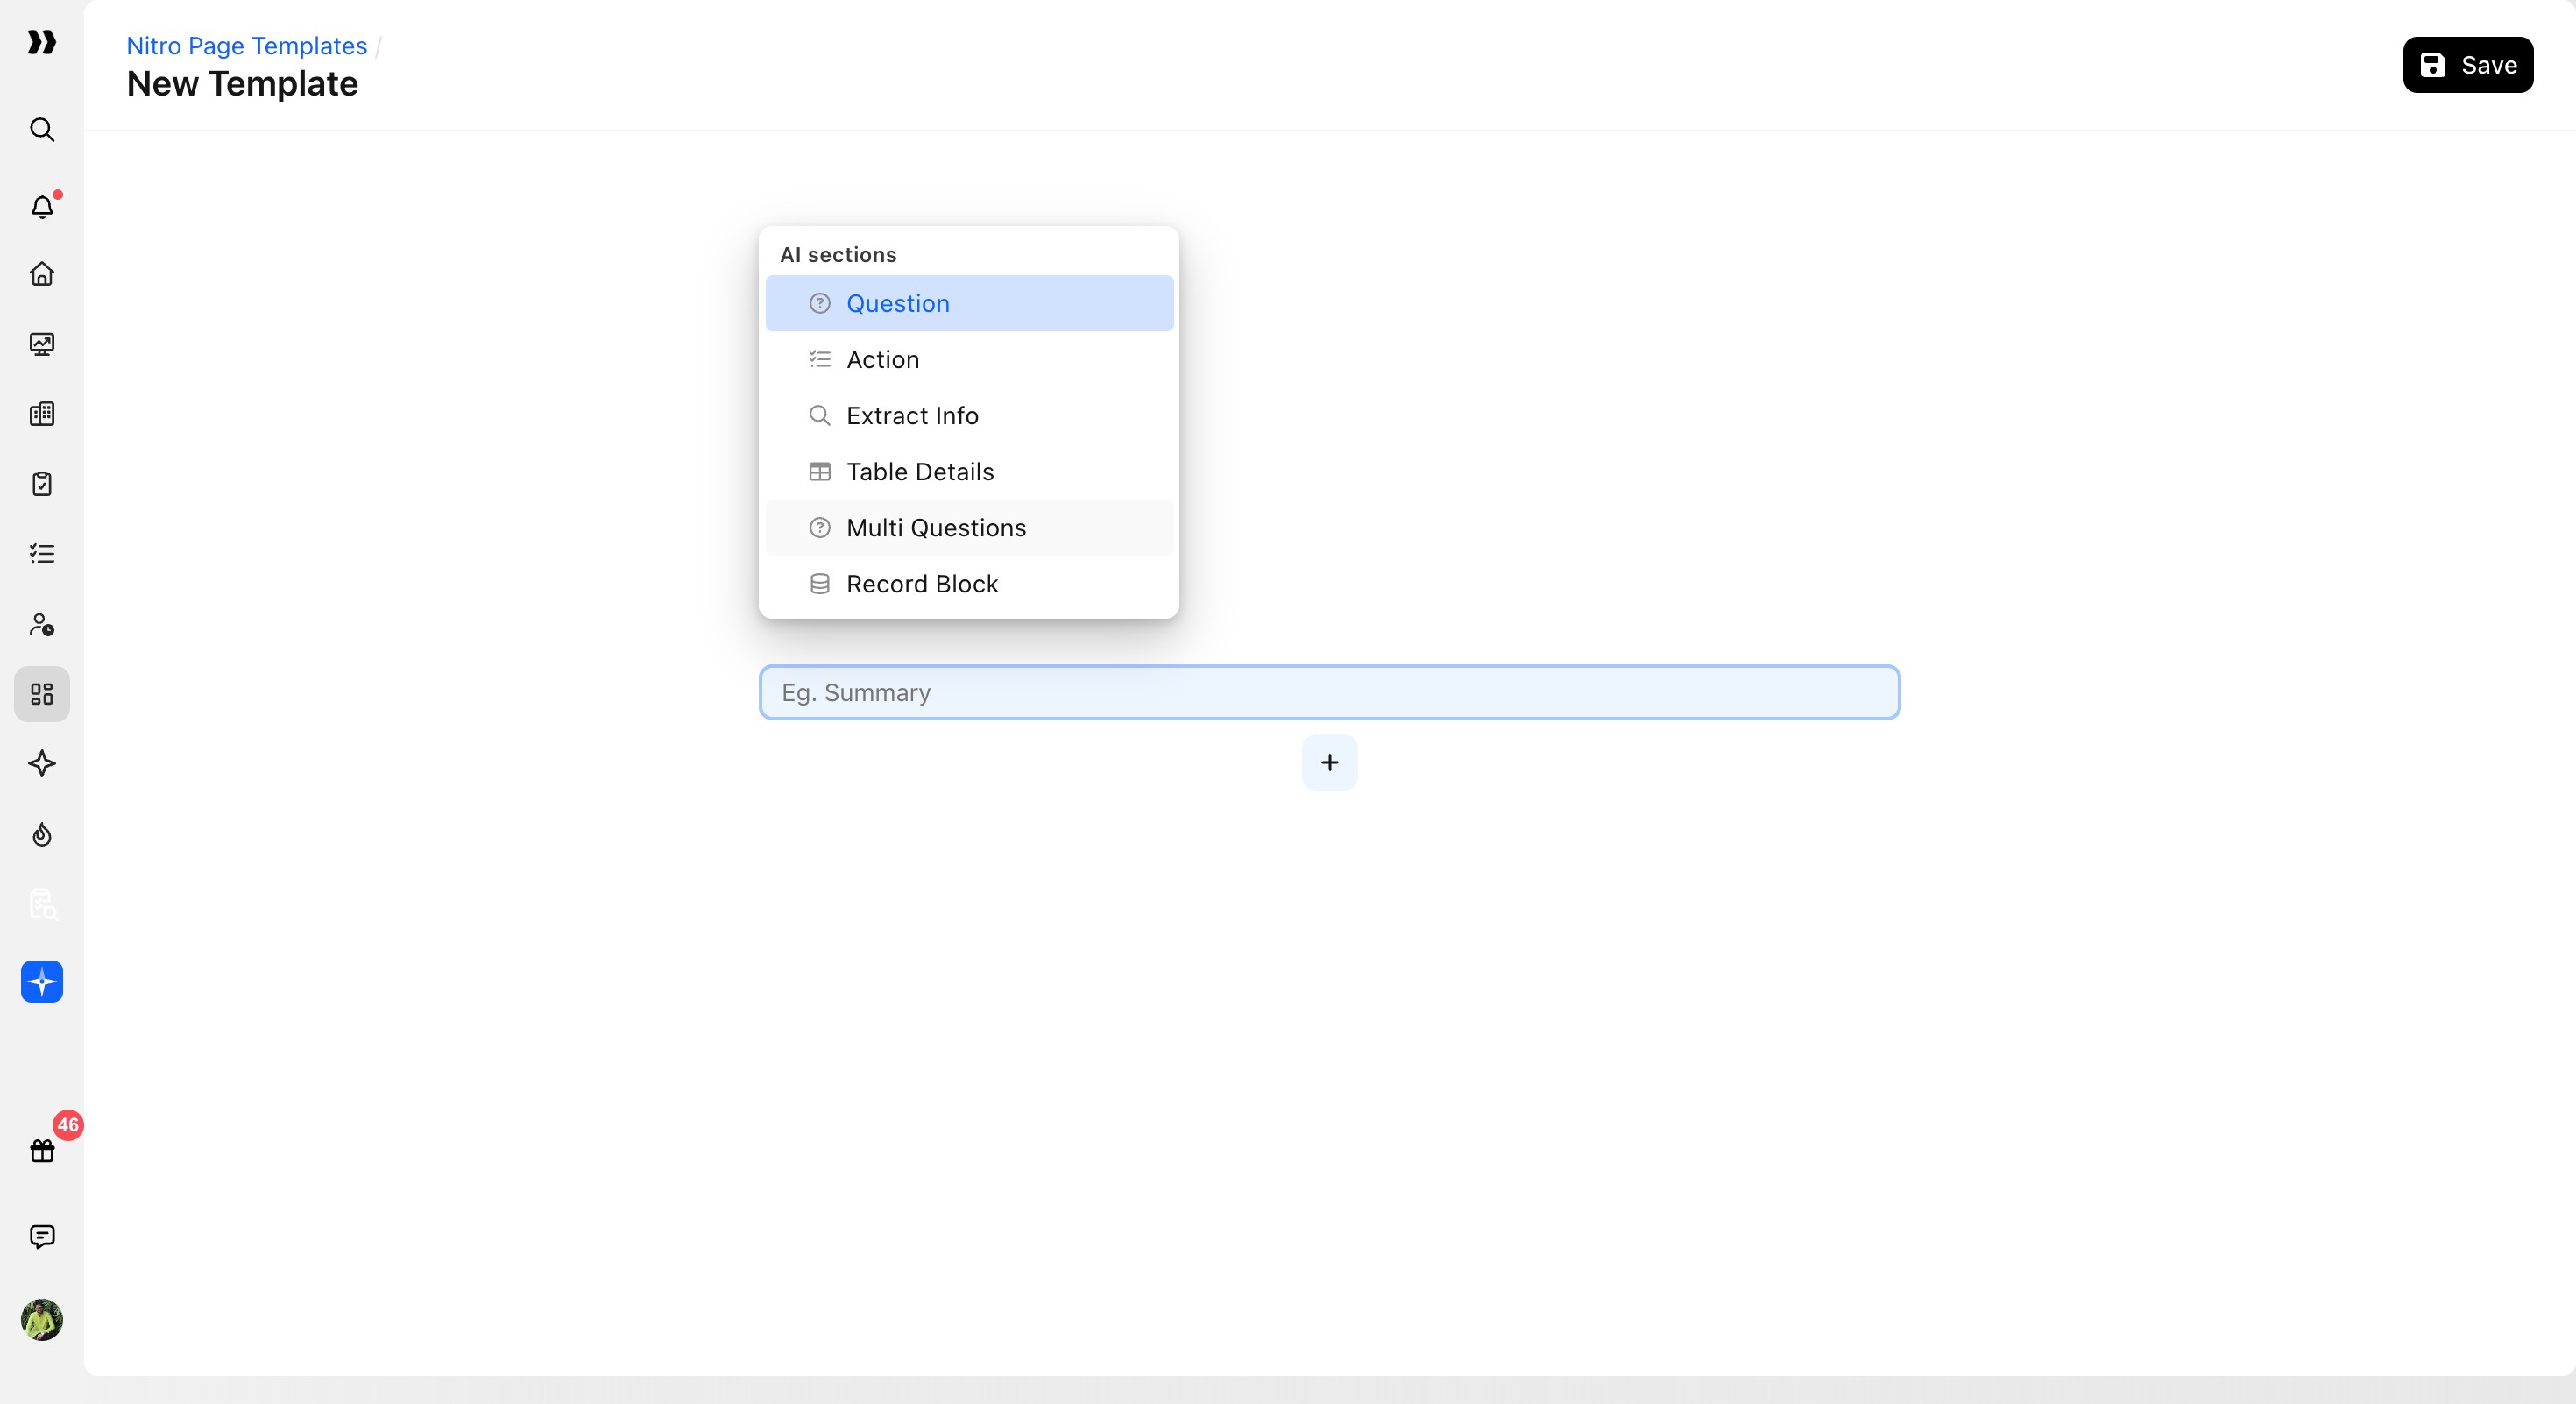
A text input field below the menu (placeholder: Eg. Summary) can be used to name the block as it is added.
Configuring a Question Block
The Question block is the most flexible block type. It controls what the AI should extract, how it should be formatted, and whose contributions should be used.
Selecting Question opens a block editor panel with the following fields.
Title
The name of the block as it will appear on the generated page. Example titles include:
Summary
Key Decisions
Next Steps
AI Context
A plain-language instruction that tells the AI what to extract or generate for the block. Examples:
“Summarise the meeting”
“List all action items with owners”
“Extract any decisions made during the call”
Group by
Controls how the output is organized. Click the Topics dropdown in the bottom bar to change the grouping.
Options:
Topics (default): Groups output by identified discussion topics.
Company: Groups by company represented in the meeting.
Participants: Groups by individual participants.
Time Period: Groups by time segments in the meeting.
None: No grouping, outputs as a single section.
Generate as
Controls the output format. Click the Paragraph dropdown in the bottom bar.
Options:
Paragraph (default)
Bullet
Number
Checklist
Participants filter
Controls whose contributions the AI should use. Click the All dropdown in the bottom bar.
Options:
All (default): Includes all participants.
Customer participants only: Includes only customer-side participants.
Rocketlane’s team only: Includes only internal participants.
Custom...: Opens the Filters for participants modal for granular rules.
Custom participant filters
Selecting Custom... opens the Filters for participants modal.
Add conditions using participant attributes, for example:
Where Sentiment is exactly Promoter
Use + Add filter to add more conditions.
Use the Matches dropdown to specify whether All or Any conditions must match.
Click Done to apply filters, or Cancel to discard.
Previewing a Block
Previewing validates how the block will render using real meeting content.
In the bottom bar of the block editor, click the play (▶) button.
A meeting picker dropdown opens and lists recent meetings with dates and participants.
Select a meeting to generate a live preview.
The preview opens alongside the editor and displays the rendered output exactly as it would appear on a generated page, including headings, paragraphs, and structured content.
Close the preview and click Done to confirm the block configuration.
Configuring an Action Block
The Action block extracts action items from a meeting. It uses the same core structure as a Question block but is designed specifically for tasks, owners, and next steps.
Setting up the Action block
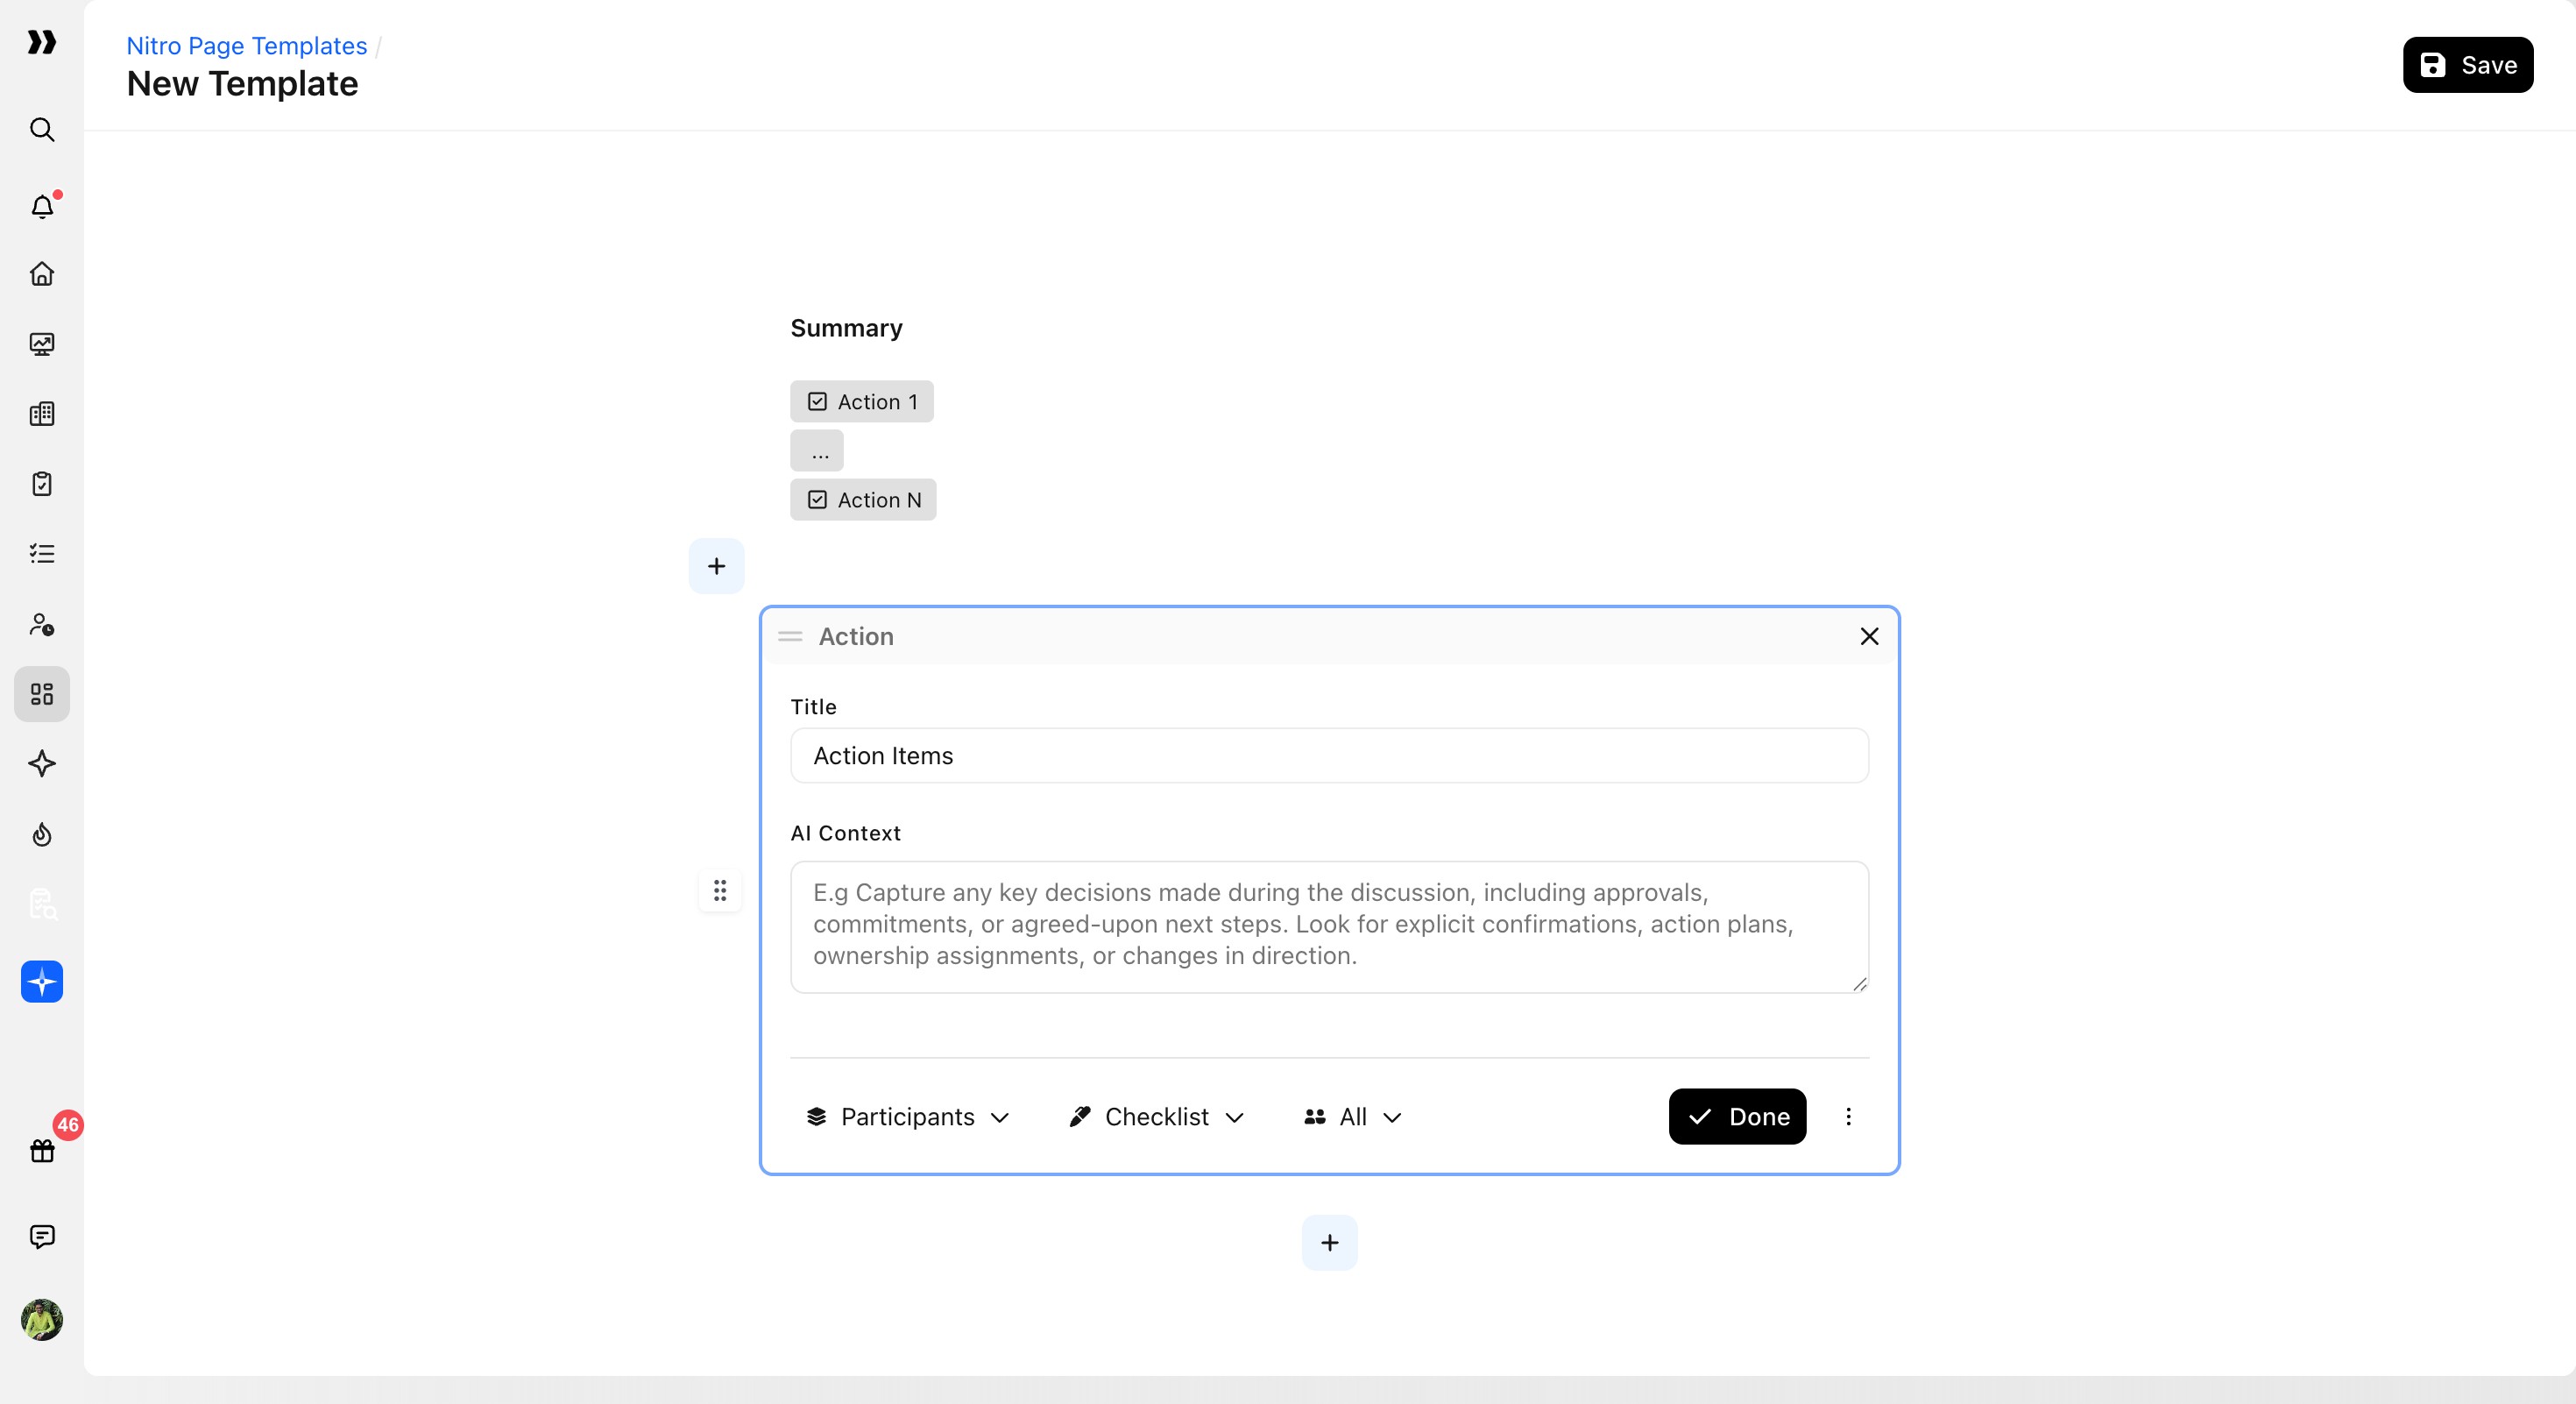
Select Action from the AI sections menu.
Enter a Title (for example, Action Items).
Click Next to expand the full configuration.
The expanded configuration includes:
Title: The block name.
AI Context: The extraction instruction (for example, “Generate an action items list for the next meeting”).
The bottom bar includes:
Group by: Topics, Company, Participants, Time Period, None
For action items, grouping by Participants is often used to attribute owners.
Generate as: Paragraph, Bullet, Number, Checklist
Checklist is recommended for action items because it generates checkable tasks.
Participants filter: All, Customer participants only, Rocketlane’s team only, Custom
Preview output using the play (▶) button, then click Done to save the block.
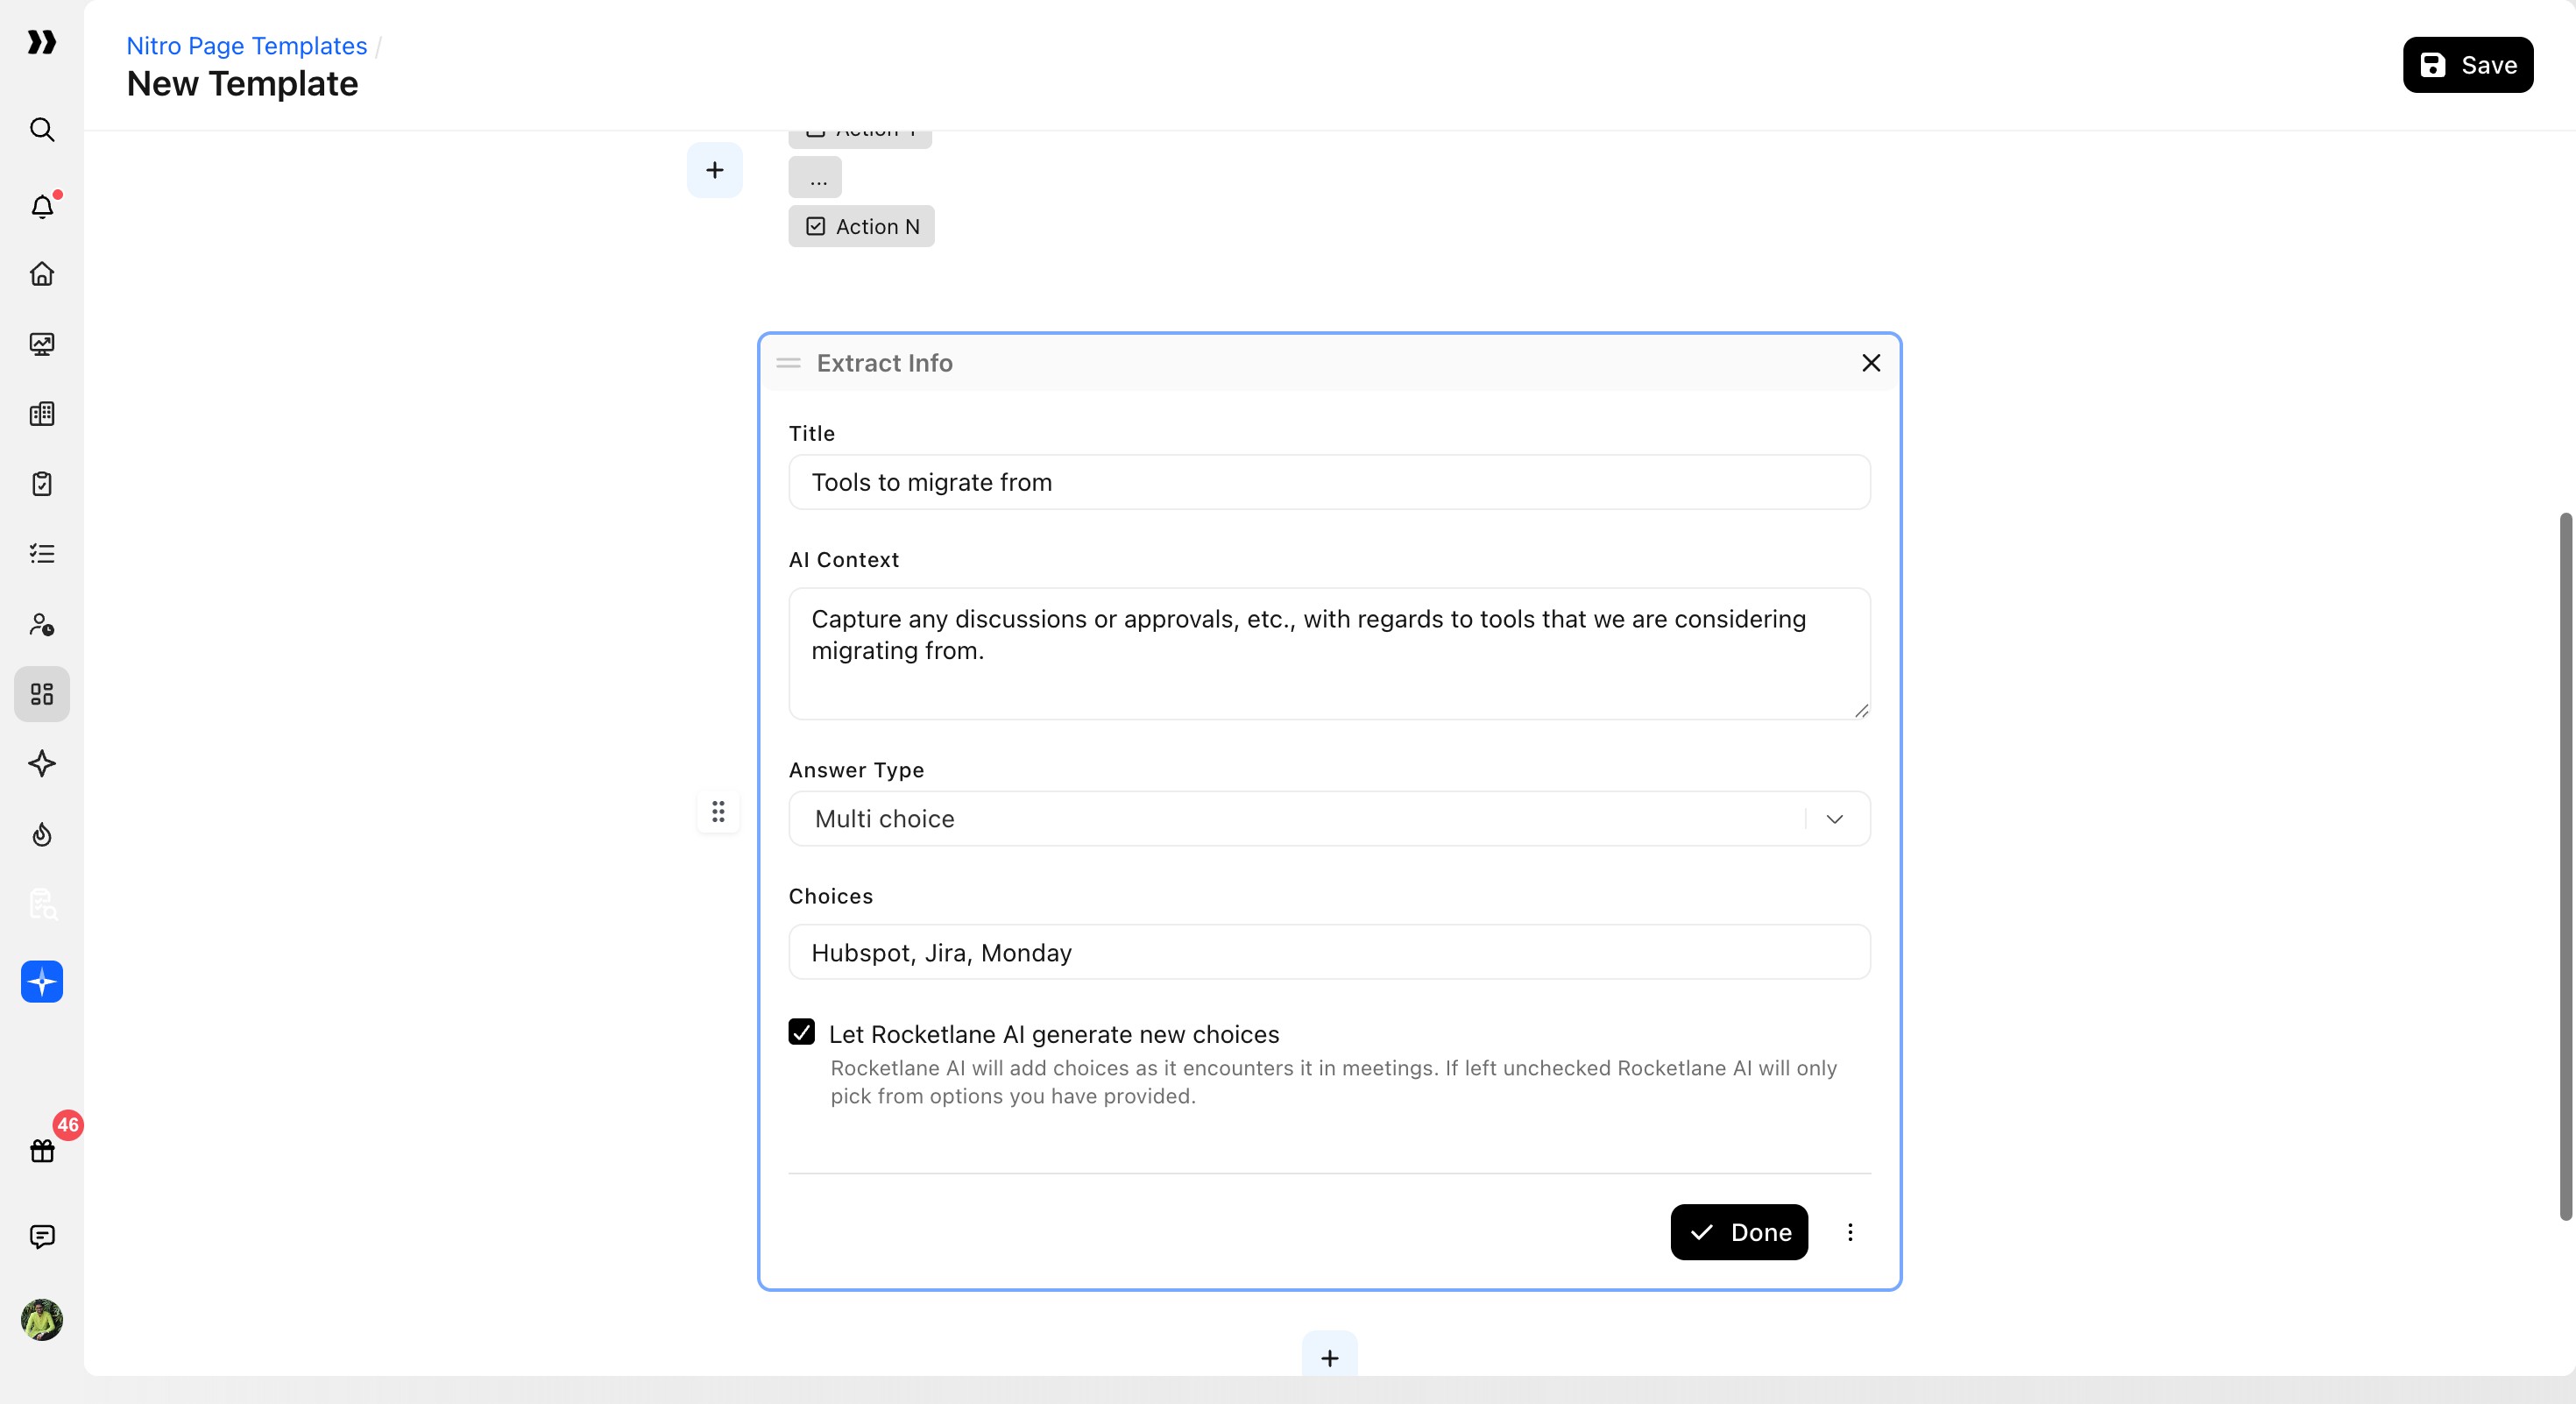
Configuring an Extract Info Block
The Extract Info block is used to pull structured information from a meeting where the expected output is a defined value rather than free-form text.
Setting up the Extract Info block
Selecting Extract Info opens a block editor with:
Title: The block name (for example, Tools to migrate from).
AI Context: The extraction instruction (for example, “Identify what concerns the customer has with regards to migration and what tools they are talking about”).
Answer Type:
Single choice: Select one answer from available options.
Multi choice: Select multiple answers. When selected, a Choices field appears for predefined options.
Answer from:
Customer
Vendor
All
Let Rocketlane AI generate new choices:
When enabled, Rocketlane AI adds new choices as it encounters them in meetings. When disabled, Rocketlane AI selects only from predefined options. The description reads:
Rocketlane AI will add choices as it encounters it in meetings. If left unchecked Rocketlane AI will only pick from options you have provided.
For example, create a block titled Tools to migrate from, add AI Context for capturing migration-tool discussions or approvals, select Multi choice, and enter choices such as Hubspot, Jira, and Monday. Enable Let Rocketlane AI generate new choices if the AI should add options found in meeting transcripts, then click Done.
Preview output using the play (▶) button, then click Done to save.
Configuring a Table Details Block
The Table Details block generates a structured table from meeting content. This is useful for recurring structured data such as upcoming releases, open issues, or competitor mentions.
Setting up the Table Details block
Select Table Details.
Enter a Title (for example, Upcoming Releases).
Click Next to open the table editor.
The editor shows a grid with default Column headers and Row placeholders.
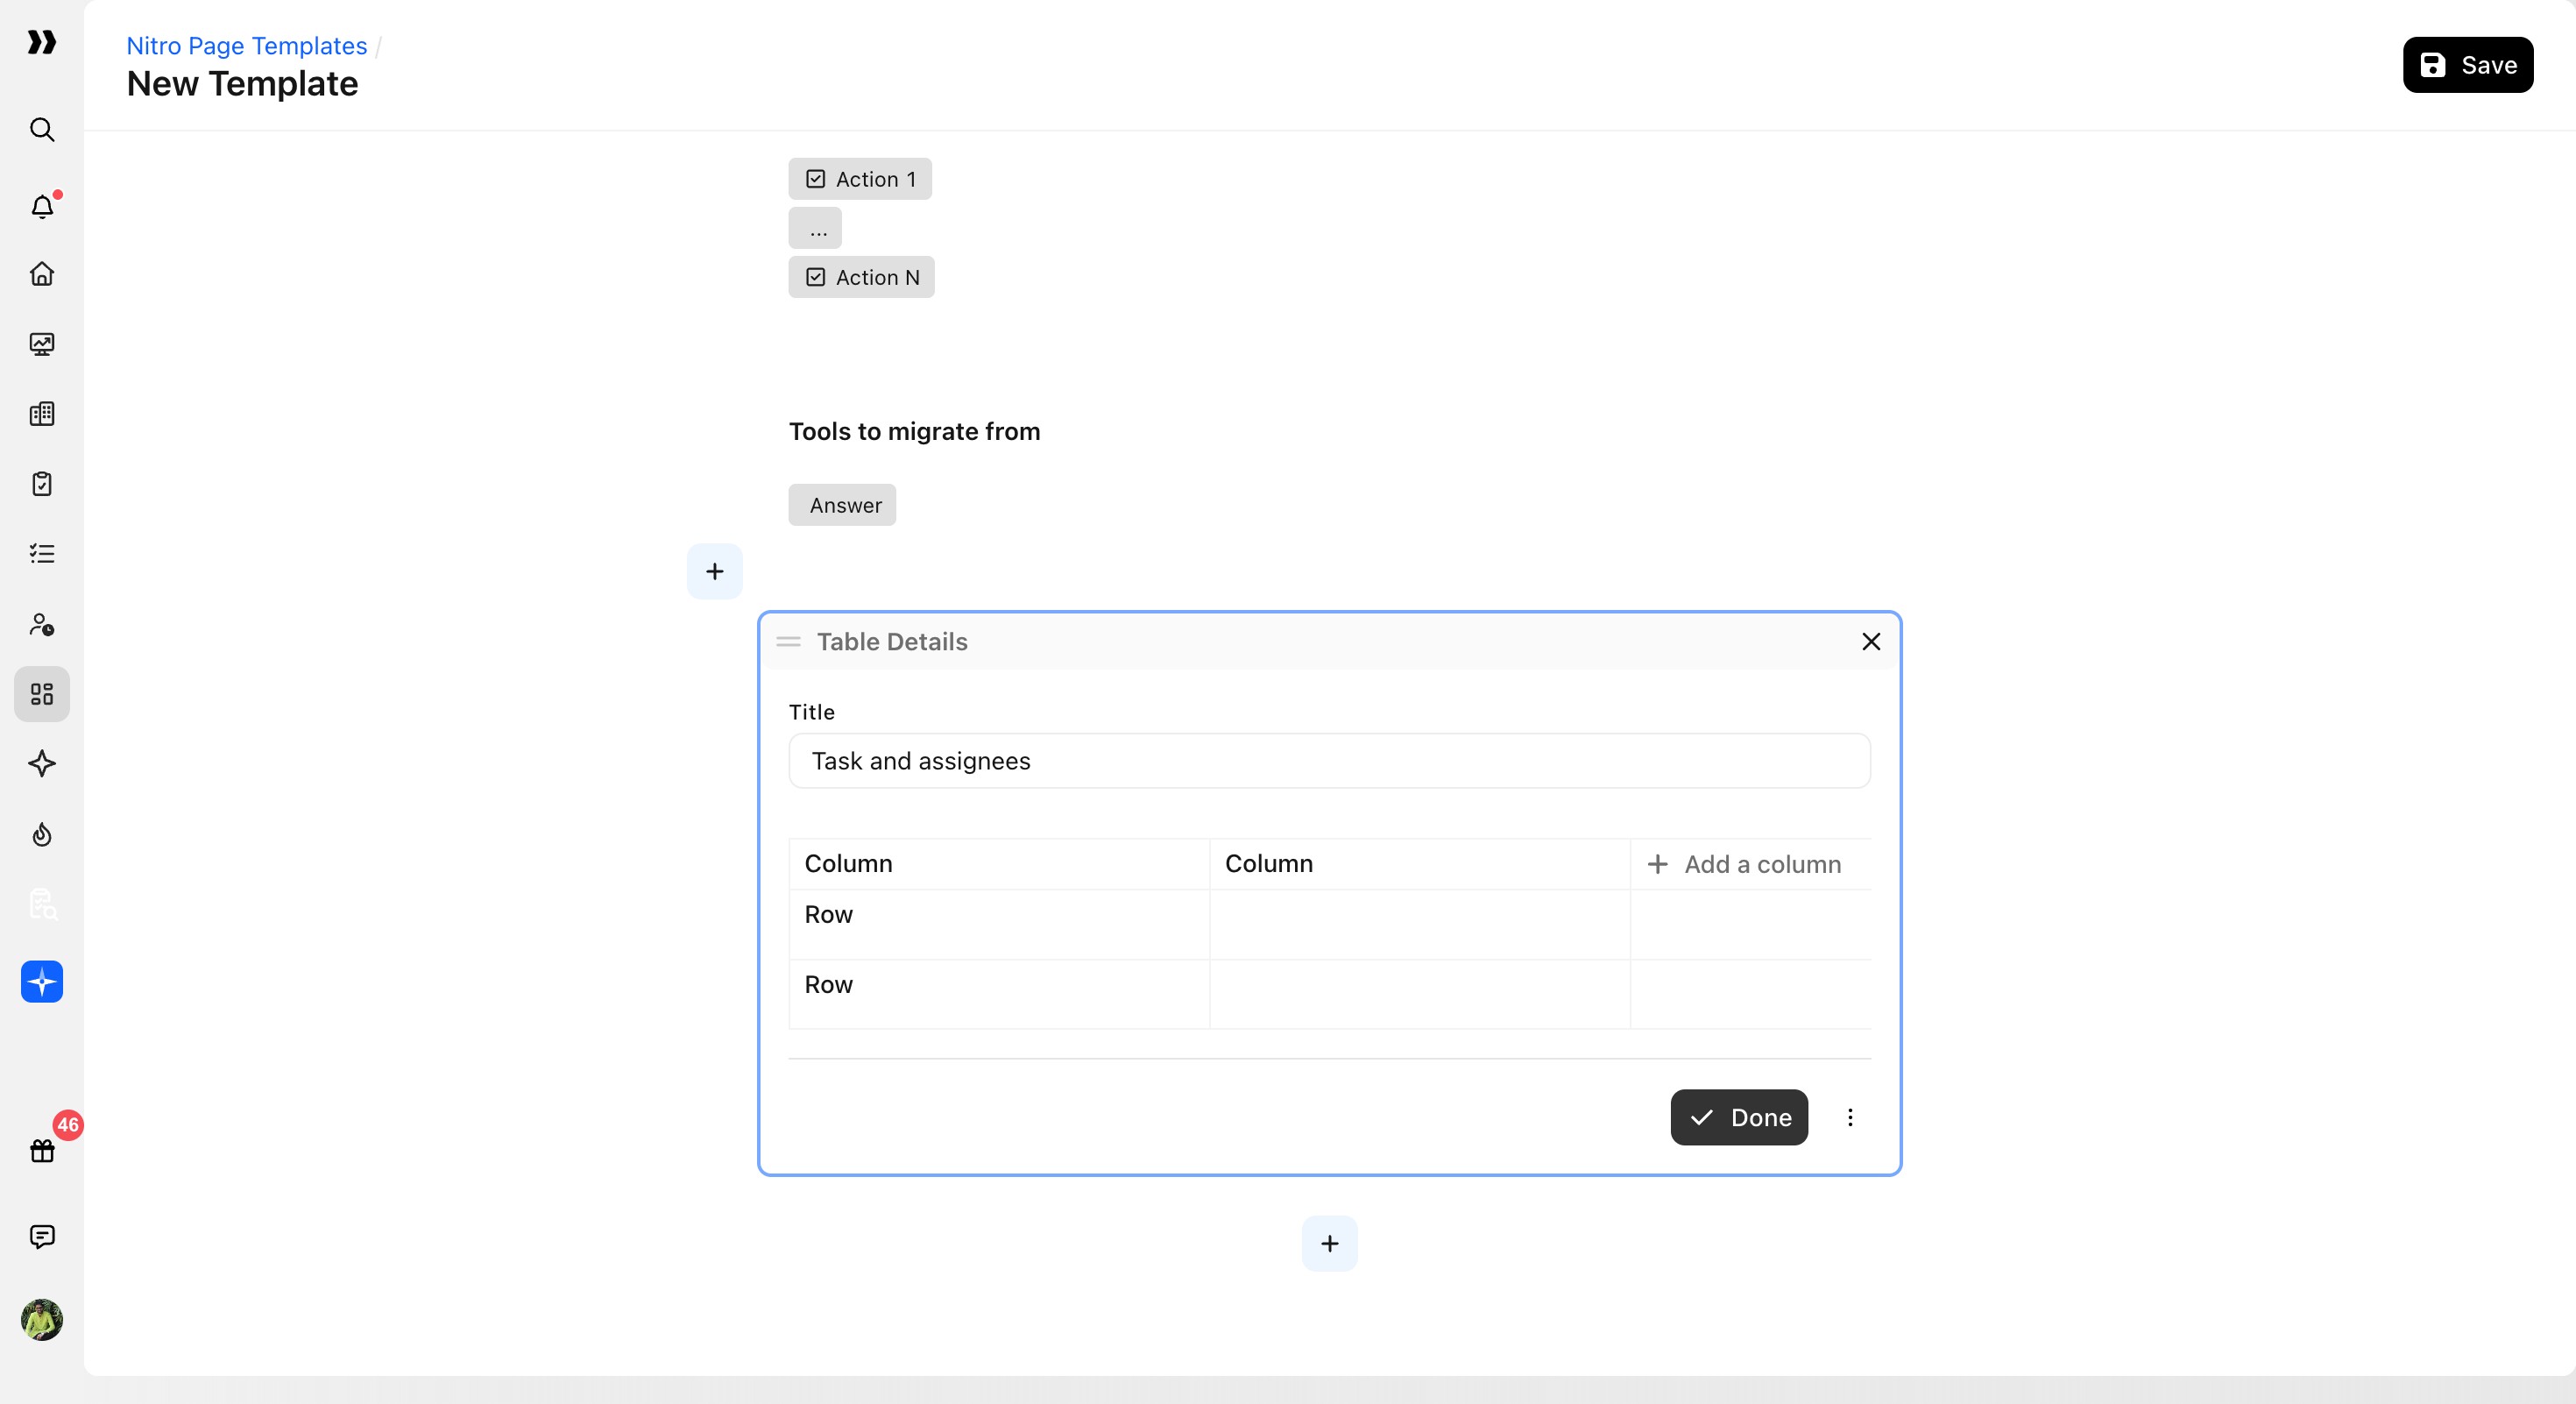
Add columns using + Add a column.
Configuring columns
Click a column header to open the column configuration panel:
Column Type: Text, Number, Yes/No, Date, Single choice, Multiple choice
Column Name: Display name for the header
AI Context: Instruction telling the AI what to populate in the column
For Single choice and Multiple choice, a Choices field appears to define predefined options.
Click Done to confirm the column configuration.
Column header actions
After a column is added, click the column header to open the Actions menu:
Edit column...
Insert left
Insert right
Delete
Table-level AI context fields
Below the grid, configure table-level guidance:
AI Context: Overall instruction (for example, “top 10 risks account has”).
Row creation criteria: When a row should be added (for example, “only add items if they are considered as a risk”).
What shouldn’t be captured: Exclusions (for example, “avoid opportunities or bugs”).
Click Done to save.
Configuring a Record Block
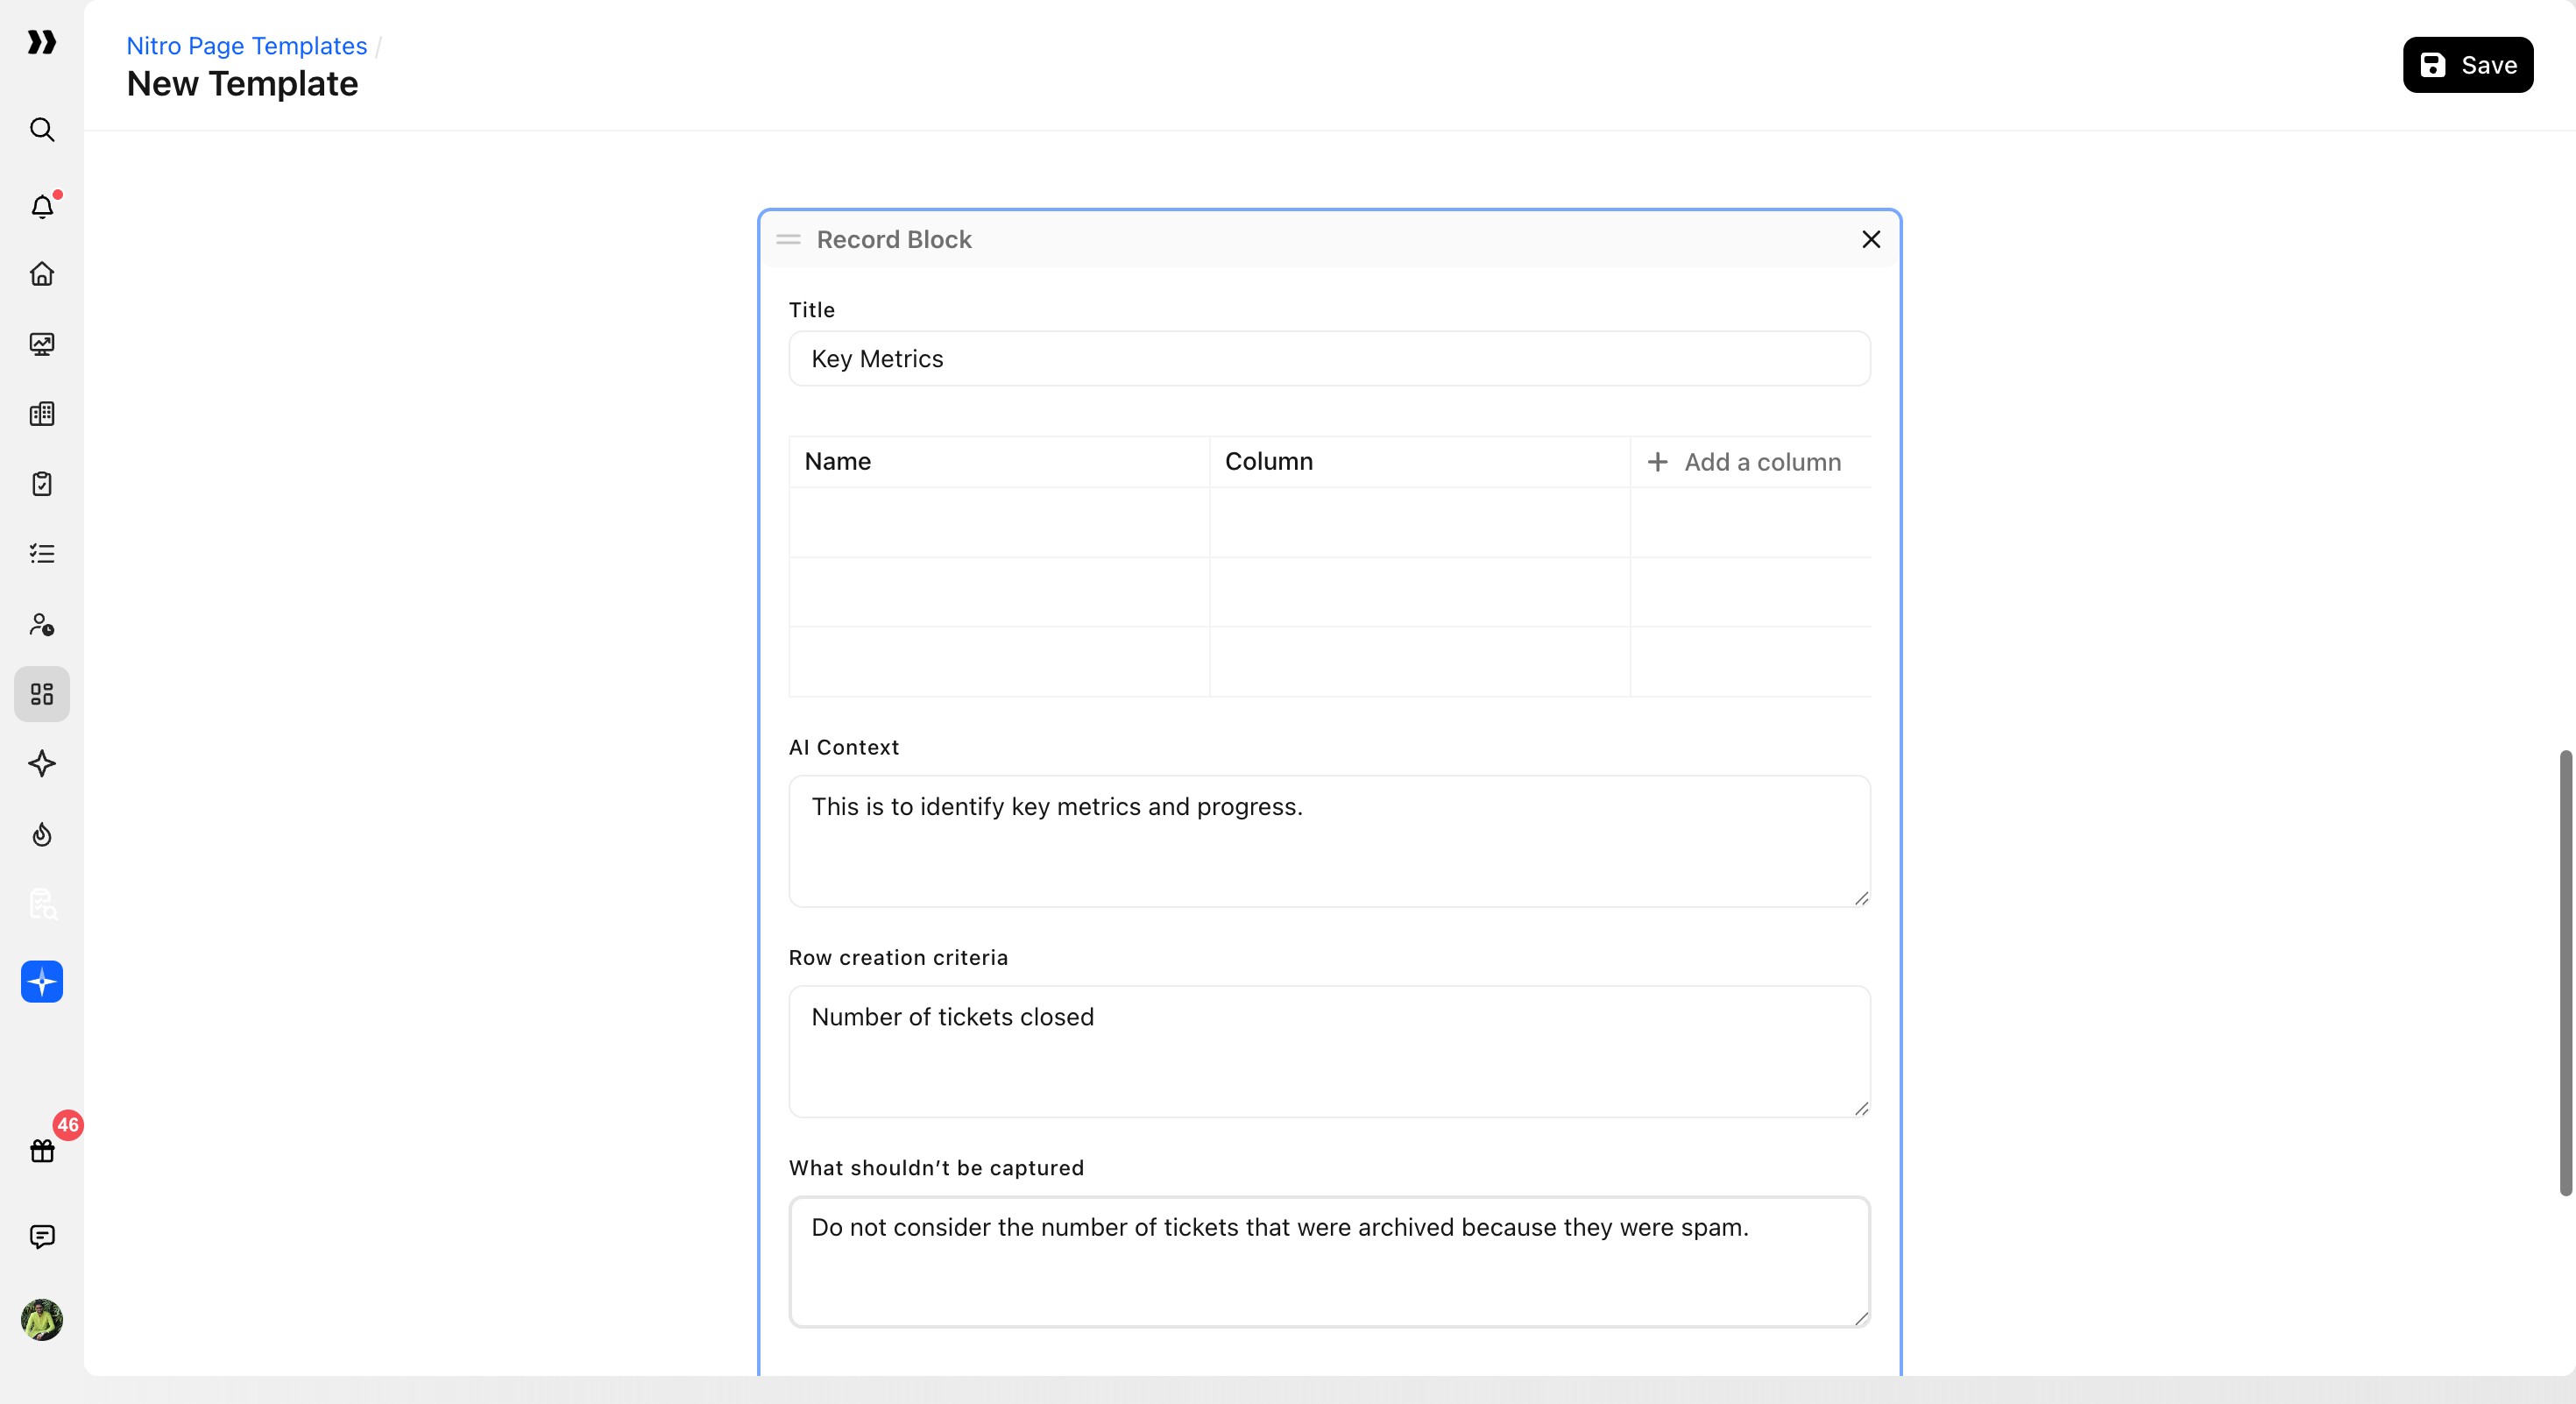
The Record Block is similar to Table Details but is designed for structured records that persist and update across meetings, such as a running risks log or open issues list.
Selecting Record Block opens a block editor with:
Title: The block name (for example, Records).
A table grid with a default Name column and + Add a column for additional fields.
Column configuration and column header actions work the same way as Table Details.
AI Context: Overall instruction for what to capture.
Row creation criteria: When a new row should be created.
What shouldn’t be captured: Exclusions to prevent irrelevant data.
Configuring a Multi Question Block
The Multi Question block groups multiple related questions under a single titled section. This is useful when several questions belong together (for example, a Plan of action section that asks about deliverables, owners, and timelines in one block).
Selecting Multi Question opens a block editor with:
Title: The grouped section name (for example, Plan of action).
Numbered Question entries: Each includes a text field and an Answer Type dropdown.
Add question: Add more questions to the group.
×: Remove individual questions.
For example, create a block titled Next Steps with the question “What is our next procedure?” Select Text as the answer type, enter an AI Context instruction, choose Customer as the answer source, set a 20-word limit, and click Done.
Each question includes:
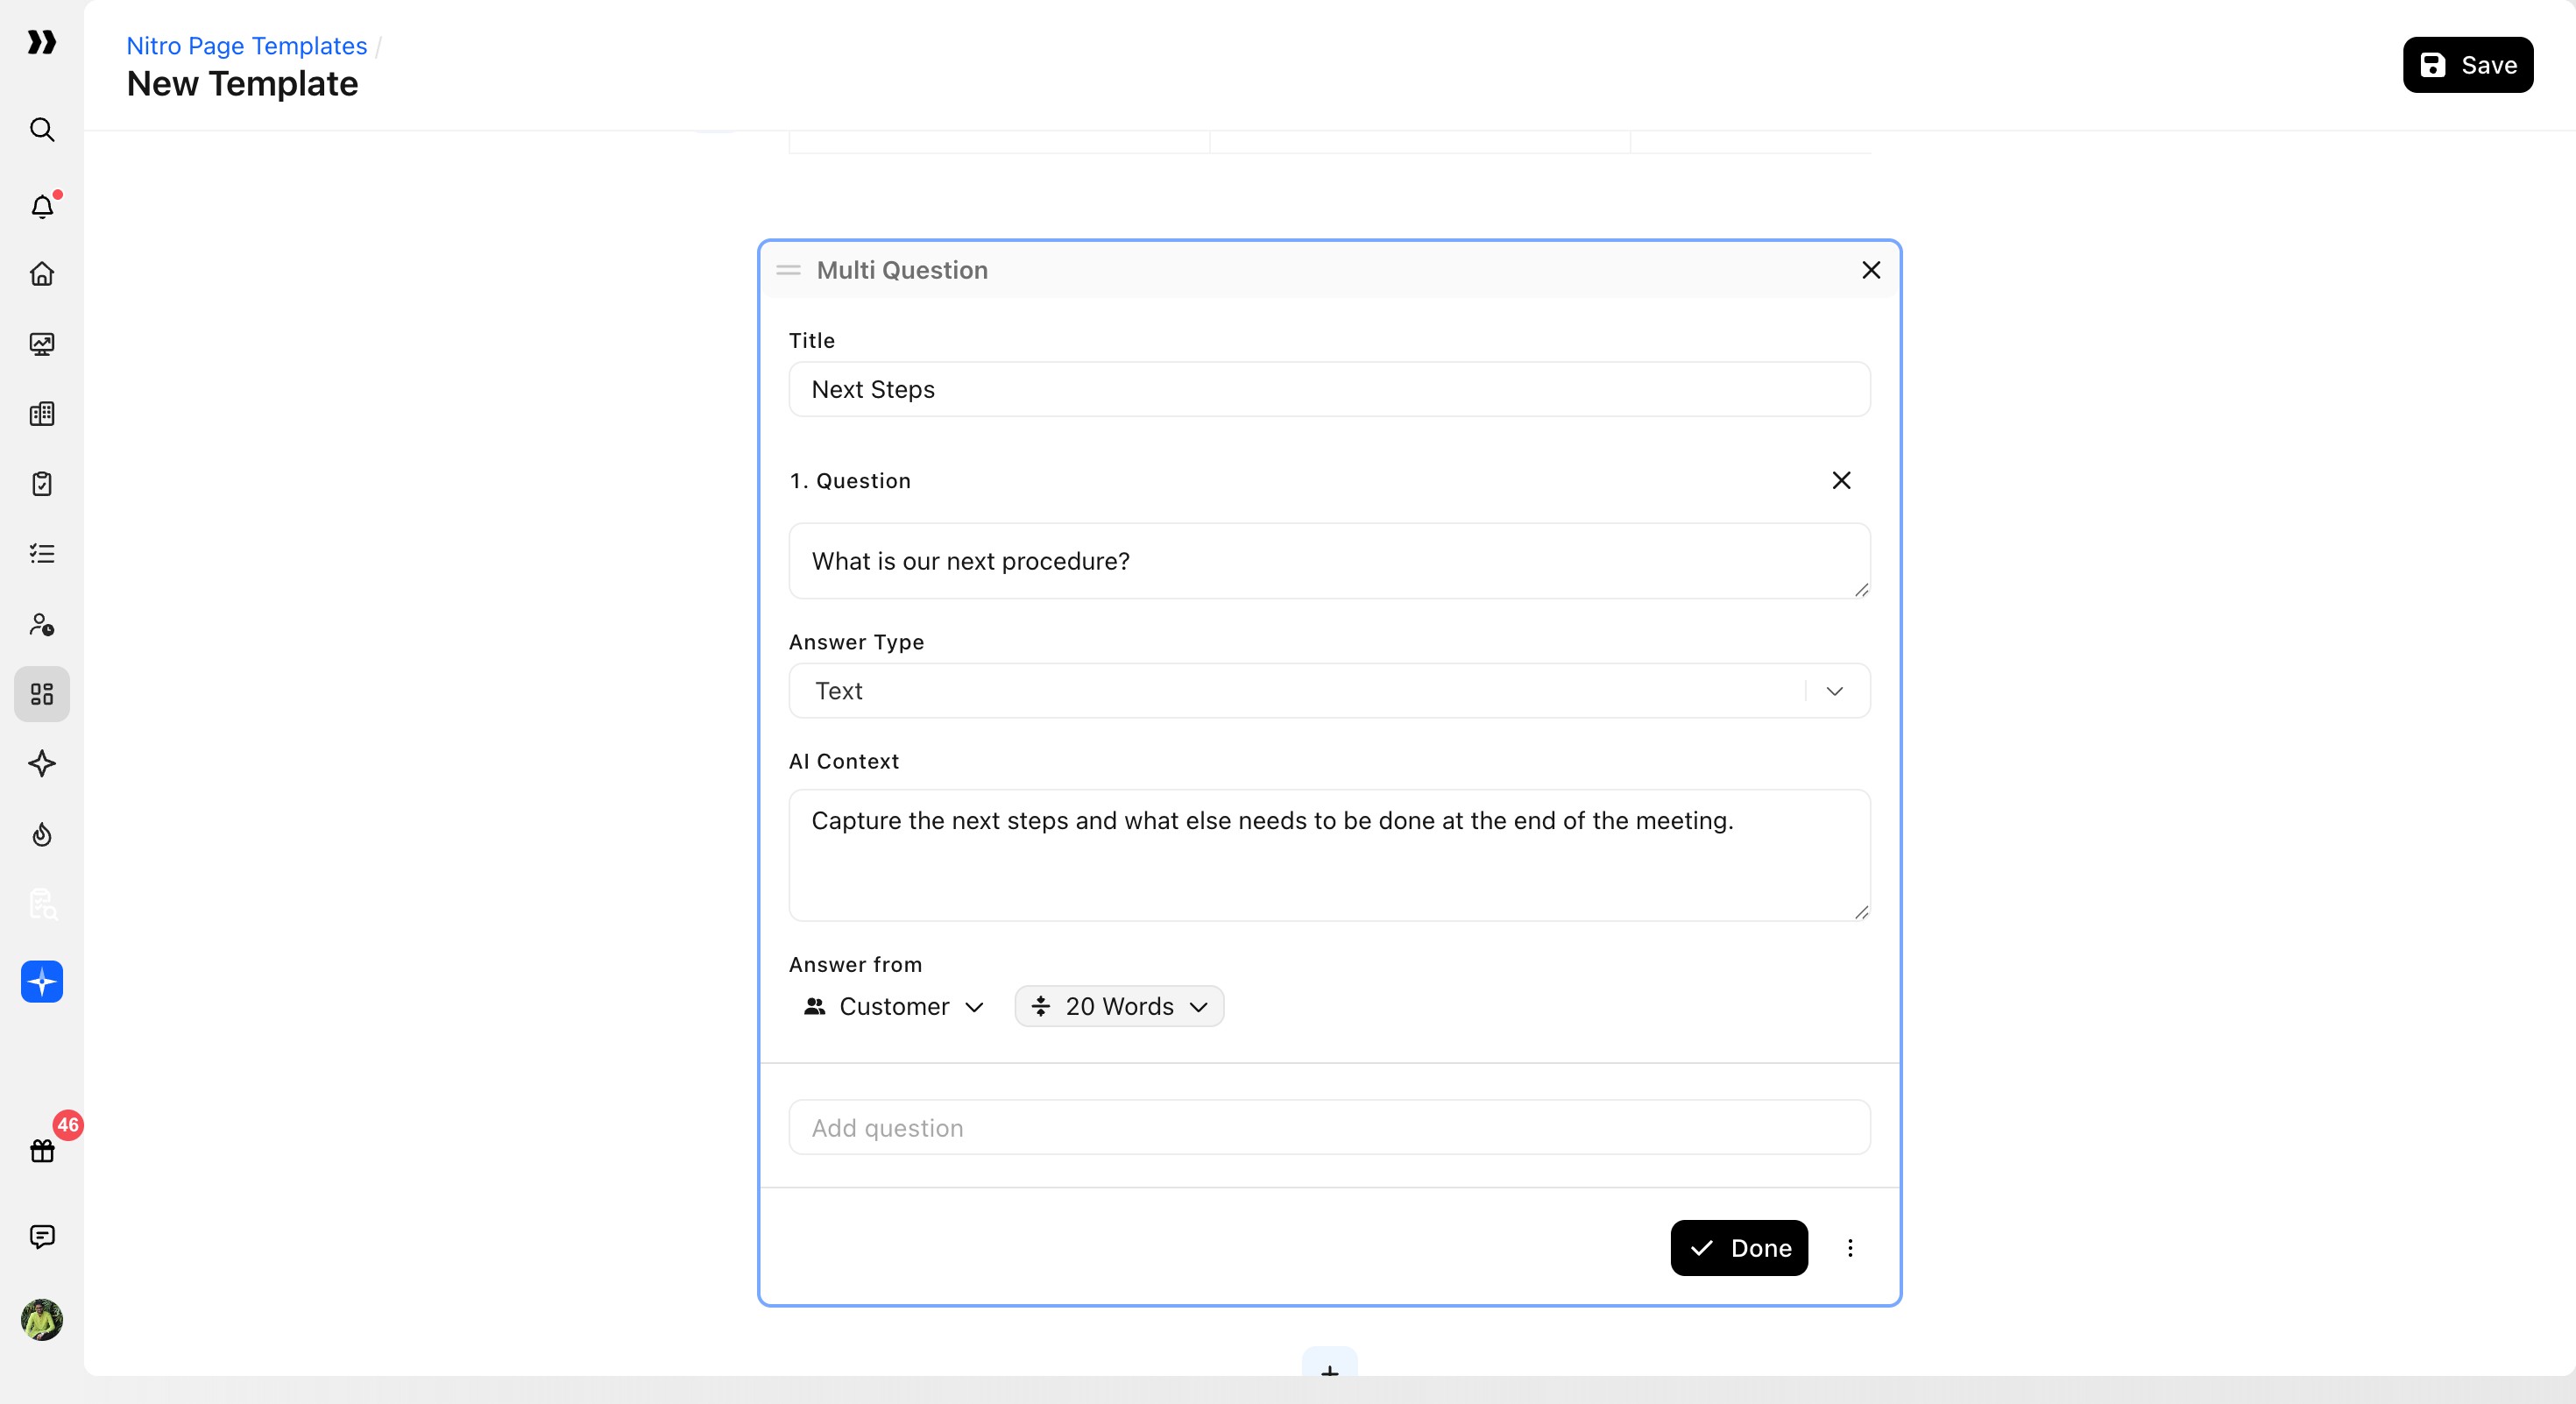
Question text: The question the AI should answer.
Answer Type: Text, Number, Yes/No, Date, Single choice, Multiple choice.
AI Context: Additional guidance. The placeholder example reads:
Capture any key decisions made during the discussion, including approvals, commitments, or agreed-upon next steps. Look for explicit confirmations, action plans, ownership assignments, or changes in direction.Answer from: Customer, Vendor, All.
When Answer Type is Text, a word limit dropdown appears next to Answer from. Options:
20 words
100 words
200 words
500 words
When Answer Type is Single choice or Multiple choice, two additional fields appear:
Choices: Add predefined options.
Let Rocketlane AI generate new choices: When enabled, AI adds new choices as encountered. When disabled, AI selects only from defined options.
Click Done to save the block.
Managing Nitro Page Templates
From the Nitro Page Templates list:
Select the three-dot menu (⋮) at the right of a template row to access additional actions.
Use the search icon in the top-right of the list to search templates by name.